7. Membership and Authorization
Our Store Manager controller is currently accessible to anyone visiting our site. Let’s change this to restrict permission to site administrators.
Adding the AccountController and Views
One difference between the full ASP.NET MVC 3 Web Application template and the ASP.NET MVC 3 Empty Web Application template is that the empty template doesn’t include an Account Controller. We’ll add an Account Controller by copying a few files from a new ASP.NET MVC application created from the full ASP.NET MVC 3 Web Application template.
The MvcMusicStore-Assets.zip download - which included our site design files from the beginning of the tutorial - has all the AccountController files you’ll need to add located in a folder named Code. Copy the following files into the same directories in our project:
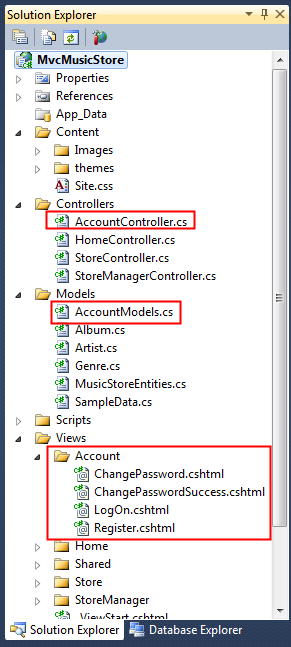
1. Copy AccountController.cs in the Controllers directory
2. Copy AccountModels.cs in the Models directory
3. Create an Account directory inside the Views directory and copy all four views in
Change the namespace for the Controller and Model classes so they begin with MvcMusicStore. The AccountController class should use the MvcMusicStore.Controllers namespace, and the AccountModels class should use the MvcMusicStore.Models namespace.
Note: If you are copying these files from an empty website rather than the Assets zip, you will need to update the namespaces to match MvcMusicStore.Controllers and MvcMusicStore.Models.
The updated solution should look like the following:
Adding an Administrative User with the ASP.NET Configuration site
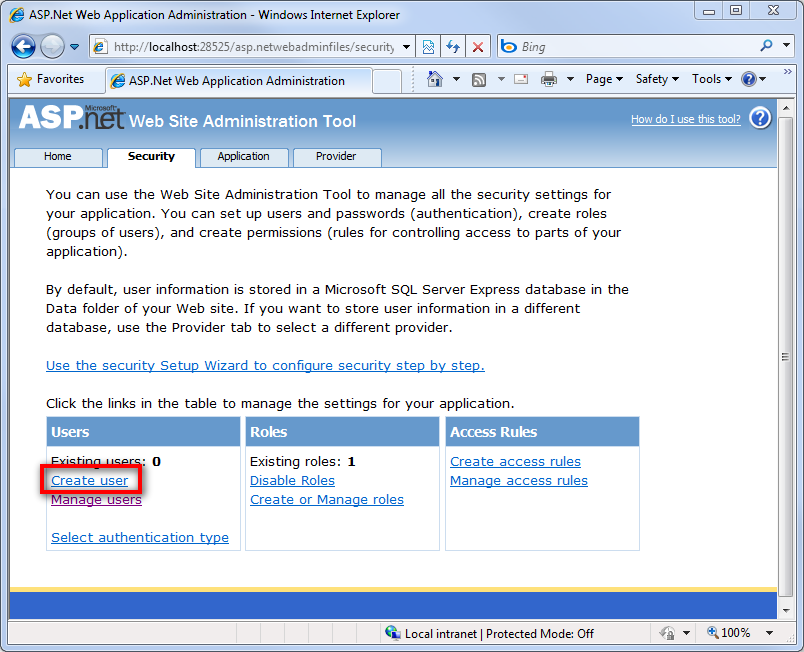
Before we require Authorization in our website, we’ll need to create a user with access. The easiest way to create a user is to use the built-in ASP.NET Configuration website.
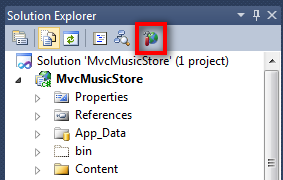
Launch the ASP.NET Configuration website by clicking following the icon in the Solution Explorer.
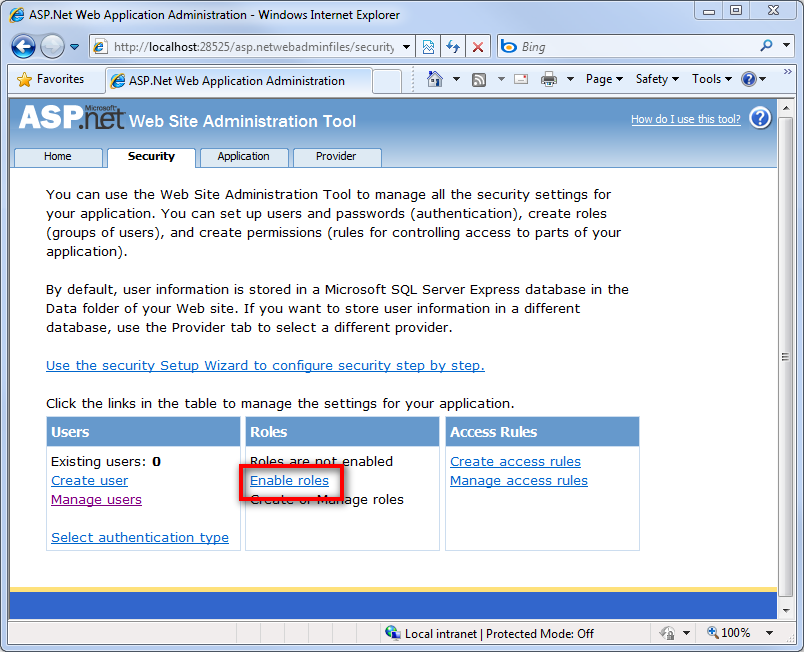
This launches a configuration website. Click on the Security tab on the home screen, then click the “Enable roles” link in the center of the screen.
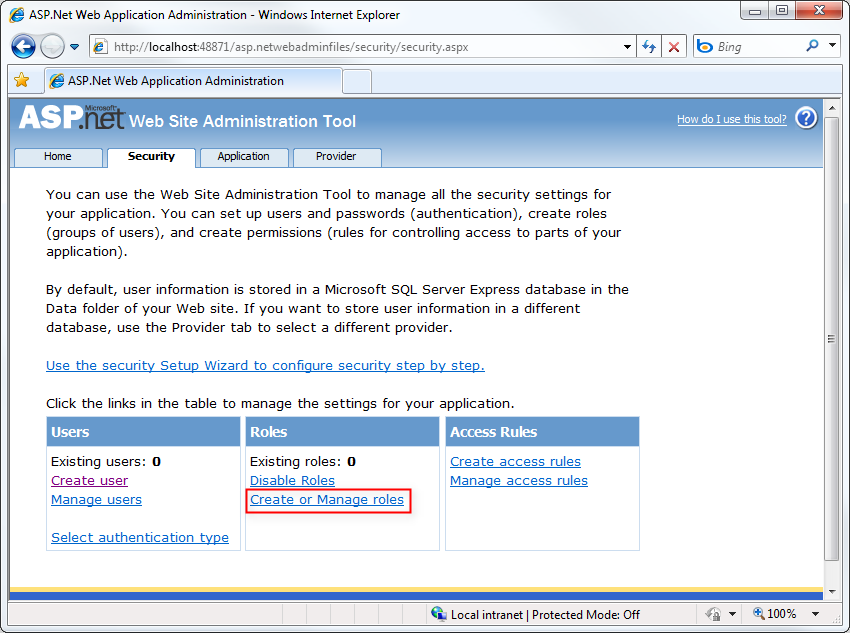
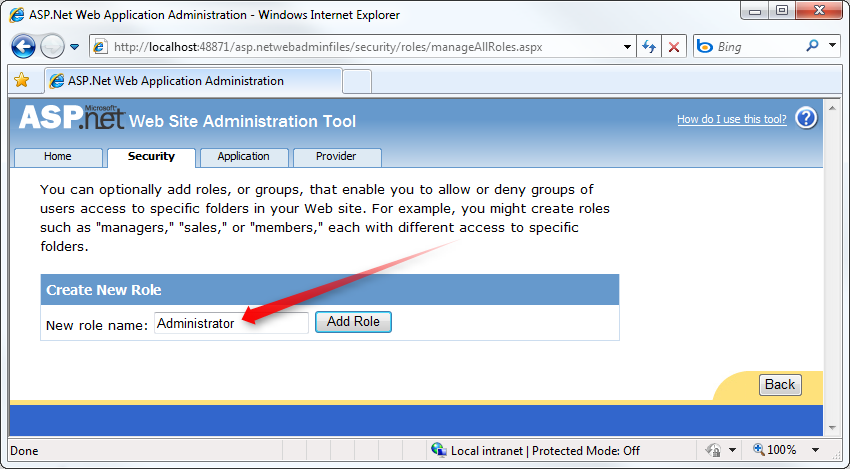
Click the “Create or Manage roles” link.
Enter “Administrator” as the role name and press the Add Role button.
Click the Back button, then click on the Create user link on the left side.
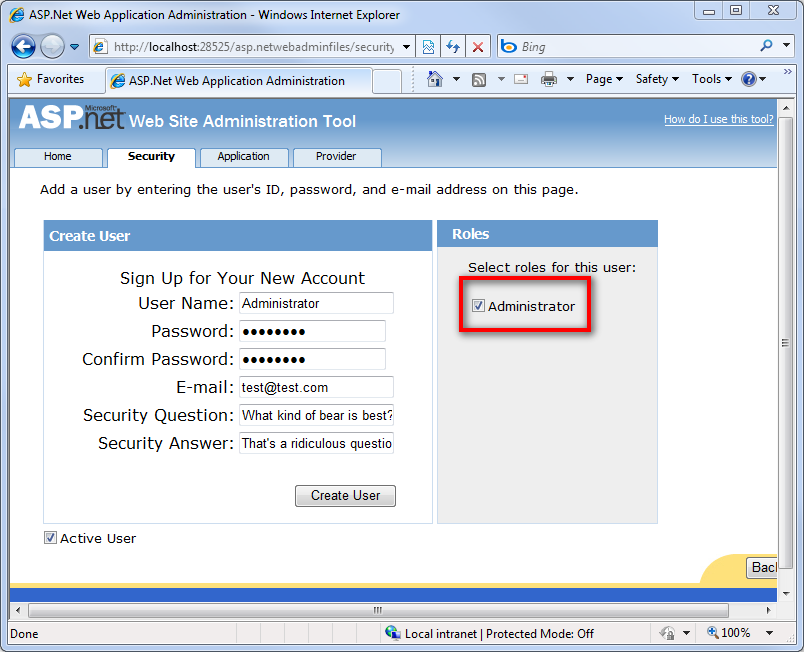
Fill in the user information fields on the left using the following information:
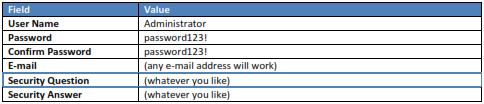
Note: You can of course use any password you’d like. The above password is shown as an example, and is assumed in the support forums on CodePlex. The default password security settings require a password that is 7 characters long and contains one non-alphanumeric character.
Select the Administrator role for this user, and click the Create User button.
At this point, you should see a message indicating that the user was created successfully.

You can now close the browser window.
Role-based Authorization
Now we can restrict access to the StoreManagerController using the [Authorize] attribute, specifying that the user must be in the Administrator role to access any controller action in the class.
[Authorize(Roles = "Administrator")]
public class StoreManagerController : Controller
{
// Controller code here
}
Note: The [Authorize] attribute can be placed on specific action methods as well as at the Controller class level.
Now browsing to /StoreManager brings up a Log On dialog:

After logging on with our new Administrator account, we’re able to go to the Album Edit screen as before.