5. Edit Forms using Scaffolding
In the past chapter, we were loading data from our database and displaying it. In this chapter, we’ll also enable editing the data.
Creating the StoreManagerController
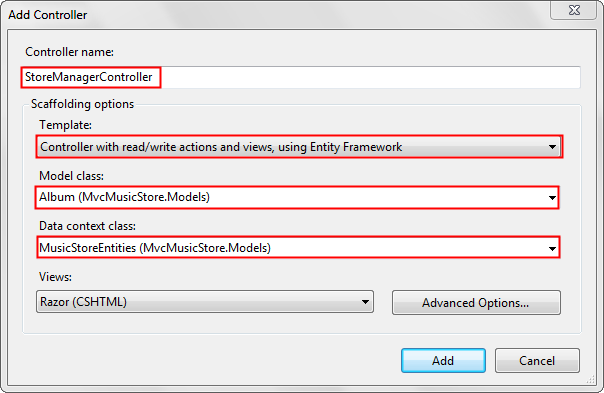
We’ll begin by creating a new controller called StoreManagerController. For this controller, we will be taking advantage of the Scaffolding features available in the ASP.NET MVC 3 Tools Update. Set the options for the Add Controller dialog as shown below.
When you click the Add button, you’ll see that the ASP.NET MVC 3 scaffolding mechanism does a good amount of work for you:
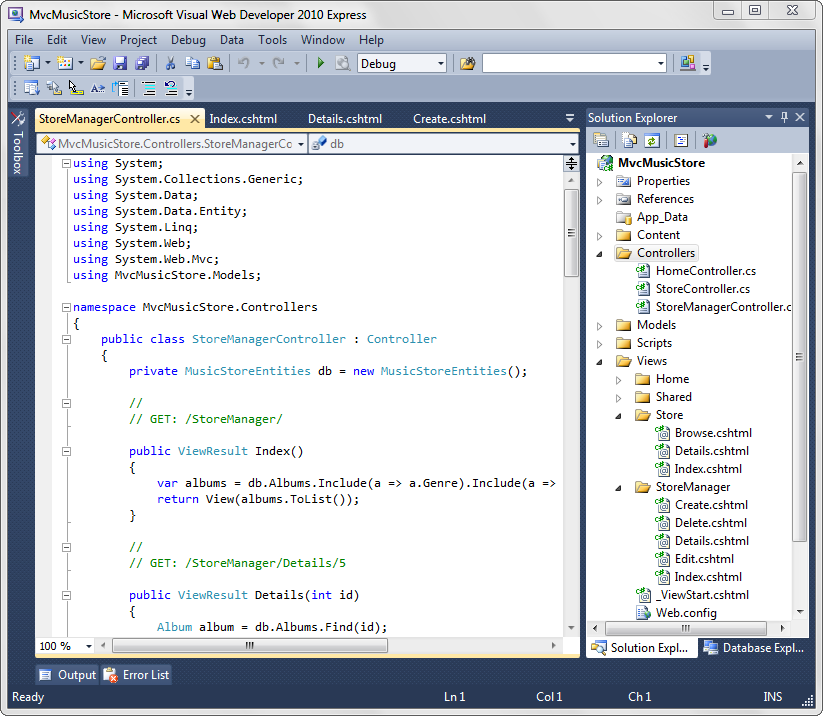
The new StoreManager controller class includes CRUD (create, read, update, delete) controller actions which know how to work with the Album model class and use our Entity Framework context for database access.
Modifying a Scaffolded View
It’s important to remember that, while this code was generated for us, it’s standard ASP.NET MVC code, just like we’ve been writing throughout this tutorial. It’s intended to save you the time you’d spend on writing boilerplate controller code and creating the strongly typed views manually, but this isn’t the kind of generated code you may have seen prefaced with dire warnings in comments about how you mustn’t change the code. This is your code, and you’re expected to change it.
So, let’s start with a quick edit to the StoreManager Index view (/Views/StoreManager/Index.cshtml). This view will display a table which lists the Albums in our store with Edit / Details / Delete links, and includes the Album’s public properties. We’ll remove the AlbumArtUrl field, as it’s not very useful in this display. In <table> section of the view code, remove the <th> and <td> elements surrounding AlbumArtUrl references, as indicated by the highlighted lines below:
<table>
<tr>
<th>
Genre
</th>
<th>
Artist
</th>
<th>
Title
</th>
<th>
Price
</th>
<th>
AlbumArtUrl
</th>
<th></th>
</tr>
@foreach (var item in Model) {
<tr>
<td>
@Html.DisplayFor(modelItem => item.Genre.Name)
</td>
<td>
@Html.DisplayFor(modelItem => item.Artist.Name)
</td>
<td>
@Html.DisplayFor(modelItem => item.Title)
</td>
<td>
@Html.DisplayFor(modelItem => item.Price)
</td>
<td>
@Html.DisplayFor(modelItem => item.AlbumArtUrl)
</td>
<td>
@Html.ActionLink("Edit", "Edit", new { id=item.AlbumId }) |
@Html.ActionLink("Details", "Details", new { id=item.AlbumId }) |
@Html.ActionLink("Delete", "Delete", new { id=item.AlbumId })
</td>
</tr>
}
</table>
The modified view code will appear as follows:
@model IEnumerable<MvcMusicStore.Models.Album>
@{
ViewBag.Title = "Index";
}
<h2>Index</h2>
<p>
@Html.ActionLink("Create New", "Create")
</p>
<table>
<tr>
<th>
Genre
</th>
<th>
Artist
</th>
<th>
Title
</th>
<th>
Price
</th>
<th></th>
</tr>
@foreach (var item in Model) {
<tr>
<td>
@Html.DisplayFor(modelItem => item.Genre.Name)
</td>
<td>
@Html.DisplayFor(modelItem => item.Artist.Name)
</td>
<td>
@Html.DisplayFor(modelItem => item.Title)
</td>
<td>
@Html.DisplayFor(modelItem => item.Price)
</td>
<td>
@Html.ActionLink("Edit", "Edit", new { id=item.AlbumId }) |
@Html.ActionLink("Details", "Details", new { id=item.AlbumId }) |
@Html.ActionLink("Delete", "Delete", new { id=item.AlbumId })
</td>
</tr>
}
</table>
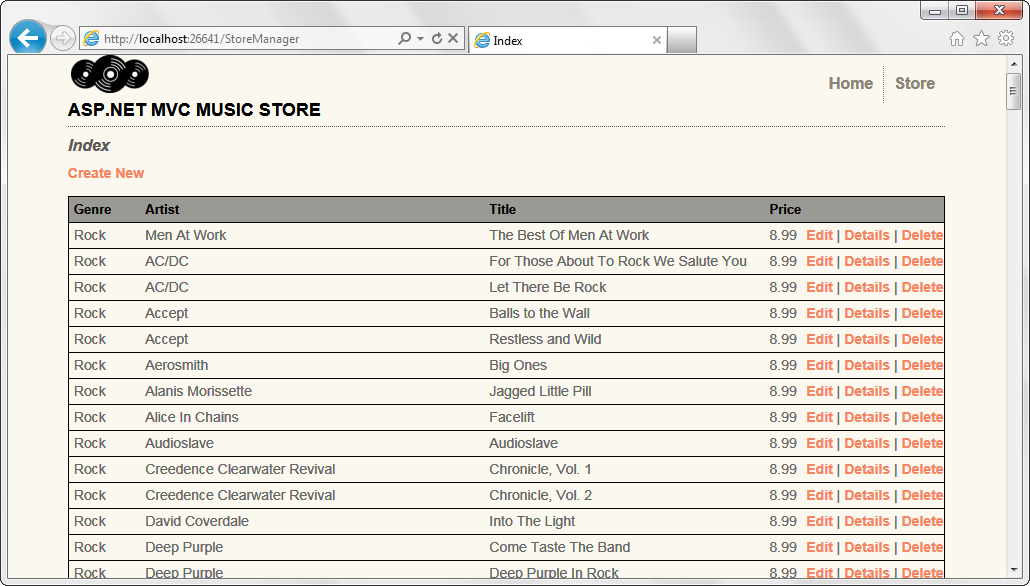
A first look at the Store Manager
Now run the application and browse to /StoreManager/. This displays the Store Manager Index we just modified, showing a list of the albums in the store with links to Edit, Details, and Delete.
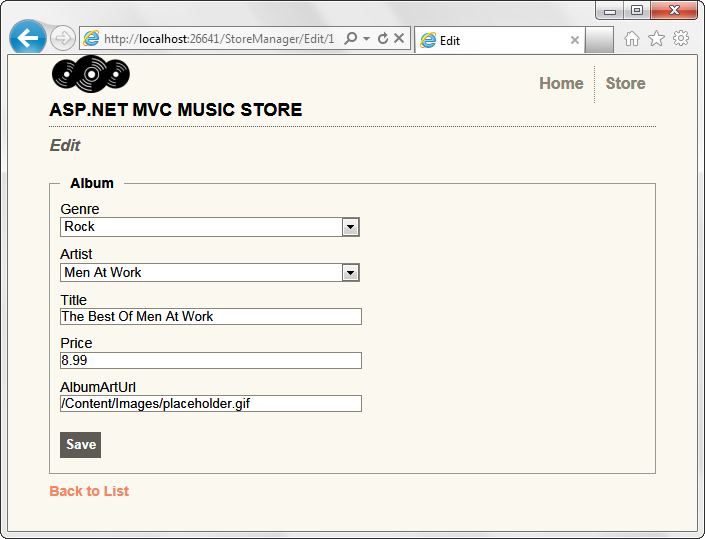
Clicking the Edit link displays an edit form with fields for the Album, including dropdowns for Genre and Artist.
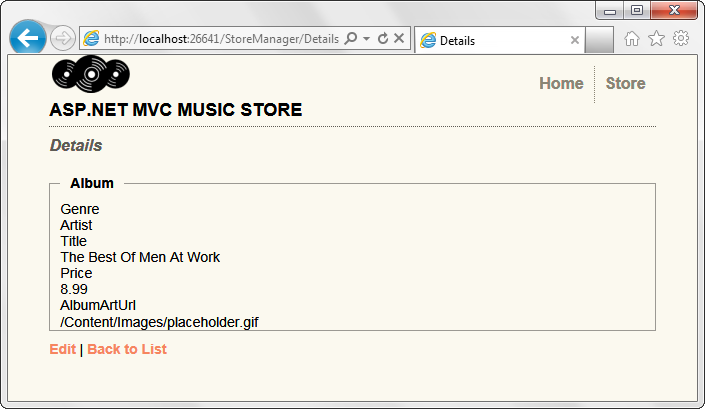
Click the “Back to List” link at the bottom, then click on the Details link for an Album. This displays the detail information for an individual Album.
Again, click the Back to List link, then click on a Delete link. This displays a confirmation dialog, showing the album details and asking if we’re sure we want to delete it.
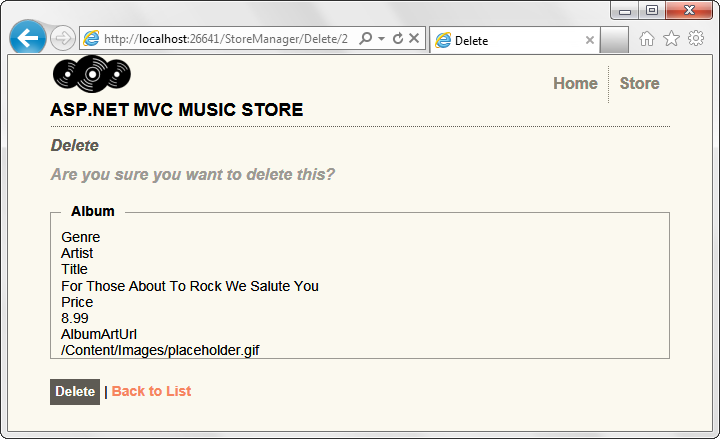
Clicking the Delete button at the bottom will delete the album and return you to the Index page, which shows the album deleted.
We’re not done with the Store Manager, but we have working controller and view code for the CRUD operations to start from.
Looking at the Store Manager Controller code
The Store Manager Controller contains a good amount of code. Let’s go through this from top to bottom. The controller includes some standard namespaces for an MVC controller, as well as a reference to our Models namespace. The controller has a private instance of MusicStoreEntities, used by each of the controller actions for data access.
using System;
using System.Collections.Generic;
using System.Data;
using System.Data.Entity;
using System.Linq;
using System.Web;
using System.Web.Mvc;
using MvcMusicStore.Models;
namespace MvcMusicStore.Controllers
{
public class StoreManagerController : Controller
{
private MusicStoreEntities db = new MusicStoreEntities();
Store Manager Index and Details actions
The index view retrieves a list of Albums, including each album’s referenced Genre and Artist information, as we previously saw when working on the Store Browse method. The Index view is following the references to the linked objects so that it can display each album’s Genre name and Artist name, so the controller is being efficient and querying for this information in the original request.
//
// GET: /StoreManager/
public ViewResult Index()
{
var albums = db.Albums.Include(a => a.Genre).Include(a => a.Artist);
return View(albums.ToList());
}
The StoreManager Controller’s Details controller action works exactly the same as the Store Controller Details action we wrote previously - it queries for the Album by ID using the Find() method, then returns it to the view.
//
// GET: /StoreManager/Details/5
public ViewResult Details(int id)
{
Album album = db.Albums.Find(id);
return View(album);
}
The Create Action Methods
The Create action methods are a little different from ones we’ve seen so far, because they handle form input. When a user first visits /StoreManager/Create/ they will be shown an empty form. This HTML page will contain a <form> element that contains dropdown and textbox input elements where they can enter the album’s details.
After the user fills in the Album form values, they can press the “Save” button to submit these changes back to our application to save within the database. When the user presses the “save” button the <form> will perform an HTTP-POST back to the /StoreManager/Create/ URL and submit the <form> values as part of the HTTP-POST.
ASP.NET MVC allows us to easily split up the logic of these two URL invocation scenarios by enabling us to implement two separate “Create” action methods within our StoreManagerController class – one to handle the initial HTTP-GET browse to the /StoreManager/Create/ URL, and the other to handle the HTTP-POST of the submitted changes.
Passing information to a View using ViewBag
We’ve used the ViewBag earlier in this tutorial, but haven’t talked much about it. The ViewBag allows us to pass information to the view without using a strongly typed model object. In this case, our Edit HTTP-GET controller action needs to pass both a list of Genres and Artists to the form to populate the dropdowns, and the simplest way to do that is to return them as ViewBag items.
The ViewBag is a dynamic object, meaning that you can type ViewBag.Foo or ViewBag.YourNameHere without writing code to define those properties. In this case, the controller code uses ViewBag.GenreId and ViewBag.ArtistId so that the dropdown values submitted with the form will be GenreId and ArtistId, which are the Album properties they will be setting.
These dropdown values are returned to the form using the SelectList object, which is built just for that purpose. This is done using code like this:
ViewBag.GenreId = new SelectList(db.Genres, "GenreId", "Name");
As you can see from the action method code, three parameters are being used to create this object:
With that in mind, then, the HTTP-GET Create action is pretty simple - two SelectLists are added to the ViewBag, and no model object is passed to the form (since it hasn’t been created yet).
//
// GET: /StoreManager/Create
public ActionResult Create()
{
ViewBag.GenreId = new SelectList(db.Genres, "GenreId", "Name");
ViewBag.ArtistId = new SelectList(db.Artists, "ArtistId", "Name");
return View();
}
HTML Helpers to display the Drop Downs in the Create View
Since we’ve talked about how the drop down values are passed to the view, let’s take a quick look at the view to see how those values are displayed. In the view code (/Views/StoreManager/Create.cshtml), you’ll see the following call is made to display the Genre drop down.
@Html.DropDownList("GenreId", String.Empty)
This is known as an HTML Helper - a utility method which performs a common view task. HTML Helpers are very useful in keeping our view code concise and readable. The Html.DropDownList helper is provided by ASP.NET MVC, but as we’ll see later it’s possible to create our own helpers for view code we’ll reuse in our application.
The Html.DropDownList call just needs to be told two things - where to get the list to display, and what value (if any) should be pre-selected. The first parameter, GenreId, tells the DropDownList to look for a value named GenreId in either the model or ViewBag. The second parameter is used to indicate the value to show as initially selected in the drop down list. Since this form is a Create form, there’s no value to be preselected and String.Empty is passed.
Handling the Posted Form values
As we discussed before, there are two action methods associated with each form. The first handles the HTTP- GET request and displays the form. The second handles the HTTP-POST request, which contains the submitted form values. Notice that controller action has an [Htt