
The trick we are going to learn here is the most interesting trick and I am sure that it will increase your prestige among your friends. Because now these days it’s a big deal among the group of your friend that if you have i3, is or i7 processor. So let’s learn how to change your pc from any of core processor to i7
For it you have to follow these steps:-
• First of all you have to go on the ͞run option and write ͞regedit to open the registry editor of your computer and click on ok
• It will open the registry editing window after you.

• Open the ͞HKEY LOCAL MACHINE as highlighted in the figure.
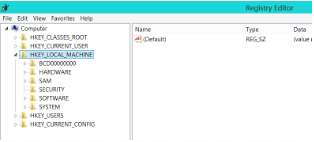
• Then open the ͞hardware option present under it

• Then open the ͞Description option and then open the ͞system option. AIso open the ͞central processor option under system option.
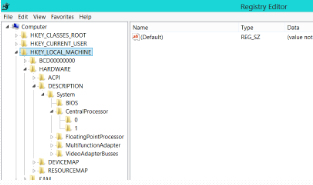
• Then give a single click to ͞0 folder present under ͞central processor
• And then you will see that in the right part of the regedit window there appear a lot of options. This is called as STRINGS.
• Search for the ͞processor name string among those strings.
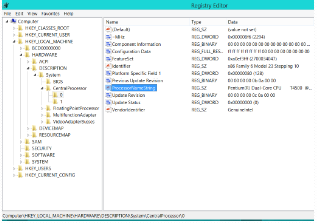
• Open the processor name string giving a double click on it.
• A dialogue box will open after you.
• In the ͞value data text box it is written what your computer’s processor actually is.
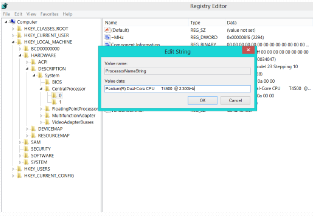
• I am using ͞Pentium{R} Dual-Core CPU T4500 @ 2.30GHz as written in the value data.
• Now delete those texts and write your own text replacing them.
• Such as you can write Intel {R} Core i7 CPU T9500 @ 2.30GHz and click on ͞ok option

• Now close the registry editor and let’s check if it is working or not.
• For checking it, you have to check the properties of your computer.
• For checking it, just give a right click on my computer icon and click on the ͞properties option which is the last option of the dialogue box.

• The system properties of your computer are shown after you.
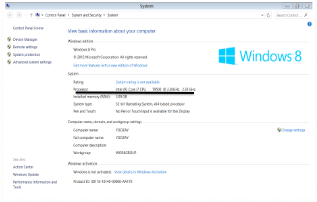
• Yuppie! As you have seen in the processor name it will be as expected.
• Now your processor is turned into i7.
And now you can say with proud that YOU HAVE AN CORE i7
PROCESSOR.


