CHAPTER
PYCUDA
Andreas Klöckner’s pyCUDA wraps NVIDIA’s C interface to their Compute Unified Device Architecture in a set of friendly Python API calls. A numpy-like interface is provided (slowest but easiest to use) along with an element-wise interface and a pure C code wrapper (both require you to write C code).
In this tutorial I’m using an older MacBook with an NVIDIA 9400M graphics card. This card only supports single precision floating point arithmetic, newer cards (e.g. the GTX 480 shown in the graph at the start of this tutorial) also support double precision floating point numbers as used in all the other examples here. As a result the following examples show float32 and complex64 (comprising two float32 numbers) rather than float64 and complex128. You can swap the comments around if you have a newer card.
I would expect all future GPUs to support double precision arithmetic, possibly mobile phone GPUs will be limited to single precision for a while yet though.
If you want an idea of what a high-spec GPU looks like - this is the GTX 480 in my desktop (note how it is large compared to the motherboard!) at my physics client:
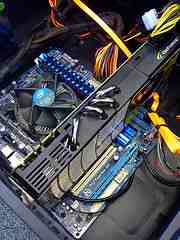
Figure 19.1: GTX 480 GPU (top of the line in 2010!)
You’ll have to spend some time getting your head around GPU programming. Vector operations are assumed (see the numpy vector examples above) and the GPU has its own memory that’s separate from the CPU’s memory, so data has to be copied to the card before processing.
The copy operations incur a time overhead - remember that it takes time to copy data to the GPU, then time to run the code (which is typically faster running in parallel on the GPU than in series on a CPU), then it takes time to copy the result back. The overheads for the copying have to be less than the speed-up you obtain by using the GPU else you will see an overall worsening for your run time.
I have a write-up on my blog from January 2010 when I wrote these early examples http://ianozsvald.com/2010/07/14/22937-faster-python-math-using-pycuda/ which includes links to two of the recommended CUDA texts (they’re still relevant in 2011!). I suspect that newer books will be published later this year which will cover the newer CUDA 4.0 and new hardware capabilties. You might also find the links in this post to be useful too: http://ianozsvald.com/2010/09/17/demoing-pycuda-at-the-london-financial-python-user-group/
The numpy-like interface is the easiest. I add g to my variables to indicate if they’re referring to data stored on the GPU. The inner loop in calculate_z_asnumpy_gpu looks like the vectorised numpy solution which is explained above, it just uses the pyCUDA syntax which is a touch different to numpy‘s.
Behind the scenes CUDA code is generated and copied to the card when you first run your code, after that your data is transparently copied to and from the card as required. Note that overheads are incurred (you’ll have to investigate the actual CUDA code to see what’s happening) which is why this version runs slower than the others.
IAN_TODO dig back into the asnumpy example and time the statements, figure out where the slowdowns are (it has been a while since I wrote this piece of code...!)
import numpy as np
import pycuda.driver as drv
import pycuda.autoinit
import numpy
import pycuda.gpuarray as gpuarray
...
def calculate_z_asnumpy_gpu(q, maxiter, z):
"""Calculate z using numpy on the GPU"""
# convert complex128s (2*float64) to complex64 (2*float32) so they run
# on older CUDA cards like the one in my MacBook. To use float64 doubles
# just edit these two lines
complex_type = np.complex64 # or nm.complex128 on newer CUDA devices
float_type = np.float32 # or nm.float64 on newer CUDA devices
# create an output array on the gpu of int32 as one long vector
outputg = gpuarray.to_gpu(np.resize(np.array(0,), q.shape))
# resize our z and g as necessary to longer or shorter float types
z = z.astype(complex_type)
q = q.astype(complex_type)
# create zg and qg on the gpu
zg = gpuarray.to_gpu(z)
qg = gpuarray.to_gpu(q)
# create 2.0 as an array
twosg = gpuarray.to_gpu(np.array([2.0]*zg.size).astype(float_type))
# create 0+0j as an array
cmplx0sg = gpuarray.to_gpu(np.array([0+0j]*zg.size).astype(complex_type))
# create a bool array to hold the (for abs_zg > twosg) result later
comparison_result = gpuarray.to_gpu(np.array([False]*zg.size).astype(np.bool))
# we’ll add 1 to iterg after each iteration, create an array to hold the iteration count
iterg = gpuarray.to_gpu(np.array([0]*zg.size).astype(np.int32))
for iter in range(maxiter):
# multiply z on the gpu by itself, add q (on the gpu)
zg = zg*zg + qg
# abs returns a complex (rather than a float) from the complex
# input where the real component is the absolute value (which
# looks like a bug) so I take the .real after abs()
# the above bug relates to pyCUDA from mid2010, it might be fixed now...
abs_zg = abs(zg).real
# figure out if zg is > 2
comparison_result = abs_zg > twosg
# based on the result either take 0+0j for qg and zg or leave unchanged
qg = gpuarray.if_positive(comparison_result, cmplx0sg, qg)
zg = gpuarray.if_positive(comparison_result, cmplx0sg, zg)
# if the comparison is true then update the iterations count to outputg
# which we’ll extract later
outputg = gpuarray.if_positive(comparison_result, iterg, outputg)
# increment the iteration counter
iterg = iterg + 1
# extract the result from the gpu back to the cpu
output = outputg.get()
return output
...
# create a square matrix using clever addressing
x_y_square_matrix = x+y[:, np.newaxis] # it is np.complex128
# convert square matrix to a flatted vector using ravel
q = np.ravel(x_y_square_matrix)
# create z as a 0+0j array of the same length as q
# note that it defaults to reals (float64) unless told otherwise
z = np.zeros(q.