Java 3D, Swing, and applets
17.1 Building the Java 3D Swing application
17.2 Adding support for running as an applet
We have reached the point where we can build a complete Java 3D application that integrates Swing for the 2D interface components and Java 3D for a 3D rendering window.
In addition, we will attempt to deploy the application as an applet using the Java 2 SDK plug-in. This is an ambitious and challenging deployment environment, but improvements in the runtime installation of Java 2 and the Java 2 plug-in are making this an increasingly viable possibility. Java WebStart represents an exciting development in this area, which may make one-click distribution, installation, and launch of Java 2-based applications a reality. A high level overview of the SwingTest example is presented along with extensive source code annotations. Please refer to http://java.sun.com/products/javawebstart/ for Java WebStart documentation.
17.1 Building the Java 3D Swing application
Rather than embarking on a theoretical HelloUniverse-type example using Swing, we will dive straight in and start building a much more realistic Java 3D application. The application (SwingTest) has the following features:
The Java 3D demo applications from Sun used the SimpleUniverse utility class to build the scenegraph for the applications. SwingTest will build the whole scenegraph from scratch, so you can relate the various classes to each other and how they are combined to produce screen output (figure 17.1). The SimpleUniverse class is useful for quick Java 3D prototypes; however, it hides many of the interesting and powerful features of Java 3D’s view model.
The code in this example is all in one class, SwingTest, which is actually a Swing JPanel. This is the approach that has been taken for much of the example code, but you should not emulate it for your applications. You should aim to break your application’s functionality into far more discrete pieces, pushing the functionality down the class hierarchy as much as possible. Other examples use utility classes defined in the org.selman.java3d.book package, which you should be able to reuse in building your applications. This example does not rely on any external library code, so you can see the entire application and how all the pieces relate to one another.
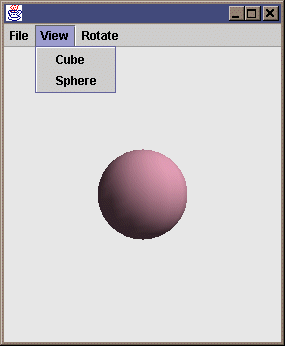
Figure 17.1The SwingTest example running as an application. Combines Swing, Java 3D, dynamic scenegraph modifications, and off-screen rendering
From SwingTest.java
//These are the fairly standard imports that we will be using
//for many of the examples in the book. The “core” Java 3D code
//resides in the javax.media.j3d package.
import java.applet.Applet;
import java.awt.*;
import java.awt.event.*;
import java.awt.image.*;
import java.io.*;
import javax.media.j3d.*;
import javax.vecmath.*;
import javax.swing.*;
import com.sun.image.codec.jpeg.*;
/*
* The SwingTest class extends the Swing JPanel and
* can therefore be added to a Swing JFrame or JPanel as a
component
* of the user interface. The SwingTest class contains
the 3D display,
* and responds to Swing user interface events by implementing
* the ActionListener interface. The main entry point for the
* application creates the JFrame that will house the
SwingTest JPanel
* as well as the JmenuBar, which will generate the
User Interface
* events.
*/
public class SwingTest extends JPanel implements ActionListener
{
/*
* Java 3D applications describe a 3D scene to the rendering
system
* that produces the rendered frames. The 3D scene description
* is added to a tree (directed-acyclic-graph) data structure
* called a scenegraph. The scenegraph tree has two major
branches:
* the scene branch describes the objects and lights in the
scene
* as well as any behaviors that act upon the scene.
The view branch
* of the scenegraph describes the viewer of the scene,
including
* their position, screen device, and viewing parameters.
*
* SwingTest needs to modify the objects on the scene side
* of the scenegraph at runtime, so we keep a reference to
it in the
* sceneBranchGroup member variable below.
*/
private BranchGroup sceneBranchGroup = null;
/*
* SwingTest rotates the objects in the scene using a
* RotationInterpolator behavior that will automatically modify
* the rotation components of a 4 × 4 transformation matrix.
* Objects that are attached to the transformation matrix
object
* (TransformGroup) will therefore be automatically rotated.
*/
private RotationInterpolator rotator = null;
/* Java 3D will render the scene into a Canvas3D component.
* To perform frame captures and save the frames to disk,
we keep
* a reference to an offscreen (nonvisible) Canvas3D
component that
* can be explicitly called to render individual frames.
*/
private Canvas3D offScreenCanvas3D = null;
/*
* The image that is attached to the off-screen Canvas3D and
* contains the results of screen captures
*/
private ImageComponent2D imageComponent = null;
//The width of the offscreen Canvas3D
private static final int offScreenWidth = 400;
//The height of the offscreen Canvas3D
private static final int offScreenHeight = 400;
//Constructor.
//Set the layout algorithm for the panel and initialize Java 3D
//and the scene.
public SwingTest()
{
setLayout( new BorderLayout() );
init();
}
//The init method does all of the work of setting up and
//populating the scenegraph.
protected void init()
{
/*
* Every Java 3D application has an instance of a class
Derived from
* VirtualUniverse. The VirtualUniverse class contains a
number of
* Locales objects, each of which describes a discrete region
* within the scene, and has its own coordinate system.
By deriving
* your own class from VirtualUniverse you can define utility
methods
* or additional datastructures for your application.
*/
VirtualUniverse universe = createVirtualUniverse();
/*
* A Locale object allows a coordinate system to be specified
* for a region within the scene. By having multiple Locales
* in your scene you can have multiple levels of detail without
* losing coordinate precision due to rounding errors.
*/
Locale locale = createLocale( universe );
/*
* A BranchGroup is a branch of the scenegraph tree.
A BranchGroup
* has a single parent Node and can have multiple child Nodes.
The
* sceneBranchGroup created below contains the graphical
objects,
* lights, and behaviors that will compose the rendered scene.
*/
BranchGroup sceneBranchGroup = createSceneBranchGroup();
/*
* A Background Node allows you to specify a colored
background,
* background image, or background geometry for your
application.
* In this example we simply create a light-gray background
color and
* add it to the scene side of the scenegraph. Java 3D will
* automatically detect that it is a Background Node and
* paint the background color into the Canvas3D prior to
rendering
* the scene geometry.
*/
Background background = createBackground();
if( background != null )
sceneBranchGroup.addChild( background );
/*
* We must now define the view side of the scenegraph. First
* we create a ViewPlatform. The ViewPlatform defines a
location
* in the scene from which the scene can be viewed. The scene
* can contain multiple ViewPlatforms, and View objects can be
moved
* between them at runtime.
*/
ViewPlatform vp = createViewPlatform();
/*
* To contain the ViewPlatform we create a scenegraph branch.
* We create a BranchGroup that is the top of the view branch.
* Underneath it we create a series of TransformGroup,
and then
* finally we attach the ViewPlatform to the lowest
TransformGroup.
* The TransformGroups (which contain a 4 × 4 transformation
matrix)
* allow the ViewPlatform to be rotate, scaled, and translated
within
* the scene.
*/
BranchGroup viewBranchGroup =
createViewBranchGroup( getViewTransformGroupArray(), vp );
//We then have to add the scene branch to the Locale
//we added previously to the VirtualUniverse.
locale.addBranchGraph( sceneBranchGroup );
//Add the view branch to the Locale
addViewBranchGroup( locale, viewBranchGroup );
/*
* Finally, create the View object and attach it to
* the ViewPlatform. The View object has an associated
* characteristics of the viewer and their display hardware.
* A Canvas3D rendering component is attached to the View
which
* is used to display the frames rendered.
*/
createView( vp );
}
/*
* Callback to allow the Canvas3D to be added to a Panel.
This method
* is called by createView and allows the Canvas3D to be added
to its
* parent GUI components, in this can as SwingTest is extends
JPanel we
* can just add it directly to SwingTest.
*/
protected void addCanvas3D( Canvas3D c3d )
{
add( "Center", c3d );
}
//Helper method to create a Java 3D View and
//attach it to a ViewPlatform .
protected View createView( ViewPlatform vp )
{
View view = new View();
//We create a default PhysicalBody and PhysicalEnvironment and
//associate them with the View.
PhysicalBody pb = createPhysicalBody();
PhysicalEnvironment pe = createPhysicalEnvironment();
view.setPhysicalEnvironment( pe );
view.setPhysicalBody( pb );
//Add the View to the ViewPlatform
if( vp != null )
view.attachViewPlatform( vp );
/*
* Set the locations of the clipping planes for the View.
* Java 3D uses a finite number of bits (in a depth-buffer) to
* track the relative distances of objects from the viewer.
* These depth-buffer bits are used to track objects between
* the front clipping plane and the rear clipping plane.
Only objects
* that fall between the two clipping planes will be rendered.
As the
* depth-buffer bits have a finite length (usually 16 or 24
bits)
* the ratio between the front clipping plane and the rear
clipping
* plane should be less than about 1000, or the depth-buffer
will be
* very coarsely quantized and accuracy will be lost.
In this example
* we use 1.0 for the front clipping plane and 100.0
for the rear
* clipping plane.
*/
view.setBackClipDistance( getBackClipDistance() );
view.setFrontClipDistance( getFrontClipDistance() );
//Create the Canvas3D used to display the rendered scene
Canvas3D c3d = createCanvas3D( false );
//Add the Canvas3D to the View so that the View has a
component
//to render into.
view.addCanvas3D( c3d );
//Here we create and add on the offscreen Canvas3D instance
//that we use for screen captures.
view.addCanvas3D( createOffscreenCanvas3D() );
//Finally, invoke the addCanvas3D callback method that will
add
//the visible Canvas3D to a GUI component (JPanel)
addCanvas3D( c3d );
return view;
}
/Simple utility method to create a solid colored background for
//the Canvas3D.
protected Background createBackground()
{
//We create a color by specifying the Red, Green, and Blue
//components, in this case a light gray.
Background back = new Background(
new Color3f( 0.9f, 0.9f, 0.9f ) );
//We need to set the volume within the scene within which the
//Background is active
back.setApplicationBounds( createApplicationBounds() );
return back;
}
/*
* Simple utility method that returns a bounding volume
* for the application. In this case we create a spherical
volume,
* centered at 0,0,0 and with a radius of 100.
*/
protected Bounds createApplicationBounds()
{
return new BoundingSphere(new Point3d(0.0,0.0,0.0), 100.0);
}
//Utility method to create a Canvas3D GUI component.
The Canvas3D
//is used by Java 3D to output rendered frames.
protected Canvas3D createCanvas3D( boolean offscreen )
{
/*
* First we query Java 3D for the available device
information.
* We set up a GraphicsConfigTemplate3D and specify that we
would
* prefer a device configuration that supports antialiased
output.
*/
GraphicsConfigTemplate3D gc3D =
new GraphicsConfigTemplate3D();
gc3D.setSceneAntialiasing( GraphicsConfigTemplate.PREFERRED );
//We then get a list of all the screen devices for the
//local graphics environment
GraphicsDevice gd[] = GraphicsEnvironment.
getLocalGraphicsEnvironment().
getScreenDevices();
//We select the best configuration supported by the first
screen
//device, and specify whether we are creating an onscreen or
//an offscreen Canvas3D.
Canvas3D c3d = new Canvas3D( gd[0].getBestConfiguration(
gc3D ), offscreen );
/*
* Here we have hard-coded the initial size of the Canvas3D.
* However, because we have used a BorderLayout layout
algorithm,
* this will be automatically resized to fit—-as the parent
JFrame
* is resized.
*/
c3d.setSize( 500, 500 );
return c3d;
}
//Callback to get the scale factor for the View side of the
//scenegraph
protected double getScale()
{
return 3;
}
/*
* Get a TransformGroup array for the View side of the
scenegraph.
* We create a single TransformGroup (which wraps a
4 × 4 transformation
* matrix) and modify the transformation matrix to apply
a scale to
* the view of the scene, as well as move the ViewPlatform back
* by 20 meters so that we can see the origin (0,0,0).
The objects
* that we create in the scene will be centered at the origin,
so if
* we are going to be able to see them, we need to move the
* ViewPlatform backward.
*/
public TransformGroup[] getViewTransformGroupArray()
{
TransformGroup[] tgArray = new TransformGroup[1];
tgArray[0] = new TransformGroup();
/*
* Here we move the camera BACK a little so that we can see
* the origin (0,0,0). Note that we have to invert the matrix as
* we are moving the viewer not the scene.
*/
Transform3D t3d = new Transform3D();
t3d.setScale( getScale() );
t3d.setTranslation( new Vector3d( 0.0, 0.0, -20.0 ) );
t3d.invert();
tgArray[0].setTransform( t3d );
return tgArray;
}
//Simple utility method that adds the View side of the scenegraph
//to the Locale
protected void addViewBranchGroup( Locale locale,
BranchGroup bg )
{
locale.addBranchGraph( bg );
}
//Simple utility method that creates a Locale for the
//VirtualUniverse
protected Locale createLocale( VirtualUniverse u )
{
return new Locale( u );
}
//Create the PhysicalBody for the View. We just use a default
//PhysicalBody.
protected PhysicalBody createPhysicalBody()
{
return new PhysicalBody();
}
//Create the PhysicalEnvironment for the View. We ju