Introduction
The Graphical User Interface (GUI) is a new alternative to the console interface. It contains forms, buttons, message boxes, menus, check boxes and graphical components. It is easier for users to use GUI applications than console applications.
The GUI is used for business applications, operating system applications, games, and development tools like Lazarus, and many other applications.
Our First GUI application
To create a new GUI application, click on the Lazarus menu:
Project/New Project/Application
Then save the application by clicking on:
File/Save All
We can then create a new folder, such as firstgui, in which to save our project files. Then we should save the main unit, for example, main.pas, and finally we should choose a project name, such as firstgui.lpi.
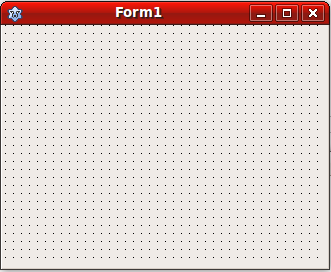
In the main unit, we can press F12 to view the form associated with the main unit, which will look like this:
If we run the application, we will get this window:
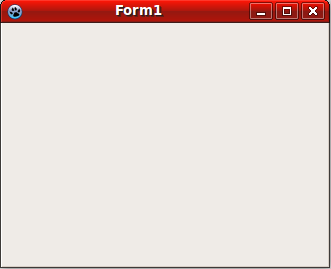

Then we can close the application to return to the designer.
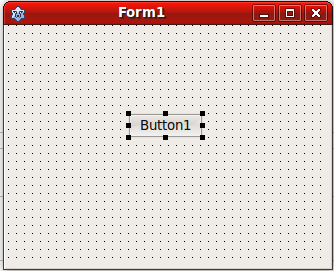
After that, we drop a button from standard component page on the form: Then put the button at any place on the form like this picture:
We can display the button's properties (like caption name, width, etc) in the Object Inspector window.
If it does not appear in Lazarus's windows, then we can display it by clicking Window/Object Inspector
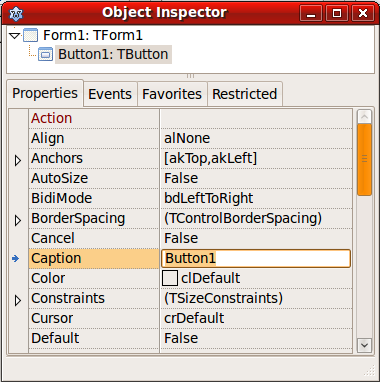
from the main menu or by pressing F11. Then we will get this window: We should make sure that we have selected the button not the form before we do any modification to its properties. Notice the Inspector window has tabs, the first being Properties and the second being Events. Each tab displays its own page.
Then we can change the text that is displayed in the button by changing its Caption property to Click.
After that, select the Events tab of the Object Inspector to display the Events page and double click the OnClick event, which will create this code template in the main unit: procedure TForm1.Button1Click(Sender: TObject);
begin
end;
Then write this line in the OnClick event code template that Lazarus created for us: procedure TForm1.Button1Click(Sender: TObject);
begin
ShowMessage('Hello world, this is my first GUI application');
end;
By doing this, when we run the application, it will display a dialog window containing the desired message when we click the button with our mouse.
In Linux, we will find firstgui as an executable file in the same project directory, and firstgui.exe if we are using Windows. These are the executable files that we can copy to another computer and can run without the need of the Lazarus tool.
In the previous example, there are many important issues:
1. Main application file: which is stored in the firstgui.lpi file in the example. We can show it by clicking Project/Source. We will get this source code:
program firstgui;
{$mode objfpc}{$H+}
uses
{$IFDEF UNIX}{$IFDEF UseCThreads}
cthreads,
{$ENDIF}{$ENDIF}
Interfaces, // this includes the LCL widgetset
Forms
{ you can add units after this }, main;
begin
Application.Initialize;
Application.CreateForm(TForm1, Form1);
Application.Run;
end.
We may need to modify this code in certain cases for special purposes, but in most cases, we can leave it as it is, and let Lazarus manage it automatically.
2. Main unit: It is the unit that contains the definition of the form that appears automatically when we run the application.
Below is the main unit code after we have completed the code for the OnClick event: unit main;
{$mode objfpc}{$H+}
interface
uses
Classes, SysUtils, FileUtil, LResources, Forms, Controls, Graphics, Dialogs, StdCtrls;
type
{ TForm1 }
TForm1 = class(TForm)
Button1: TButton;
procedure Button1Click(Sender: TObject);
private
{ private declarations }
public
{ public declarations }
end;
var
Form1: TForm1;
implementation
{ TForm1 }
procedure TForm1.Button1Click(Sender: TObject);
begin
ShowMessage('Hello world, this is my first GUI application');
end;
initialization
{$I main.lrs}
end.
In the main unit header, we find the TForm1 declaration, which is similar to the record type, but is a Class. We will talk about classes in the next chapter: Object Oriented Programming. Button1 is declared inside the TForm1 class.
We can show this unit source code by pressing CtrlF12 then selecting main unit.
3. Object Inspector/Properties: In this page of the Object Inspector, we can view and modify any component's properties, like a Button's caption or location, a form's color, or a labels font, etc.
These components are similar to records, and their properties are similar to a record's fields.
4. Object Inspector/Events: This page of the Object Inspector contains a component's events that we can receive, like On Click event in a button, Key Press of an edit box, double click in a label, etc. When we click on any event of a component, Lazarus creates a new procedure template for us to write the code that will be called when this event occurs. We can write Pascal code for this event like the example below for a button's OnClick event:
procedure TForm1.Button1Click(Sender: TObject);
begin
ShowMessage('Hello world, this is my first GUI application');
end;
This procedure will be called when the user clicks that button. This procedure is called an event handler.
Second GUI application
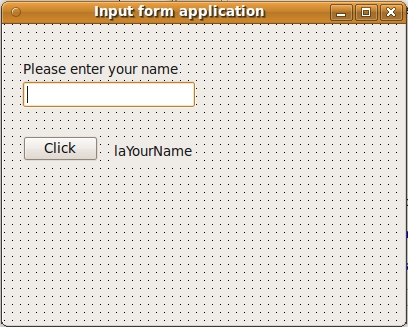
In this example, we will let the user enter his/her name in an edit box, and then when he/she clicks on a button, a greeting message will be displayed in a label.
To write this application, do the following:
Create a new application and save it as inputform. Save the main unit as main.pas, then drop these components on the form from the standard component tab:
2 Labels
Edit box
Button
Then modify some properties of the above components as shown:
Form1:
Name: fmMain
Caption: Input form application
Label1:
Caption: Please enter your name
Label2:
Name: laYourName
Edit1:
Name: edName
Text:
Button1:
Caption: Click
Put the components on the form to look like the picture below:
Put this code in the OnClick event handler:
procedure TfmMain.Button1Click(Sender: TObject);
begin
laYourName.Caption:= 'Hello ' + edName.Text;
end;
Then we can run the application and write our name in the edit box, and then click the button.
In the previous example, we used the field Text in the edit box edName to read what the user types.
This is the graphical alternative to the Readln procedures used in console applications to receive user input.
We also used the Caption property of the label laYourName to display a message. This is one of the alternative methods to Writeln in GUI applications.
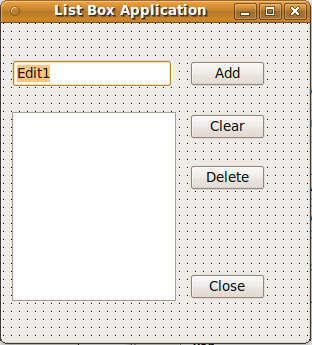
ListBox application
In the next example, we need to add text in a list box, delete it, and clear the list. To do this application follow these steps:
– Create a new application and put 4 buttons, an Edit box, and a List Box ( TListBox) on its main form
– Change the name of buttons to these names:
btAdd, btClear, btDelete, btClose
– Change the captions of the buttons according to their names as shown in this figure:
Write these event handlers for the buttons' OnClick events:
procedure TForm1.btAddClick(Sender: TObject);
begin
ListBox1.Items.Add(Edit1.Text);
end;
procedure TForm1.btClearClick(Sender: TObject);
begin
ListBox1.Clear;
end;
procedure TForm1.btDeleteClick(Sender: TObject);
var
Index: Integer;
begin
Index:= ListBox1.ItemIndex;
if Index <> -1 then
ListBox1.Items.Delete(Index);
end;
procedure TForm1.btCloseClick(Sender: TObject);
begin
Close;
end;
Clicking the Add button will insert the text of the edit box into the list. The Delete button will delete current selected list item. The Clear button will clear the entire list. Finally, the Close button will close the application.
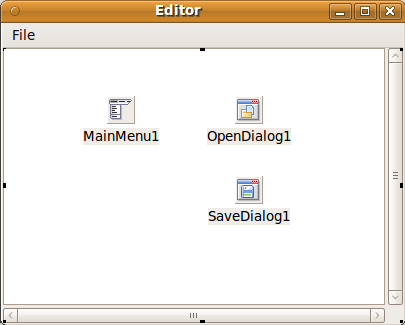
Text Editor Application
In this example, we will show how to create a simple text editor application.
Follow these steps:
•
Create a new application and put these components on it's main form:
TMainMenu
TMemo: Change it's align property to alClient and ScrollBars to ssBoth
TOpenDialog and TSaveDialog from Dialogs page of components palette.
•
Double click on the MainMenu1 component and add File menu and a sub menu containing Open File, Save File, and Close menu items.
Our form will look like this:
•
For the Open File item's OnClick event write this code:
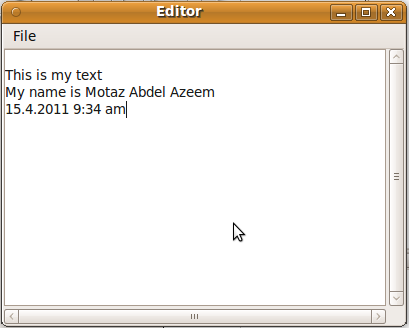
if OpenDialog1. Execute then
Memo1.Lines. LoadFromFile(OpenDialog1. FileName);
•
For the Save File item write this code:
if SaveDialog1. Execute then
Memo1.Lines. SaveToFile(SaveDialog1. FileName);
•
For the Close item write:
Close;
After running this text editor application, we can write any text and then save it to disk. We also can open existing text files, like . pas files:
News Application
This time we need to write an application for storing news titles using these steps:
– Create a new application and name it gnews
– Add two buttons of type type TButton
– Add a text box ( TEdit)
– Add memo ( TMemo)
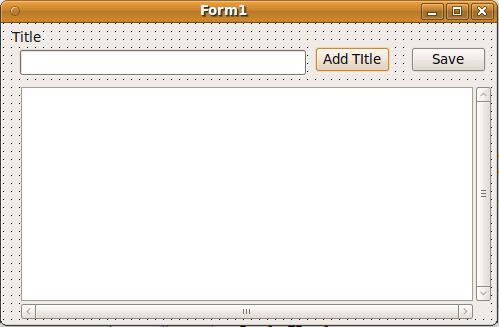
– Change the component's properties according to the following values:
Button1
Caption: Add Title
Button2
Caption: Save
Anchors: Left=False, Right=True
Edit1:
Text=
Memo1
ScrollBars: ssBoth
ReadOnly: True
Anchors: Top=True, Left=Ture, Right=True, Bottom=Ture
Then we will get a form like this:
– For the Add Title button's OnClick event write this code:
Memo1.Lines.Insert(0,
FormatDateTime('yyyy-mm-dd hh:nn', Now) + ': ' + Edit1.Text);
– For the Save button's OnClick event write:
Memo1.Lines.SaveToFile('news.txt');
– For the main form's OnClose event write this code to save entered news: Memo1.Lines.SaveToFile('news.txt');
– For the main form's OnCreate event write the code that loads previously saved news titles if any exist:
if FileExists('news.txt') then
Memo1.Lines.LoadFromFile('news.txt');
Application with a Second form
In the previous GUI applications, we have used only one form, but in real applications sometimes we need multiple forms.
To write a multiple formGUI application, do the following steps:
1. Create a new application and save it in a new folder called secondform.
2. Save the main unit as main.pas, and name the form component as fmMain. Save the project as secondform.lpi.
3. Add a new form by clicking File / New Form. Save this new unit as second.pas and name its form component fmSecond.
4. Add a label in the second form and write in its Caption property 'Second Form'. Increase its font size from the label's Font.Size property.
5. Go back to the main form and put a button on it.
6. Add this line after main unit implementation section:
uses second;
7. For the OnClick event of the button, write this code:
fmSecond.Show;
Then run the application and click the button to display the second form.