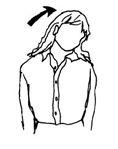
Try carefully moving your left ear to your left shoulder, make sure your shoulder doesn’t come up. Feel the stretch in your neck and keep it there for about 8 seconds, then release. Do this exercise 3 times.
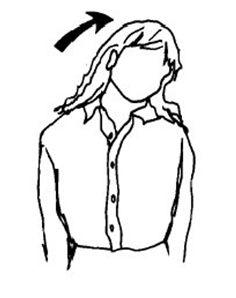 This exercise shouldn’t cause any pain and you may not have any dizziness. If this should occur, stop the exercise immediately. This counts for every exercise.
 Try carefully moving your right ear to your right shoulder, make sure you shoulder doesn’t come up. Feel the stretch in your neck and keep it there for about 8 seconds, then release. Do this exercise 3 times.
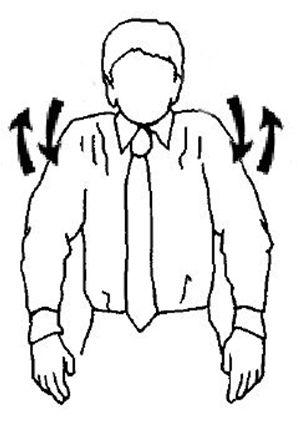
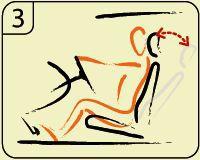
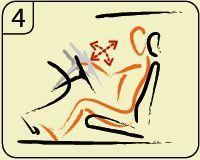
Make circling movements with your shoulders. First 15 seconds forward, then 15 seconds backward. Make slow movements. Try to feel stretch in your shoulders, neck and upper back when making forward movements. Try to feel stretch in your shoulders, the front of your neck and your chest muscles when making backward movements.
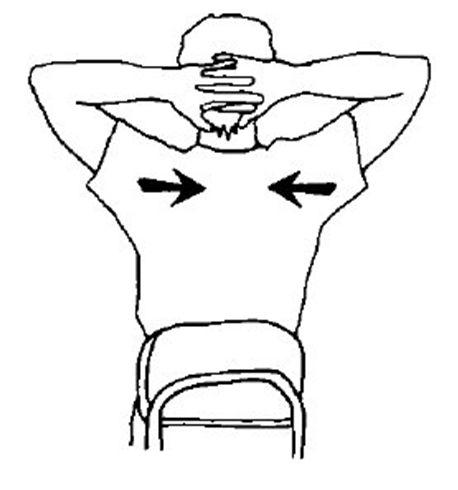
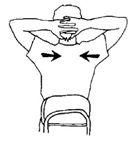
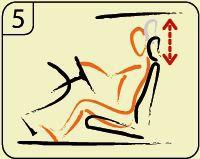
Fold your hands in the back of your neck and pull your shoulder blades together. Hold on for 8 seconds. Don’t pull your neck! Do this exercise 3 times.
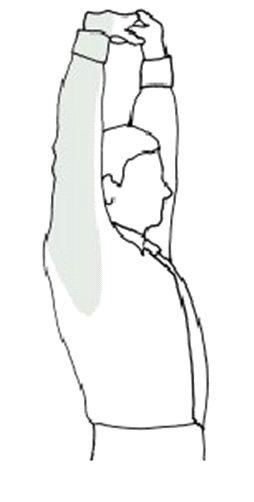
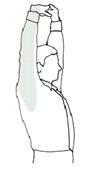
Fold your hands together and stretch your arms with the palm of your hands faced up. Hold on for 8 seconds. Do this exercise 3 times.
 Tip 7: In the shower –Relaxed stretching
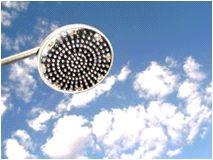
What’s nicer than doing stretching exercises with your neck under a hot shower? This will cost only 3 to 5 minutes of your time and will lead to astonishing results. The combination of the warmth and the stretch of the muscles is a very effective combination. Let the tension in your neck flow away with the water. You will relax and begin your day full of energy.
• As a start you can massage your neck with a hot water stream. Don’t lean, but take a firm straddle. Place your feet slightly spread (following your hips) and let your feet point forwards.
• Let your arms hang next to your body and tray to relax your shoulders.• Now do exercises 1 to 4 (tips 3 to 6)

 How to treat and prevent shoulder injuries? Go to www.pilates-back-jointexercise.com
Tip 8: Physical exercise
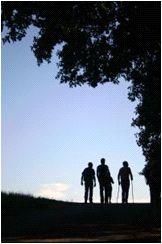
I want to point out the fact that physical exercise is important to stay healthy. Blood circulation is stimulated, waste products are transported well, muscle tension is lessened, muscles get stronger, respiration is improved etcetera, etcetera. There are all kinds of sports to think of. My experience as a Nordic Walking trainer has taught me that Nordic Walking is one of the most comfortable and effective ways of physical exercise.
1. Stamina, power, condition and coordination are trained.
2. You use about 600 muscles. That’s 90% of your whole body, so a lot more than you use with most other activities and sports.
7. Nordic Walking stimulates and mobilizes by using the diagonal technique, the shoulder, neck, back and belly muscles. This will give you a blessed feeling in your neck, shoulder, upper and lower back.
8. It gives more stability in the spinal column; therefore it’s also suitable forNordic Walking - step by step at www.nordicwalkingstepbystep.com Tip 9: Relaxation through appreciation
To get a relaxed neck, you can do this exercise to get positive feelings, so get a relaxed feeling. We already found out that negative feelings about something can cause extra muscle tension. Think about neck complaints that develop, because you are having a long lasting conflict with your chef.
This exercise can be done everywhere, because it is nothing more than thinking of nice thoughts. The process will be stronger when you write down your feelings, but it’s not necessary.
Look around you and search something nice. Now focus on this and think about how nice it feels. The longer you focus on this, the stronger the positive feelings become. Now experience the positive feelings and praise yourself that you may experience this.
At first, always take easy subjects, which are easy to appreciate (for example a good meal, or a kiss of your beloved).The more you practice appreciation, the less resistance and muscle tension you’ll feel. When you start, it would be a good idea to make 10 to 15 minutes free a day to do this exercise. After enjoying these positive feelings for a few days, you’ll notice that you’ll do it more and more in one day. Just because it feels so good. It’s possible that the neck pain disappears and never comes back. Neck pain and negative feelings strengthen each other. Same goes for a relaxed neck and positive feelings.
Above all remember the benefits you will feel when you’ve mastered the steps to stress less and smile more!Change Your Life! Become HAPPYER! Go to www.feelingofhappiness.com
 Just take a look at http://nl.youtube.com/watch?v=vr3x_RRJdd4 to see what the effect of appreciation can be.
Tip 10: Neck position
A very effective exercise to improve your posture is the next:
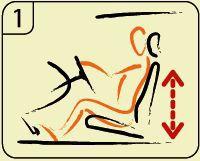
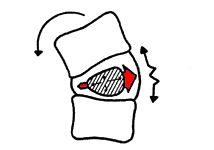
During the moments you’re standing, sitting or walking, you can visualize there’s a sharp nail in your chest. This sharp nail points with the sharp point up and pricks in your chin. This nail is the red arrow in the illustration below. Every time you bend your head forwards, the nail will prick your chin. To prevent this, you have to keep your head straight up.
This exercise can be made more easy by, instead of visualizing, using your finger. You hold your hand against your chest and point up with your index finger (your finger is the nail, the red arrow in the illustration). Doing this, you are stimulated to take a good position every time your finger (the nail) pricks your chin.
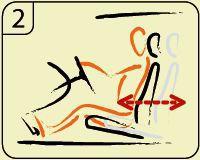
On the same moment you visualize there’s another nail, pricking your upper back. Every time you take a bad position (round back) you visualize that the sharp point of the nail(the red line in the illustration below) is pricking your upper back. Practice these simple exercises at the same time and make it one exercise. If you repeat this exercise again and again, you’ll be automatically stimulated to stand , sit up and walk straighter.
Tip 11: Driving – relaxed on the road
An hour a day. That’s how much an average commuter drives, according to research. That’s 15 days a year! Suppose you drive a car for about 40 years, that means you spend about one and a half year of your life driving. When you have a wrong or tense posture while driving, you can build up some tension in all this time. Relaxation is the keyword yet again! It is of great importance that you set your chair in the right height, so you can sit as relaxed as possible, and so you can see the neighbourhood well.
Sit down in your car and set, if possible, the right position for the chair. Keep an eye on the amount of road and neighbourhood you’ll see (also traffic lights above the road). Most of the time, a higher position is found nicest. This makes stepping into the car easier, and gives more survey on the road etc.Kick down the clutch totally and push your chair so much forward or backward that the front of the seat touches the upper leg.
Kick down the clutch totally and push your chair so much forward or backward that the front of the seat touches the upper leg.
Grab the top of the steering wheel with slightly bend arms and adjust the back so that the lower back is supported. Afterwards you can adjust the lumbar support if present, adjust it to the hollow part of your back.
You may want to adjust this with axial and radial adjustments of the steering wheel (make sure you don’t lose sight on your dashboard when doing a radial adjustments). The steering wheelpedal range is usually small in a car, so if you have “long” legs you have the steering wheel all out. And put it as low as possible so that you can get out of the car without touching the wheel. A low steering wheel position is less burdening for the shoulders.
Put the head support on the right height (rounding of the head support on height of the rounding of your head)
 Tip 12: Relaxed respiration
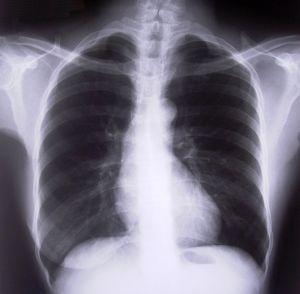
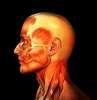
Respiration starts in the belly. Right through the middle of your body, in the chest, right beneath the lungs is the midriff, a strong muscle in the shape of a dome. The midriff moves downwards when you breathe in. To be able to do that, the stomach and intestines have to move down. So when you breathe in, your belly will expand and your stomach will move down. The midriff pushes downwards, creating a vacuum in your chest cavity. This vacuum forces the lungs, that don’t have muscle tissue, to fill themselves with air. This takes place roughly in the lower part of the lung, which absorbs about 80% oxygen. The upper part, which absorbs about 20%, is only used when you are more active, are having stress or when you’re in a crisis situation. The belly breathing makes us more active, more purposive and more precise. It makes us more balanced.
A lot of people breathe wrong. They breathe with their chest. That means that they have to breathe a lot faster to get enough air.-With chest breathing you breathe in about 25000 times a day
-With belly breathing you breathe in about 12000 times a day
So with chest breathing you work twice as hard for the same result! That costs a lot more effort. Doing that, you create a tension and you are more likely to get ill or pain.
Breathing exercises
EXERCISE 1
• Sit on a chair with a straight back and your legs next to each other, or on the floor sitting cross-legged against the wall.
• Put your hands on your belly, one above the navel and one on the navel, while you’re breathing in. You will then feel how your navel expands en how the respiration slowly goes up, into the chest cavity.
When you breathe out, your hand above your navel goes “in”, followed by•your hand beneath that.
• Keep breathing like this for at least 2 minutes, and slowly go to 5 minutes a day.
EXERCISE 2
• Take the same starting position as in exercise 1
• Breathe through your left nostril for 6 seconds and keep your right nostril closed with your finger.
• Keep your breath for 3 seconds.
• Now release the right nostril and breathe out for 6 seconds, keeping your left nostril closed.
• Breathe in through your right nostril for 6 seconds.
• Keep your breathe for 3 seconds.
• Release your left nostril and breathe out for 6 seconds, keeping your right nostril closed.
This exercise can be done as many times as you wish. As long as it feels nice. Especially with a stressful event, this exercise is particularly relaxing and calming.
For more information go to www.theultimaterelaxation.com
A correct, relaxed posture has the following characteristics:
• Position of the head: The head should be straight on your shoulders.
• Position of the shoulders: The shoulders should be held straight and low, en not bend forward or pulled up. The chest is “open”.
• Position of the knees: Not stretched, but slightly bent.
• Position of the feet: The are slightly standing apart and point forward.
Changing postures is the best solution to lessen tension in joints and muscles. For example take turns with walking and standing.
Open yourself to the world around you and have self-confidence surrounding you!
 Tip 14: Massage techniques
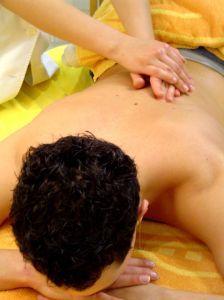
There are different possibilities when it comes to massage. You can get yourself a massage with a professional masseur, but of course the downside of this is that it costs money. You can also do some techniques on your own. I’ll give some techniques:
• To lessen the muscle tension in your neck, you massage the muscles on the left side of your neck firmly with the index and ring finger of your right hand. Start with circling rub movements and round off with a firm pressure. Now do the same on the other side.
• When you’re taking a shower, you can massage your neck with help of the shower itself. Make circling movements and take turns in putting the shower far away and close to your neck.
• Another way to massage your neck is to use a tennis ball to reach difficulty reachable spots or to get through to the tissue better. You can put 2 tennis balls in a sock next to each other and put a knot in it so the balls stay in place. Lay on the floor with your knees pulled up and put the sock against the border of your skull (with one tennis ball on the right and the left side of your neck). By breathing in you’ll make the pressure of the tennis ball on your neck less, and by breathing out you’ll make it bigger. Also, you can move your head lightly to the left and the right to reach different spots of the neck. You will be stunned by the amount of relaxation created by this. Do this 2 to 3 times a week, 5 minutes a day.
Now, finally, a breakthrough program that more than relieves the symptoms of stress, it eliminates the causes, actually reversing the stressful habits, attitudes and mindsets you've developed over the course of your life.
Go to www.pickmeupbooks.com/stressbook
 Bron: http://nl.wikipedia.org/wiki/Emotional_Freedom_Techniques
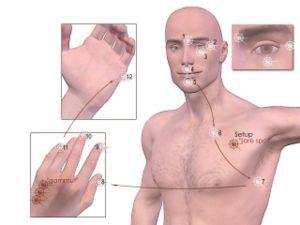
EFT is based on the observation that a disturbance in balance in the energy system of the body has a deep effect on the personal psychology and vice versa. This balance disturbance is corrected by knocking on several places on your body with your fingertips. These spots are the same as the areas around the starting and ending points of some energy meridians (known from acupuncture). The principles behind EFT have been discovered by Dr. Roger Callahan, a clinical psychologist with broad experience, that goes back to the sixties of the last century. He made it his life’s work to find ways to cure people of varying psychosomatic complaints. Gary Craig has developed these techniques further and made them accessible for everyone. You can watch the promotion movie of the EFT procedure by clicking this link:
www.emofree.com
Because you can’t explain the EFT procedure in a few sentences, we give you the opportunity to download the free EFT manual from this link : http://www.emofree.com/downloadeftmanual.asp
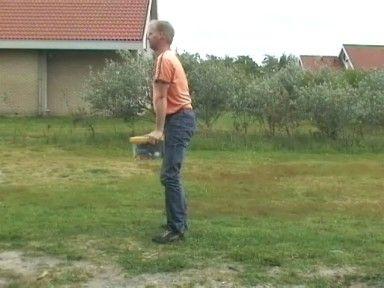
Tip 16: Vacuum in the right positionWhen vacuuming, people often bend over or work in a twisted position. By doing this, a lot of pressure is put on the cervical discs and a lot of tension is created in the back muscles.
 To prevent this, you must vacuum with a straight back. Underneath are some tips to get this straight back:
 • The vacuum cleaner’s hose has to be behind the back and is being held with both hands (see picture)
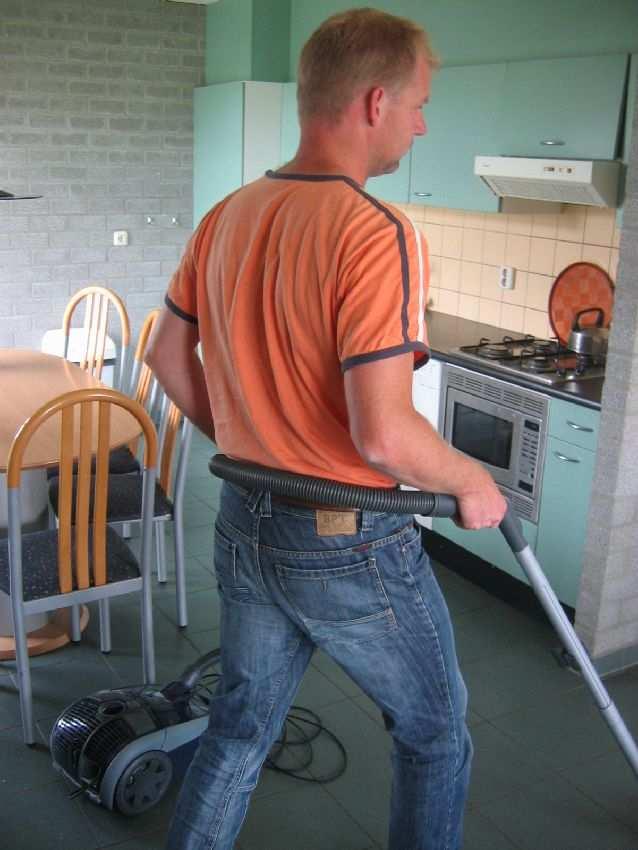
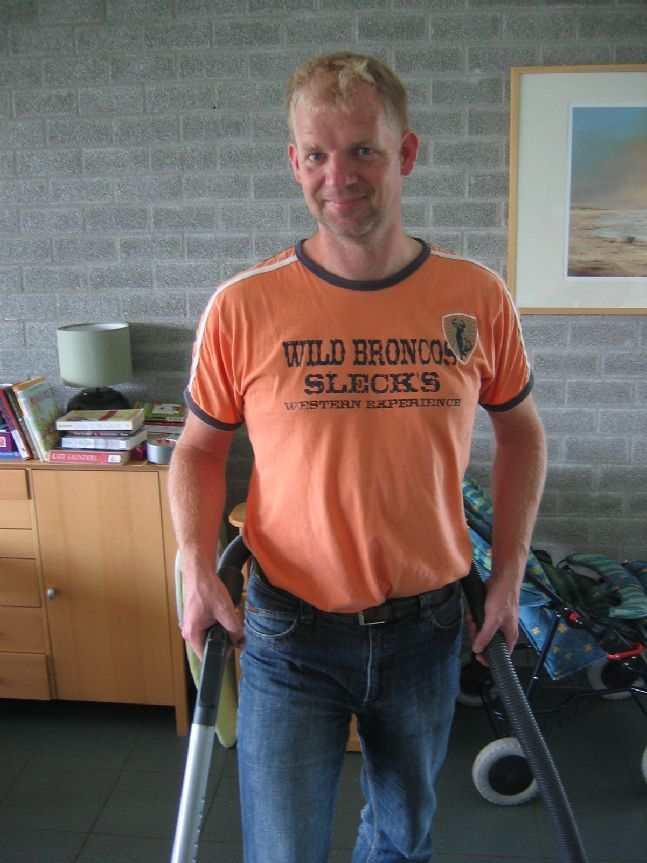
• The knees are slightly bent.
• You have to stand in hip position.• Don’t put too much force into it with the upper body, but get the movement from the legs. Swing it out!
• Don’t squeeze the hose too much, because this will lead to cramped muscles. Hold the hose lightly.
• Create space before you start cleaning, so that you don’t have to put things aside while vacuuming.
• Try to tilt your pelvis backwards. You do this by tightening your belly and buttock muscles, so that the back straightens. Keep breathing!
• When cleaning under sofas, beds, counters etc, you can work in the Kneeling Shooting Position, so you can work with a straight back.
Tip 17: Do the dishes in the right way
If you, like me, don’t own a dishwasher yet, I’ll give you a few tips to do the dishes in a good, neck saving manner.
Doing the dishes is a static act; this means that you are in a position for longer than 3 seconds. Static acts are very rough for your neck. So be careful!
When dishwashing, most of the time you’ll use a sink (in combination with a washtub). Because you this you have to reach out a lot, because the sink is lower than the kitchen unit. Also, the head is bending far over during washing so the neck muscles are highly overburdened.
When you stand too long in the same position, the cervical disc is pressured very much. By this, the cervical disc is pushed in and (temporarily) there is no circulation in it, so it dries out.
Tips for doing the dishes:• To keep the cervical disc well circulated and flexible, it is advisable to take different positions in a certain period, like sitting, standing or walking. The circulation in the cervical disc may also be stimulated by tilting the pelvis now and then. This tilting can be made possible by putting a foot a little bit higher than the other foot.
So putting the foot higher (on for example a kitchen cabinet) and take turns with the other foot. 1 time per 3, 4 minutes is about enough.• To prevent reaching, you have to put the dishes higher, for example putting the dishes on a turned over washtub in the sink.
• If possible, take turns in washing and drying.
• You can also vary in positions by for example sit at the table to do the dishes or dry standing.
Tip 18: Avoid reaching
With reaching is meant that the horizontal distance of shoulder to hand is more than 50 cm. With a lot of reaching comes a lot of tension in the neck and shoulder muscles. You are dealing with a burdened arm, so every muscle has to do its very best and there’s extra load on the joints. You’ll notice by having a sleeping hand that there’s a circulation disorder. This is an indication to stop with the thing you are doing at the moment.
The reaching can be high, far or deep. Think about putting things deep in a cabinet, sorting out clothes or reaching for things on a high closet.Tips to avoid reaching:
• To avoid reaching as much as you can, it is handy to put your things in the store cupboard on order as ergonomic as you can. Put things you use often in the front, the ones you use less in the back.
• Keep the load close on the body• Place as many things as you can on hip height and shoulder height. When you have to grab something beneath hip height, you have to change your position (see tip tilting) and when you have to grab something about shoulder height, best thing to do is to use a kitchen staircase.
When you are doing something, put your stuff as much as you can within•arm’s reach.
Tip 19: Tilting in the right way
People often tilt in the wrong way. There’s a lot being tilted in a day. How much do we tilt a day?
We tilt:
• Clothing
• Suitcase
• Chairs
• Pans
• Boxes
• Books
• And so on...
When you’re tilting there’s being created a lot of pressure on the cervical disc. When you hold a 20 kilo weight in a bent position, there’s 220 kg pressuring the cervical disc (see the picture below). No wonder that at one point it’s got enough and lets you know that it doesn’t want to do it anymore. This results in cramped muscles and neck pain.
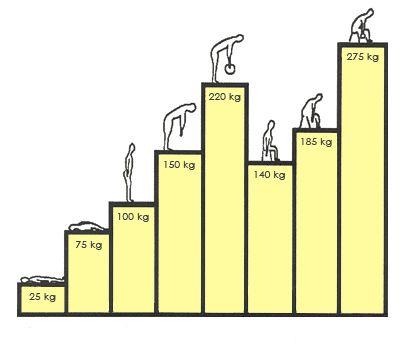
That’s why it’s important to tilt in the right way to avoid overburden on your neck. Go to www.back-pain-advisor.com for more information.
That’s why it’s important to tilt in the right way to avoid overburden on your neck. How do we tilt in the right way?
• Put your feet next to the object you want to tilt;
• Keep your back straight (tighten belly and buttock muscles and look straight forward) and go down by bending your knees.
• Take the object in your hands and tilt from the legs by stretching the legs (don’t tilt with your back!). This because leg muscles are much stronger than back muscles.
• Keep the object close to your bodyWhen you’re tilting you need to mind the following:
• The 3 second rule. That means that you take the object in your hands and count to three and then you tilt. Studies show that fast tilting puts about 1,5 times more load on your back than slow tilting
• Judge the weight of the object before tilting to avoid balance problems;• If possible, divide the weight, for example over two buckets instead of one;
• Divide the weight in a few stages. For example by first tilting it on the chair and then on the table;
• Use where needed objects that can help you tilting.
Tip 20:Tilting things from the floor in the right way
When tilting things from the floor you often take the wrong position, you bend over too much. Even by grabbing a pen off the floor, there’s more than 150 kilos of load pressuring your cervical disc (see picture with tip 19).
Not really healthy!
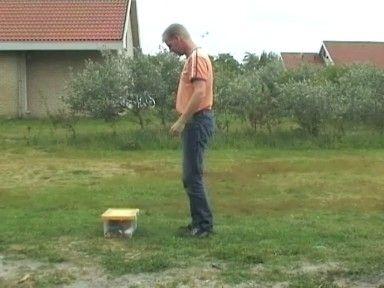
Use the finder technique to take little things off the floor (like a pen). When you take it swing the opposite leg as a contra weight backwards (mind the space behind you) and keep your back straight. Get the object off the floor and swing the leg back. Look at the picture beneath:
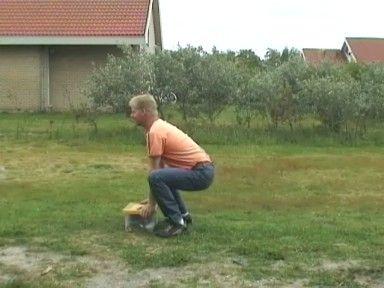
When getting larger and heavier things off the floor, use the Kneeling Shooting Position technique.
• Kneel on one knee on a side of the object
• Put the other foot on the floor with the knee bent 90 degrees
• Your back is stretched
• You get the object and go back to the standing position, keep your back straight doing this;
Look at the picture beneath:
Tip 21: Micro breaks for the neck
To avoid overburdening of the neck, you have to keep the load from the neck every now and then. To keep the load away from your neck you can have short mini breaks. Every hour you can do an exercise, or you can get coff

Reads:
26
Pages:
110
Published:
Apr 2025
Modern Intimacy is a group psychotherapy practice and online platform connecting people with therapists, resources, and content relevant to the intersection o...
Formats: PDF, Epub, Kindle, TXT
Reads:
34
Pages:
46
Published:
Feb 2025
The popular Down With Acid encyclopaedia is getting too big to print now and receiving regular updates, but there is a demand for a printed copies."Down With ...
Formats: PDF, Epub, Kindle, TXT

Reads:
37
Pages:
37
Published:
Nov 2024
The failure rate for manmade diets is 98.3%. The reason why manmade diets fail is because they are, well, manmade. Fasting does not have this fatal flaw. I wa...
Formats: PDF, Epub, Kindle, TXT

Reads:
65
Pages:
66
Published:
Nov 2024
Everyone knows you have to eat less to lose weight.The mistake most people make is thinking that it has to involvesuffering. Inside hunger hacks you'll unlear...
Formats: PDF, Epub, Kindle, TXT