Create Your Facebook Page
Facebook allows (and encourages) 1 personal account for all your personal stuff (“real life” friends) and 1 business account to manage all your business activity.
The critical difference is that your business account doesn’t have a “profile” associated with it (i.e. the Wall, Photos, etc) and can’t have friends. It’s JUST an “admin” account used to administer Pages and Facebook Ads.
When you log into the business account you setup, you’ll go straight to the “business dashboard” instead of the regular Facebook homepage that you’re used to (the page that shows you your friends’ activity)
You DEFINITELY don’t want to have more than 1 personal account (i.e. personal profiles with friends, photos, etc)
There are 2 particular benefits of having a business AND personal account:
1. It keeps your business and personal activities separate – so if something happens to your personal account (e.g. it gets compromised or gets suspended) then your business activity is unaffected (and vice versa).
2. It allows you to give access to another member of your team without them having access to all your personal stuff (friends, private messages, etc).
IDEAL SOLUTION:
What I would recommend is setting up your Facebook Page using a business account, and then adding your personal account as an “admin” so that you can easily administer the page without having to log in and out all the time. This is the best way to do it because you can’t add a business account as an admin later (because they’re not “people” there’s no way to add them!)
ALTERNATIVE:
If you already have well-established Pages setup with your personal account then you can’t separate them out into a new business account (you should do this for future Pages, though)
You definitely SHOULDN’T set up a new PERSONAL account to manage your Facebook Pages. For safety, I would recommend adding 1 or 2 other trusted people (friends, colleagues or staff members) as admins of your Page. Otherwise if something happens to your personal account, you will lose access to your Facebook Page.
Page 8 of 15


Visit
http://www.facebook.com/pages/create.php and enter your log in information in the

upper right hand corner.
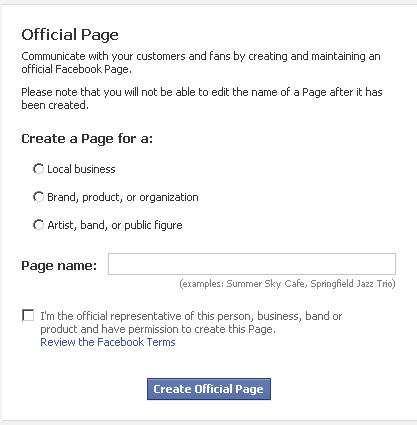
As seen in the
screenshot, you’ll be
asked to choose a
category for your
Facebook page. You’ll also be asked to enter your page Name.
Experts strongly
recommend using your name, not the name of your business. This is because people are
looking to connect with other people on
Facebook, not
companies.
Once you have created your Facebook fan page,
you will need to add photos and information in order
to make it a page that Facebook users will want to
visit again and again.
Again, use your own photo rather than a logo or
business graphic.
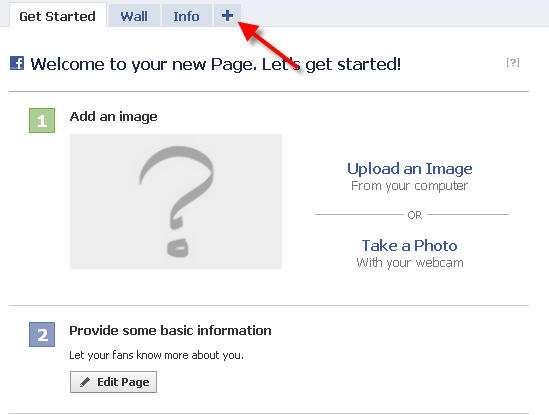
In the screenshot you’ll also notice a red arrow
pointing to a +. When you click on the plus symbol
you can add a new tab to your page.
 Page 9 of 15


You’ve already planned your page, so this step should be fairly straightforward. Simply add the tabs you’ve planned. You can play with the wording and the copy on the page. It’s all a draft and not “live” until you publish it.
To add a welcome tab, click on the plus symbol and search for “Welcome” in the drop down menu.
Once your page is ready to go, it’s time to publish your page. Your Facebook fan page is not yet live until you click the "Publish this Page" link. You can edit your page at any time by simply clicking “edit page”.
**It should also be noted that you can outsource this project to a professional or a service. There are a number of social media and Facebook experts that create custom


 Visit
Visit upper right hand corner.


