GARDENING IN CONTAINERS is a fascinating way of growing plants. It has expanded the horizons of gardening for homeowners and often has provided the only way to garden for apartment and condominium dwellers.
Planting in containers has also provided a contemporary aspect to gardening. The use of unusual plants in unusual pots and containers provides interest and colour to surroundings that were once considered drab and stereotyped.
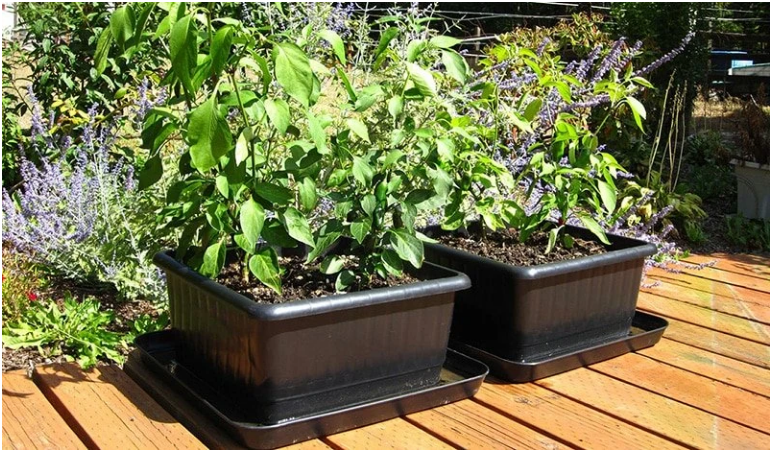
This form of gardening has been especially rewarding for those who have only a patio, deck or balcony on which to grow plants. Container plants provide the right touch needed for contrast and interest in these spaces. They are the accessories that make the scene comfortable and complete.
Growing vegetables is great fun, good exercise and a sure way to more nutritious eating. But for many of us, simply wanting to plant a garden may not be enough. We may lack a good site, or be too busy with other things. Container gardening is a simple and fun way to grow edible crops in just about any situation.
It is growing in popularity because it’s easy to get started and enables anyone to be successful- including those who think they have a “brown thumb”. Even if you have an in-ground vegetable garden you may find it desirable to have edible containers of herbs and salad greens near the kitchen door.
Container Farming can be defined as a micro model of farming where a family unit or household is producing fruits and vegetables in special containers for personal consumption to help improve the income, health and well-being of its family members.
ADVANTAGES OF CONTAINER GARDENING
Used functionally to grow produce in a small space or as an accoutrement to the landscape, container gardens have many benefits to offer. Among the many benefits include:
PRINCIPLES OF CONTAINER GARDENING
Thanks to their size, container gardens are much more manageable than growing in a ground-level bed. They also allow for greater control of the growing conditions. You can address soil structure, fertilizer, and water needs of specific plants and you can position containers so they are receiving the appropriate sunlight for each variety.
Placing containers in ideal locations will save water and lead to healthier plants that can fight off pests more readily.
Growing plants in containers differs from growing plants in the ground. Field soils drain by capillary action, which pulls excess moisture downward. Soils in containers have poorer drainage characteristics due to the shallow depth and reduced capillary pull. This is compensated for by providing a more porous planting mixture.
Poorly drained potting mixture can lead to root problems. Under conditions of excess moisture and poor aeration, roots become stressed and are easily invaded by root rotting fungi. Under these circumstances, plants fail to grow properly or even die.
ESTABLISHING A CONTAINER GARDEN
As in any other agribusiness venture, establishing a container garden will start with careful planning. Emphasis should be given to the following areas:
o Location: Incorporating containers into outdoor living space requires some basic knowledge about the needs of the plants you want to grow. An eye for design will produce more pleasing, aesthetic results.
Containers can be placed on any level surface - decks, balconies, and along driveways and sidewalks. You can also set them on bare ground and allow the plant roots to grow down into the soil or place them on top of a mulched area. Edibles can also be grown in hanging baskets and window boxes.
You will need 6-8 hours of direct sun for warm-season crops (tomato, pepper, eggplant, squash) and 3-5 hours of direct sun for cool-season crops (lettuce, spinach, Asian greens).
Easy access to water is crucial. Some containers will need watering every day when the weather is hot and dry.
Consider the microclimate in the container garden area. Watch out for heat sinks created by brick, concrete, and reflective surfaces.
o Choosing what to plant: After having decided on the garden location, the next step is to decide on what to plant. In determining the type and kind vegetables and fruits to plant, we should take the number, respective ages and the nutritional needs of family members as our basis for decision making. Vegetables as a group constitute an important component in human diet. However, vegetable consumption in developing countries is often much less than the minimum intake of 200 g of vegetables recommended by FAO for a sufficient micronutrient and vitamin supply.
Almost any vegetable that will grow in a typical backyard garden will also do well as a container-grown plant. Vegetables that are ideally suited for growing in containers include tomatoes, peppers, eggplant, green onions, beans, lettuce, squash, radishes and parsley. Pole beans and cucumbers also do well in this type of garden, but they do require considerably more space because of their vining growth habit.
o Growing media (a.k.a. “potting soil”): One of the keys to “container gardening” success is the planting medium. Container gardening requires a specific soil mixture to be used. Ordinary garden soil on its own may not be sufficient if it lacks the properties necessary for healthy plant growth. First and most important, the growing medium must be porous in order to allow good aeration of the plant roots. A porous structure will also allow a good drainage, which will minimize the risk of waterlogging and subsequent rotting of plant roots. The ideal soil mixture is dark brown in colour and looking much like chocolate cookie crumbs. The ideal growing medium is a mixture of 3 part loam soil, 1 part compost or composted manure and 1 part rice hull or coconut coir dust or washed river sand. Clayey soil requires 3 parts clay soil to 2 parts of compost to 1 part rice hull (or its substitute). You can also add bio char as you are preparing the growing medium.
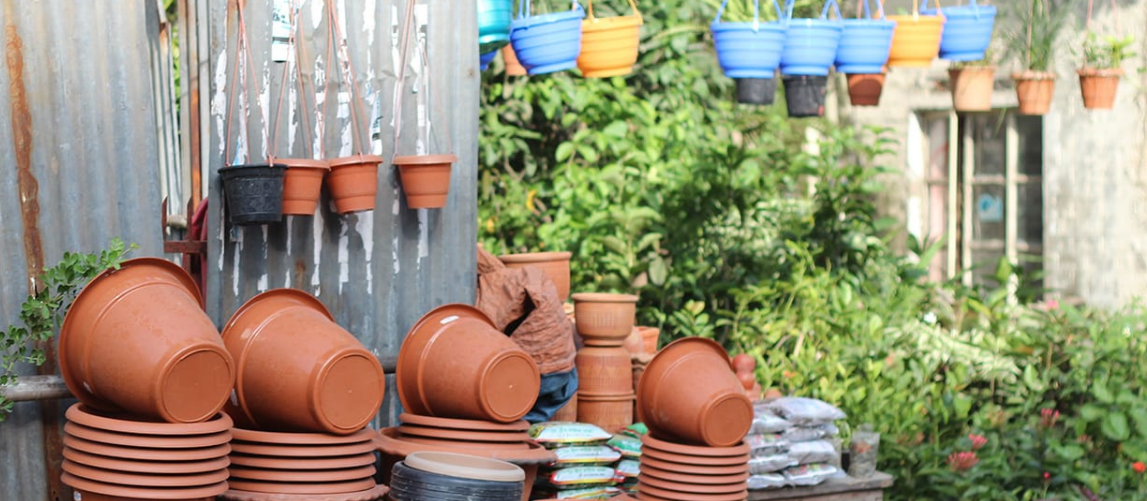
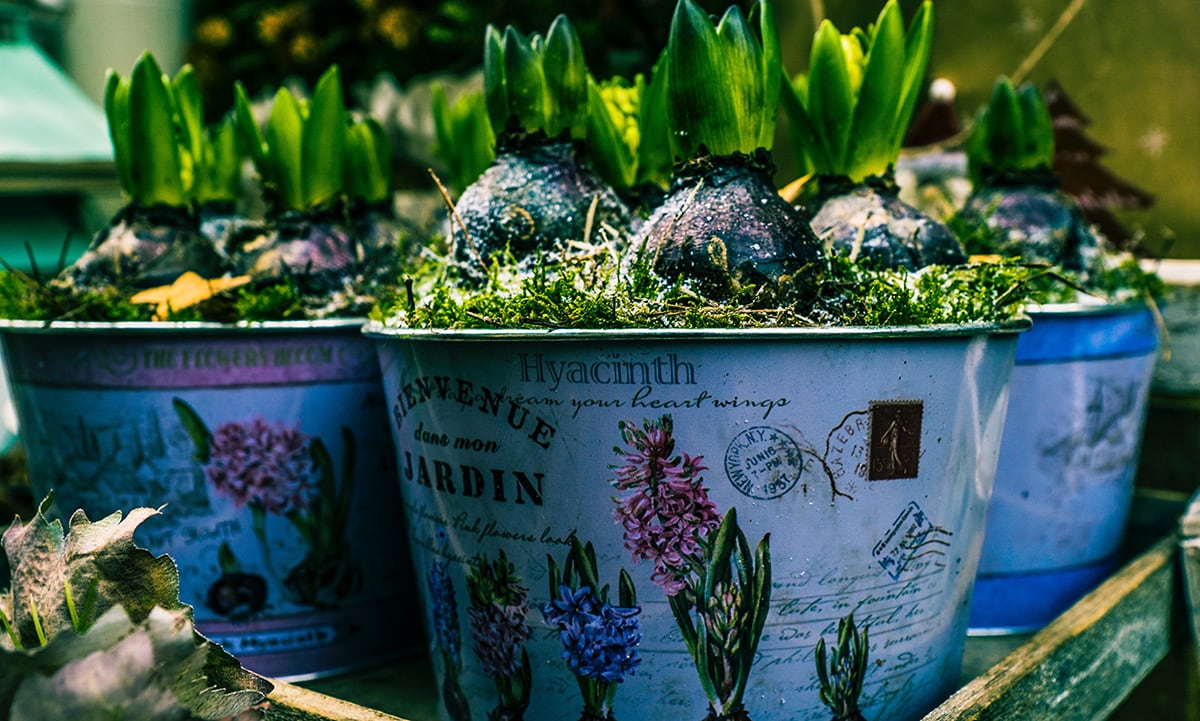
o Choosing Containers: The design of the containers to choose and use is a manifestation of the design goals set by the grower depending on his/her bias as well as on the availability of these materials. If for instance the goal is to showcase the containers, glazed ceramic pots, porcelain pots, plastic pots in all shape and sizes may be used. With a little talent, indigenous materials available in the locality may be converted into beautifully looking containers such as cut bamboo poles or others. Only the fantasy of the grower is setting the limits.
If the goal is recycling and finding long-term use of objects that are normally thrown into the garbage, then old tires, sacks, tin cans, plastic containers for mineral water, oil, milk, catsup, and etc. can be used.
Self-watering containers
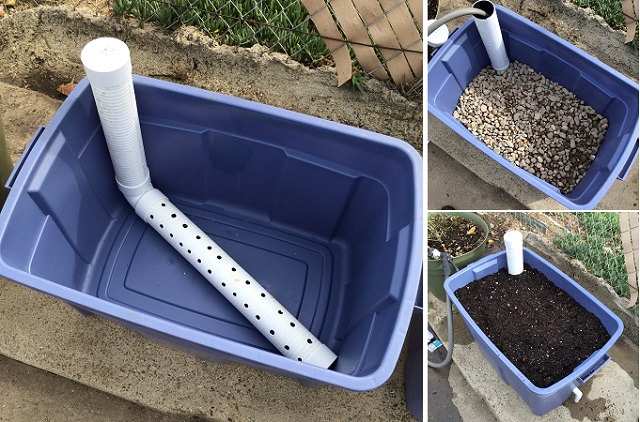
“Self-watering” containers represent a relatively new gardening concept. Instead of drainage holes in the bottom, these containers have an overflow hole on one side. The growing medium sits on a perforated platform directly above a water reservoir. Plant roots grow through the medium and into the water. In most cases, water is wicked up from the reservoir into the medium. These containers can be seen as a hybrid between hydroponic gardening (plant roots growing in nutrient-enriched water) and conventional container gardening. Self-watering containers help conserve water and nutrients and make it possible to ignore your containers for a few days.
The simplest application is to place a saucer under a pot. The excess water is wicked up into the media or pulled up by roots that reach the saucer. A number of commercial models are available or you can make your own.
Cautionary notes
o Tender Loving Care: The single most important ingredient for success with container gardening / farming is Tender Loving Care because your container plants have to depend entirely on YOU for all of their needs. It’s always best to start small the first year. Share ideas and create a plan with the other people in your household. Plant crops that you and your family like to eat, and keep your containers filled with edible plants through the entire growing season.
Commercial potting mixtures are ideal for container plants. These are referred to as “soilless mixtures” because they do not contain soil but rather various combinations of vermiculite and peat moss as well as either perlite or ground pine bark. The latter two components are used to improve drainage and aeration. The better commercial mixes are also fortified with fertilizer and lime as well as a wetting agent. Commercial mixtures are recommended for gardeners who require only a few cubic feet for container plant needs.
Those who plan to grow a considerable number of container plants may prefer to prepare their own potting mixture. Good field soils can be used for this purpose. Blend sandy or clay loams with organic matter to improve the necessary drainage characteristics. Numerous formulas are effective, but a mixture of 50 per cent soil and 50 per cent organic matter works well. One of the best organic matter amendments to use is ground pine bark having a ¼- to d-inch particle size. Nurseries usually have this size bark on hand for their potting needs. Either fresh or composted pine bark is acceptable. Compost hardwood barks before use.
Peat moss also can be used as the organic matter amendment. The coarser type peat moss is recommended. Avoid fine, muck type peat mosses. They decrease aeration and drainage rather than improve it
Because of its characteristics, peat moss absorbs and holds a considerable amount of moisture. This could be detrimental when it is mixed with soil and used in containers exposed to extended rainy weather because the potting mixture could hold excessive moisture. Consequently, it is advisable to add perlite to a soil/peat mixture. Perlite, a white, heat treated expanded mineral, improves the drainage properties of the mixture. A ratio of two parts soil, two parts peat moss and one part perlite should be satisfactory.
Add fertilizer and lime when preparing a potting mixture for containers. The fertilizer adds nutrients that are essential for plant growth. Lime supplies the essential elements calcium and magnesium. It also adjusts the soil to a pH range suitable for optimum plant growth (sweetens the soil).
Choose a premium grade of fertilizer to add to the potting mixture, one which contains both major and minor elements needed for plant growth. This information is listed on the fertilizer bag. An analysis such as 5-10-15, 5-10-10 or 6-12-12 is satisfactory. Add fertilizer to the mixture at the rate of 2 kilograms per cubic yard (27 cubic feet) of the potting mixture.
Mixing a potting mixture properly is important. All ingredients must be blended sufficiently to make a homogeneous mixture. Layering of amendments due to improper mixing can interfere with root growth and causes poor quality plants.
Because most recommendations for potting mixtures are given on a cubic yard/cubic foot basis, it is easier to mix on this basis. Smaller volumes from 1 to 5 cubic feet are easily mixed in a wheelbarrow. The cubic foot volumes are usually printed on the wheelbarrow. Small wheelbarrows hold approximately 2 cubic feet; medium size wheelbarrows hold 4.5 cubic feet, and the larger construction type wheelbarrows hold 5 to 5½ cubic feet. Add the ingredients, including fertilizer and lime, to the wheelbarrow on a volume basis and turn them several times to blend them. Remembering that a standard bushel basket holds 1.25 cubic feet, this means of measuring can also be used.
You can mix a large volume of a potting mixture on a driveway or in a garden area. Add the basic ingredients to form a pile. Distinct layers form as ingredients are added. Simply sprinkle fertilizer and lime on top of the pile. Turning the pile three times is sufficient to blend the ingredients properly. The best method is to start a new pile of the mixture each time the original pile is turned. This method reduces any layering effect.
Here are a few recommendations that, when followed, will give you a better potting mixture.
1) Expose peat moss or bark to rain for several weeks before using. Both are difficult to wet and require repeated soaking.
2) Avoid over-fertilization. This can cause root damage.
3) Cover potting mixtures with plastic cloth to keep the unused mixture freer of weed seed.
4) Place potting mixture in full sun, cover with clear plastic, and seal down the sides during high temperature periods to kill weed seeds and harmful fungi. Soil should be no more than a foot deep to ensure sufficiently high temperature at the bottom of the pile. This process may require several days for a beneficial heat build-up.
Interesting containers often make plants more picturesque, and the varieties available are almost endless. Colour, size and texture are important, but the most important consideration when choosing a container is whether it has adequate drainage holes. If you choose an attractive pot without provision for drainage, use a system of “double potting.” This requires that you pot the plant in a container that has drainage holes, and then place it on gravel inside the pot without drainage holes.
Container size is also important. Outdoor container plants, especially rapidly growing ones such as dry season flowering annuals, need adequate space for root development. Small pots restrict root growth, which causes limited top growth. The end result is fewer flowers.
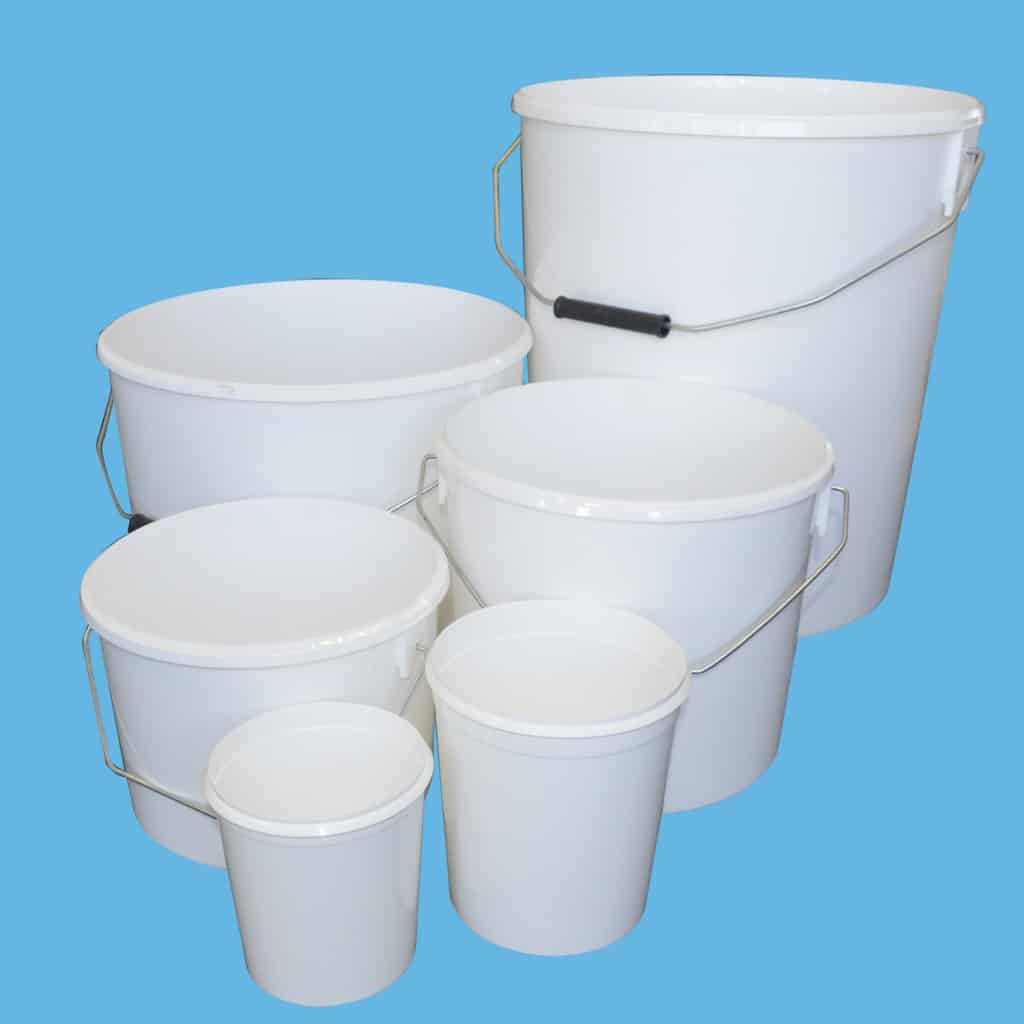
While small 6-inch flower pots are often used, gardeners should think in terms of containers holding several gallons of potting mixture. These produce the most attractive plants and by far the most flowers. They also do not require such frequent watering.
Nursery containers offer potential for container gardening. They are easy to find, economical and come in a variety of sizes ranging from 2 to 15 gallons. Containers ranging in size from 3 to 7 gallons are commonly used.
Heavy fibre pots are quite acceptable. They are attractive, reasonably priced and will last an entire season if not placed directly on the soil. Termite damage is likely if fibre pots are in direct contact with the soil.
|
Key Note Keep in mind that it's easier to grow plants in large containers than small ones. That's because large containers hold more soil, which stays moist longer and resists rapid temperature fluctuations. Small hanging baskets are especially prone to drying out, and during hot dry season weather, you may have to water them twice a day to keep plants alive. It's also important to decide what plant you want to grow in each container. Several factors help determine how large and deep the container must be. Consider the size and shape of a plant's root system; whether it is a perennial, annual, or shrub; and how rapidly it grows. Root bound plants, which have filled up every square inch of the soil available, dry out rapidly and won't grow well. Choose a large pot or tub for a mixed planting, one that will offer enough root space for all the plants you want to grow. Light-coloured containers keep the soil cooler than dark containers. |
CONTAINER MATERIAL
The container material is also a factor to consider when choosing your vessel. Some of the most common options are highlighted below.
Plastic or resin is lightweight, inexpensive, and durable. But these materials can also become over saturated, causing root disease. It’s also worth noting that the standard black plastic or resin pot absorbs more heat, so if you are putting a container in a hot, sunny location, choose a lighter colour instead.
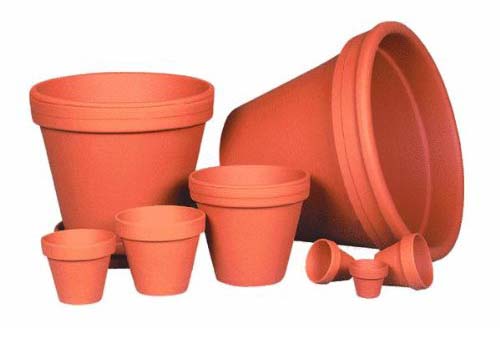
Terra cotta or clay pots are a popular option for those who live in wetter coastal climates. Terra cotta pots dry much quicker than plastic (and smaller pots dry out more quickly than larger ones), which helps control associated moisture diseases. A downside is that they are heavy, breakable, and need to be emptied or protected in locations that freeze in the winter.
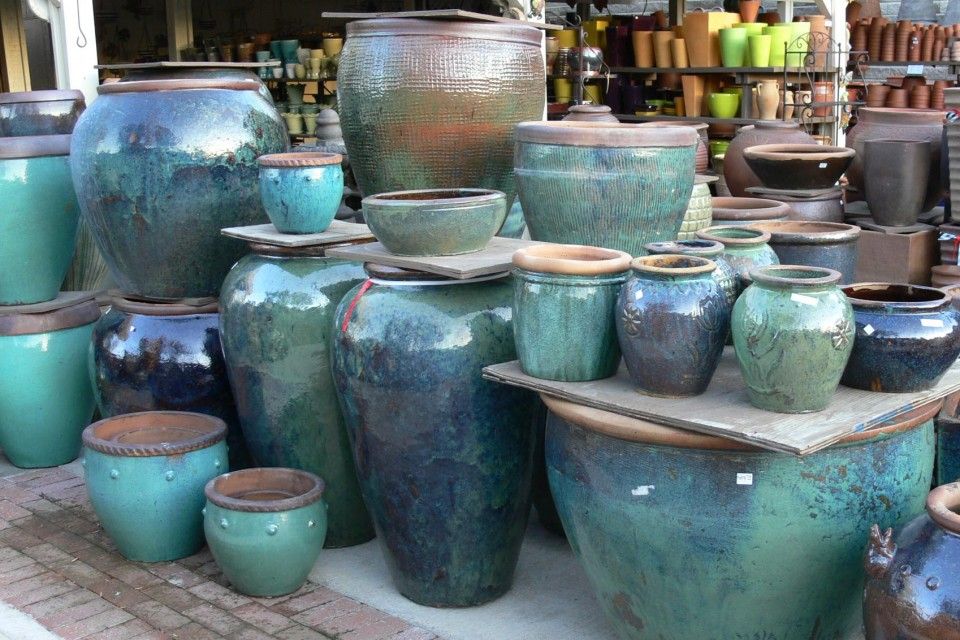
Glazed clay pots offer a wide range of colour and size providing significant impact in any space. However, like the plastic or resin, clay pots can become saturated with water causing root disease and also need to be emptied or protected in winter.
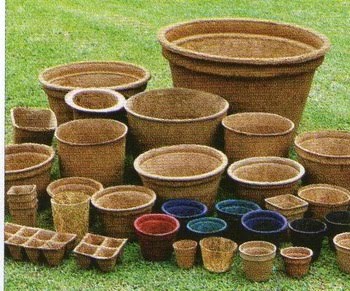
Eco pots or fibre pots have a high porosity and breathe well, which promotes healthy root growth, particularly for vegetables. These pots can be made from coconut coir, pressed paper or other grain husks, each with its own life span. A primary benefit being that these pots will degrade naturally with little impact on the environment by contributing to the landfill at the end of their lifespan.
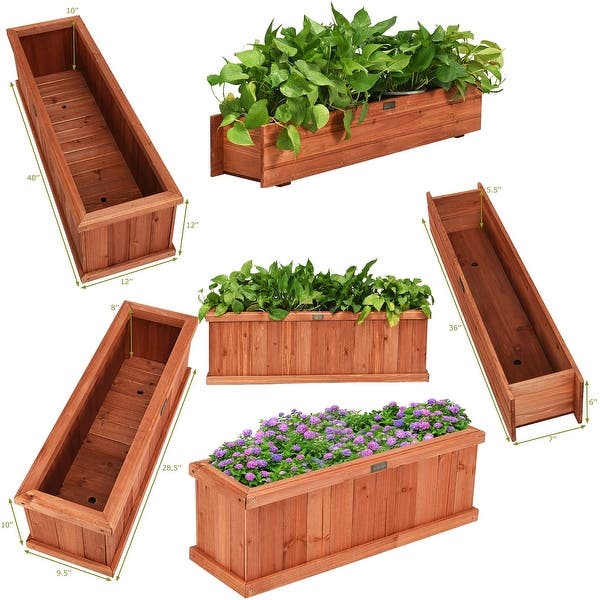
Wood is the most common planter material for raised beds or planter boxes. Mostly constructed with cedar, wood is beautiful, easy to build and can be made to any size or shape. One of the disadvantages for wood is that wood can rot, making it more attractive to the pill bug which also likes to feed on plant material.
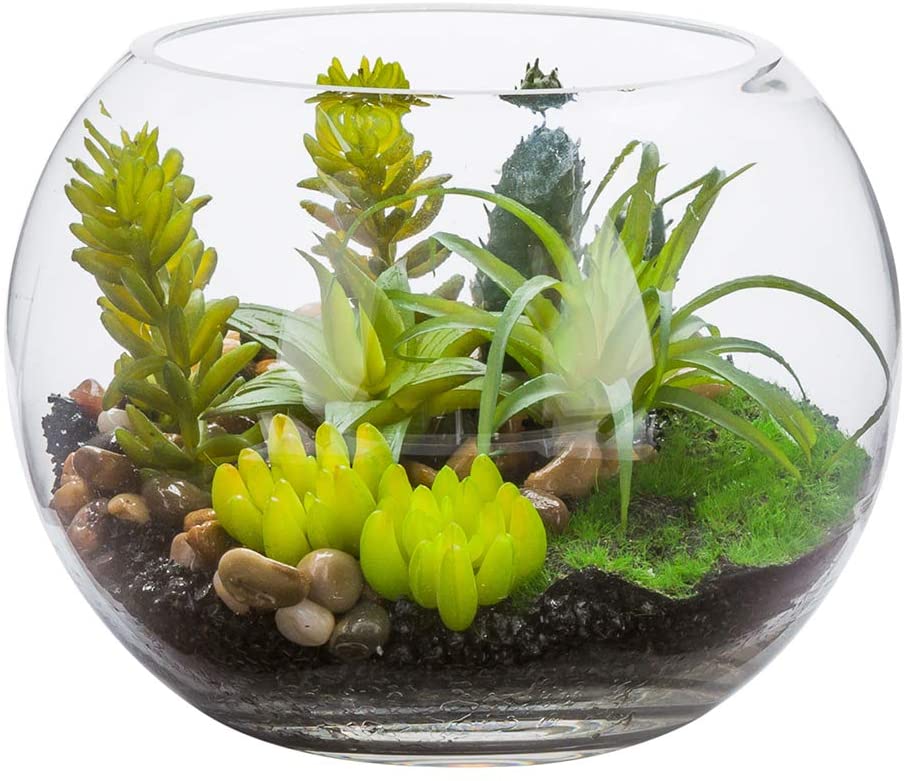
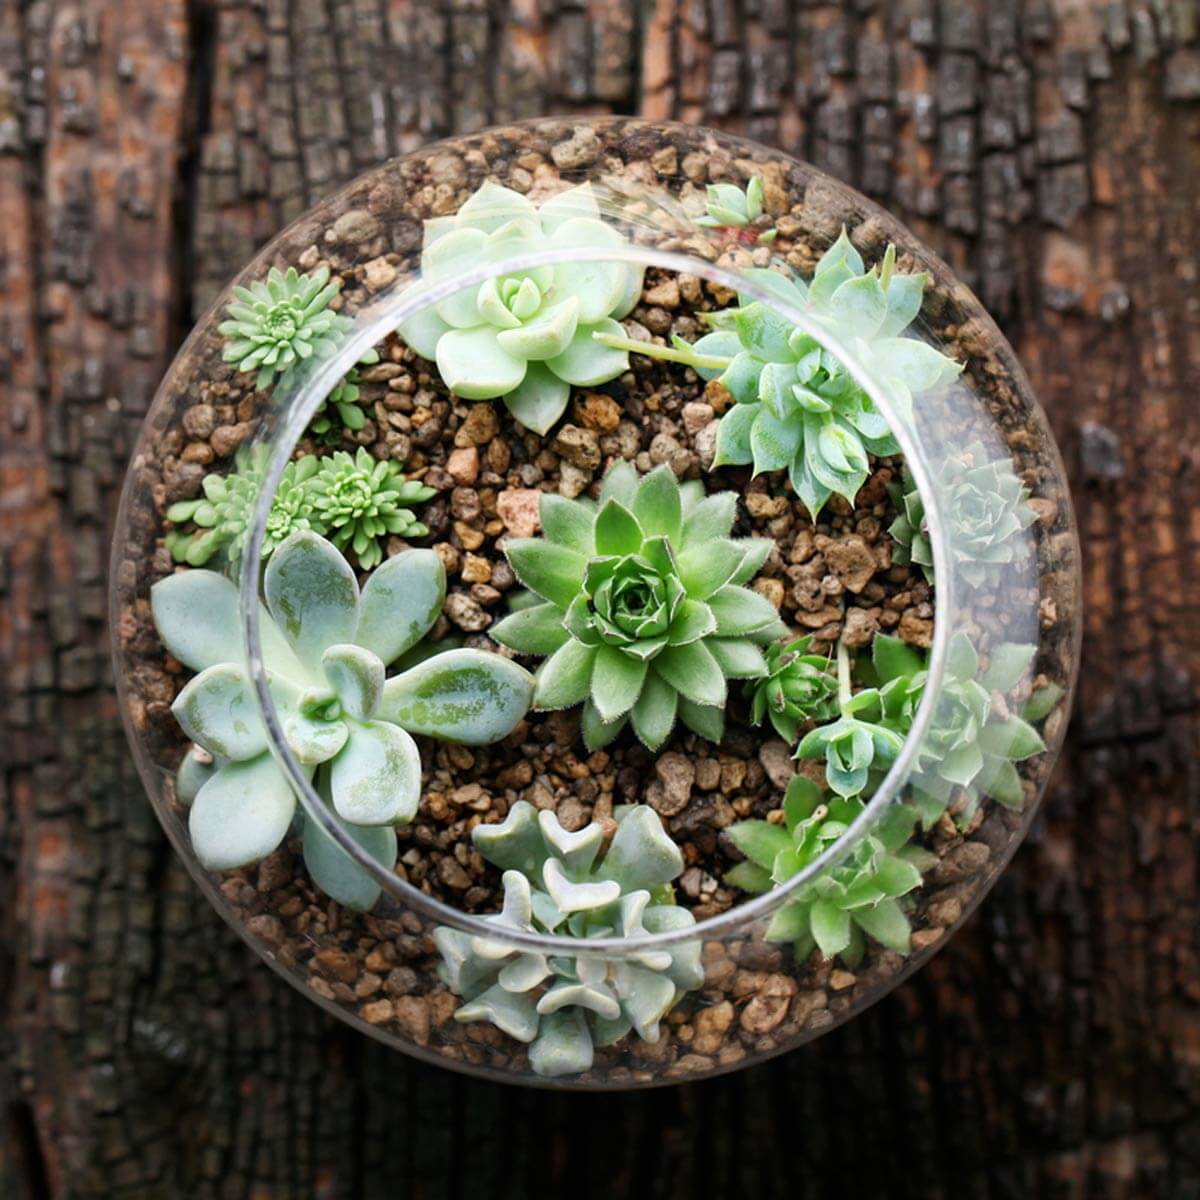
Glass or plastic terrariums are meant to provide a moist, humid environment for tropicals and a beautifully unique way to create a lush environment in a small space. The terrarium can be created using an old aquarium, a large vase or clear bottle. Given that drainage cannot be added, over-saturation can be an issue encouraging rot and gnats. Ensure that the base of the vessel has a sufficient layer of coarse gravel and a thin layer of charcoal to alleviate these potential problems.
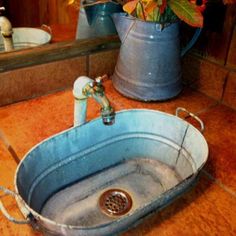
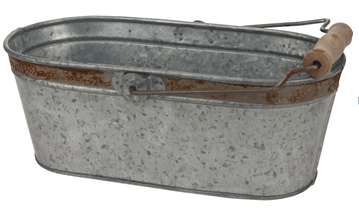
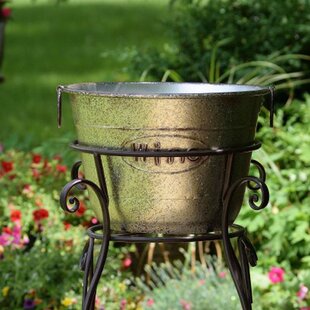
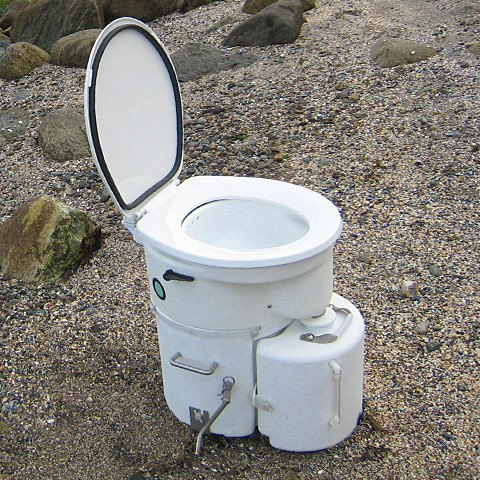
Uncommon vessels like metal buckets, washtubs, old boots, boats, baskets, sinks, bathtubs and even toilets can be used to personalise your landscape. With the addition of holes for water drainage, transforming these non-conventional containers to a planter requires little else.
Several planting techniques can be used advantageously to enhance the appearance of container plants.
You can achieve a more finished appearance by using larger plants or by combining several large plants in a single container. For example, a 6- to 7-inch potted geranium already in bloom could be started in a 3- gallon container. Several 6- to 7-inch potted caladiums might be used initially in a half barrel. Or a 2-gallon potted hibiscus already in bloom could be transplanted in early spring in early spring or early summer to a 5- to 7-gallon container. This gives an immediate colour effect.
Another approach might be to use 4-inch potted annual flowers initially. Several 4-inch plants already in bloom can be repotted into a larger container. Three or four plants are sufficient for a 5- to 7-gallon container. Some colour is obtained immediately; however, after several weeks of growth, the colourful effect is more dynamic.
Small and more economical flowering plants also can be used at first. You will need about a half dozen plants for a 5- to 7-gallon container. Plant these close to the edge of the pot with one plant in the middle. This procedure allows ample room for growth and air circulation. From four to six weeks of growth will be required to obtain a good effect.
When filling containers, do not pack the soil, simply bump the container in the ground lightly to settle the soil. Fill the container to within 2 inches of the top of the container. This will leave sufficient room for water to thoroughly soak the soil. Before knocking out and planting individual plants, thoroughly wet the root mass. Plant individual plants so roots are set shallowly rather than deeply and gently firm soil around the roots. Finally, water the plants in thoroughly. This may require a couple of waterings in succession to wet the mixture entirely.
Proper watering is essential for a successful container garden and one watering per day is usually adequate. However, poor drainage will slowly kill the plants. If the mix becomes water-logged, the plants will die from lack of oxygen. Avoid wetting the foliage of plants since wet leaves will encourage plant diseases. Remember to use the nutrient solution for each watering except for the weekly leaching when you will use tap water.
Water-holding gels are becoming popular for use in container gardening. These starch based gels are called hydrogels. They absorb at least 100 times their weight in water and slowly release that water into the soil as it dries. To be effective, they should be incorporated in the soil mix before planting.
Cultivating the soil at a depth of 2 to 3 inches below the surface of the potting medium will encourage maximum air flow around the roots, which encourages bigger and healthier root growth and subsequently better water and nutrient uptake.
Weeding allows the plants to benefit from the nutrients and water that is provided by the medium without having to compete with other non-productive plants. It has to be considered that weeds being native to the environment, usually grow bigger and faster, than cultivated crops.
You do not need to fertilize container plants the first two to three weeks after planning if the potting mixture was amended with fertilizer. Nutritional levels usually drop after this period because plants use them and because nutrients are leached from the soil because of frequent watering.
Fertilization of annuals and perennials of a succulent or soft nature should start about two to three weeks after potting. The frequency of fertilization depends on the method you use. For example, if you use a so-called liquid soluble fertilizer, make an application every two to three weeks during the growing season. If more rapid growth is desired, fertilize every one to two weeks.
Mix soluble fertilizer according to the label directions and apply as a normal watering. Apply enough of the solution so some drains out of the bottom of the container. If you use a dry, garden type fertilizer, apply it every three to four weeks. One-half teaspoonful of fertilizer per gallon of soil mixture spread evenly on the soil surface is adequate. Watering after applying the fertilizer dissolves the nutrients and carries them into the root zone. Watering the fertilizer in reduces chances of fertilizer damage to stems and roots.
Slow release fertilizers are popular. These are sold in the form of small, round pills. They release fertilizer gradually when wet. The type that lasts approximately three months is generally used. A teaspoonful per gallon of soil is usually recommended. Check the recommendations on the container because products differ and rates vary.
Fertilize containerized trees and shrubs of a woody nature as often as succulent plants. Woody plants should do nicely if fertilized in early rainy season (March) and again in May and July. Granular type, garden fertilizers at the rate of ½ teaspoonful per gallon of soil mix per application will be adequate. Slow release fertilizers that last six to nine months have proven satisfactory for shrubs and trees in containers. Apply them in early spring. Spread the pellets evenly on the soil surface at the rate of 1 teaspoonful of the material per gallon of the soil mixture.
TROUBLE IN PARADISE: DIAGNOSING PLANT PROBLEMS