ARE DOING
XLV.--A REVIEW LESSON
TO THE TEACHER.
Geography may be divided into the geography of the home and the geography of the world at large. A knowledge of the home must be obtained by direct observation; of the rest of the world, through the imagination assisted by information. Ideas acquired by direct observation form a basis for imagining www.gutenberg.org/files/12228/12228-h/12228-h.htm
2/73
8/10/12
The Project Gutenberg eBook of Home Geography for Primary Grades
those things which are distant and unknown.
The first work, then, in geographical instruction, is
to study that small part of the earth's surface lying
just at our doors. All around are illustrations of
lake and river, upland and lowland, slope and
valley. These forms must be actually observed by
the pupil, mental pictures obtained, in order that he
may be enabled to build up in his mind other
mental pictures of similar unseen forms. The hill
that he climbs each day may, by an appeal to his
imagination, represent to him the lofty Andes or
the Alps. From the meadow, or the bit of level land
near the door, may be developed a notion of plain and prairie. The little stream that flows past the schoolhouse door, or even one formed by the sudden shower, may speak to him of the Mississippi, the Amazon, or the Rhine. Similarly, the idea of sea or ocean may be deduced from that of pond or lake. Thus, after the pupil has acquired elementary ideas by actual perception, the imagination can use them in constructing, on a larger scale, mental pictures of similar objects outside the bounds of his own experience and observation.
To effect this, the teacher should visit with her class places where the simpler geographical features in miniature may be observed. If the school is in the city, pupils may be taken to the parks for this purpose.
If out-of-door study be impossible, they may be induced to recall objects which they have seen on their way to school or on short excursions in the neighborhood. In the case of children who have little opportunity for observing nature, a drawing, a photograph, or a model will be helpful in giving them a proper idea of the matter. It must not be forgotten, however, that actual observation by the pupil is necessary to seeing clearly and intelligently.
Vegetable and animal life are essential features of the geography of the world, and considerable time should be given to the study of those within the observation of the pupils. Information concerning plants may be gained by outdoor study; also by planting seeds in boxes and having pupils carefully watch their germination and growth.
Pupils should be encouraged to make collections of the minerals and rocks of their region. These should be classified and arranged for use, not for show.
The lessons about rain, snow, dew, etc., should be given at appropriate times. A wet day will suggest a lesson on rain, a snowy day a lesson about snow. No attempt should be made at "science" teaching, so-called. All that should be sought is to get the pupil thoughtfully to observe, and thus to awaken his interest in the world about him.
Lessons should be conversational in form, which is always a most pleasing style for children, as it is the most natural. The work of the teacher is to awaken and stimulate interest, not to impart information. The attention of the child should be directed to what lies around him. He must observe, and think, and express his thoughts. Nor should his observations be confined to the school and school hours. He should be encouraged to obtain his information by his own searching, without guidance, and report the results.
The development of clear mental pictures is stimulated by expression. "Expression is the test of the pupil's knowledge." Hence, the child should be required to reproduce what he has learned. He may do this by modeling, drawing, and oral and written description. These are placed in the order which should be followed in the training of children.
The inclination of nearly every child left to his own mode of development is to make, in some plastic material, what he has seen. Trying to fashion the hills and valleys with which he is familiar excites his interest, and leads to closer observation. This may be followed by the reproduction in molder's sand, or in clay, of the forms seen in pictures or learned from description. Definitions of the various forms, hill, mountain, valley, island, etc., should be developed as they are molded. The memorizing of definitions should seldom be required, and should never be made a test of the pupil's knowledge.
Reproduction by the hand should be followed by drawing, whenever this can be done. Drawing teaches www.gutenberg.org/files/12228/12228-h/12228-h.htm
3/73
8/10/12
The Project Gutenberg eBook of Home Geography for Primary Grades
the child how to see well. It often enables him to reveal what could not well be expressed in words. He also becomes ready and rapid in the use of the pencil when he has ideas to put on paper. Only reasonable accuracy should be required. Practice in making fine pictures should not be the end sought, but the development of geographical ideas.
Finally, pupils should be led to give clear and connected statements of what has been learned. For a language lesson, a written description may be prepared, illustrated by a drawing.
Home Geography.
LESSON I.
POSITION.
Lay your hands upon your desk, side by side.
Which side shal we cal the right side? The left side?
Put your hands on the middle of your desk on the side farthest from you. That part is the
back of your desk.
Think which is the front of your desk. Put your hands on the front of your desk.
Who sits on your right hand? On your left? At the desk in front of you? At the desk behind you?
Turn round. Who is on your right now? On your left? Before you? Behind you?
Turn again. Who is now on your right? On your left? Before you? Behind you?
NOTE.--Lead children to see that the terms right, left, front, and back are of little use in teling the position of places, and that some fixed standard of direction is necessary.
www.gutenberg.org/files/12228/12228-h/12228-h.htm
4/73
8/10/12
The Project Gutenberg eBook of Home Geography for Primary Grades
LESSON II.
HOW THE SUN SHOWS DIRECTION.
If I should ask, "Which is the way to your home?" who could tel me what I mean?
You al know which way you must go to find your home, but if you should wish to go to a
place where you have never been, you would ask, perhaps, "Which way is it?"
THE WAY TO A PLACE IS CALLED DIRECTIO N.
The way to a place is caled direction. In order to find a place, we must know in what direction from us it lies, and we have names for directions, such as north, south, east, and west. We may know these directions by seeing where the sun is.
Did you ever see the sun rise? Point to the place where you saw the sun rise. The direction in which the sun seems to rise is caled the east.
Did you ever see the sun set? Point to where you saw the sun set. The direction in which the sun seems to set is caled the west. The west is just the opposite direction from east.
When do we see the sun rise? Where do we see the sun rise? What is the name of this
direction? When do we see the sun set? Where do we see it set? What is the name of this
direction? On which side of the schoolroom does the sun rise? On which side does it set?
Which is the east side of your desk? Which the west side?
When coming to school this morning, in what direction did you see the sun? If we walk so
that the morning sun shines in our faces, in what direction are we going? What direction is behind us?
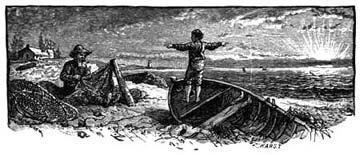
Now that you know the east, you wil be able to find other directions in this way: Stretch out your arms so that your right hand points toward the east, and your left hand toward the west.
You are now facing the north. The direction behind you is the south.
www.gutenberg.org/files/12228/12228-h/12228-h.htm
5/73
8/10/12
The Project Gutenberg eBook of Home Geography for Primary Grades
YO U ARE NO W FACING THE NO RTH.
Write the following on your slates:
The sun seems to rise toward the east, and set toward the west. The west is just the opposite direction from the east.
When my right hand is pointing to the east, and my left hand to the west, my face is toward the north and my back is toward the south.
ORAL EXERCISES.
Which is the north side of the schoolroom? Which is the south side? Who sits to the north of you? To the south?
In what direction do the pupils face? On which side of your schoolroom is the teacher's
table? Which sides have no windows? Which sides have no doors?
If a room has a fireplace in the middle of the east side, which side of the room faces the fire?
Suppose the wind is blowing from the north, in what direction wil the smoke go?
In what direction from the schoolhouse is the playground?
What is the first street or road north of the school? The first street or road east? South?
West?
In what direction is your home from the school? The school from your home? The nearest
church from the school? The post office from your home?
LESSON III.
HOW THE STARS SHOW DIRECTION.
You have learned how to tel north, south,
www.gutenberg.org/files/12228/12228-h/12228-h.htm
6/73
8/10/12
The Project Gutenberg eBook of Home Geography for Primary Grades
east, and west by the sun; but how can we tel
these directions at night?
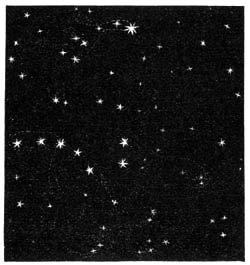
Ask some one to point out to you a group of
seven bright stars in the north part of the sky.
Some people think that this group of stars
looks like a wagon and three horses; others
say that it looks like a plow.
The proper name of the group containing these
seven stars is the Great Bear. The group was
given this name because men at first thought it
looked like a bear with a long tail.
These seven stars are caled the Dipper. It is a
THE GREAT BEAR.
part of a larger group caled the Great Bear.
Find the two bright twinkling stars farthest from its handle. A line drawn through them wil point to another star, not quite so bright, caled the North Star. That star is always in the north; so by it, on a clear night, you can tel the other directions at once.
Write on your slates:
Sailors out on the sea at night often find direction by looking at the North Star.
LESSON IV.
HOW THE COMPASS SHOWS DIRECTION.
But there are times when it is cloudy, and neither the sun nor the stars can be seen. How can we tel direction then?
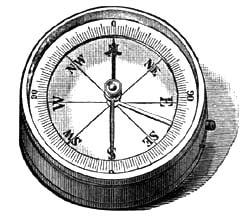
Have you ever seen a compass? It is a box in
which is a little needle swinging on the top of a
pin. When this needle is at rest, one end of it
points to the north.
As the needle shows where the north is; it is
easy to find the south, the east, or the west.
With the compass as a guide, the sailor, in the
darkest night, can tel in what direction he is
going.
www.gutenberg.org/files/12228/12228-h/12228-h.htm
7/73
8/10/12
The Project Gutenberg eBook of Home Geography for Primary Grades
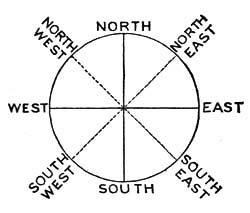
North, south, east, and west are caled the
chief points of the compass.
A CO MPASS.
Other directions are northeast, halfway
between north and east; northwest, halfway
between north and west; southeast, halfway
between south and east; and southwest,
halfway between south and west.
Write on your slates:
The chief points of the compass are north,
PO INTS O F THE CO MPASS
south, east, and west.
Other directions are northeast, southeast, southwest, and northwest. Sailors find their way over the ocean by the help of the compass.
LESSON V.
QUESTIONS ON DIRECTION.
Your teacher wil give you time to discover answers to these questions. She could tel you,
but it is better to find them out for yourself.
If I go out of doors, how can I find the north? How
can I find it on a starlight night? How can I find it on
pleasant days? How on rainy days? How does a sailor
find the north?
If you were lost and knew your home was north, how
would you find it? Do you know how hunters and
Indians who live a great deal in the woods find out
where the north is? When you are in the woods, notice
the amount of moss on the north side of trees as
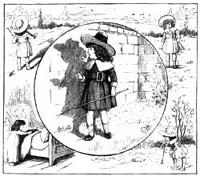
IN WHAT DIRECTIO N DO ES
YO UR SHADO W FALL?
compared to that on the south side.
As winter approaches; many of our birds wil want to go to a warmer country; in what
direction wil they fly? Point to where ice and snow have their home. What direction is that?
In what direction does your shadow fal at sunrise? At sunset? At noon? When, during the
www.gutenberg.org/files/12228/12228-h/12228-h.htm
8/73

8/10/12
The Project Gutenberg eBook of Home Geography for Primary Grades
day, is your shadow shortest?
In what direction does your shadow
extend from yourself when it is shortest?
What time of day is noon? How can we
tel when it is noon? When is the sun
highest in the sky?
What may we discover by watching the
direction of the smoke from the
chimneys? What does a vane on a
steeple tel us? What is a north wind? A
south wind? An east wind? A west
WHAT MAY WE DISCO VER BY WATCHING THE
wind?
SMO KE?
What kind of weather may be expected from a north wind? From a south wind? From an
east wind? From a west wind?
LESSON VI.
WHAT THE WINDS BRING.
Comes the north wind,
Flowers sweet the
snowflakes bringing:
west wind offers,
Robes the fields in
Peeping forth from
purest white,
vines and trees;
Paints grand houses,
Brings the butterflies
trees, and mountains
so briliant,
On our window-panes
And the busy,
at night.
humming bees.
Hils and vales the east
Each wind brings his
wind visits,
own best treasure
www.gutenberg.org/files/12228/12228-h/12228-h.htm
9/73

8/10/12
The Project Gutenberg eBook of Home Geography for Primary Grades
Brings them chily,
To our land from
driving rain;
year to year;
Shivering cattle
Blessings many without
homeward hurry,
measure
Onward through the
E'er attend the winds'
darkening lane.
career.
Heat the south wind
---Lillian Cox.
kindly gives us;
Reddens apples, gilds
the pear,
Gives the grape a richer
purple,
Scatters plenty
everywhere.
"Whichever way the wind doth blow.
Some heart is glad to have it so;
And blow it east or blow it west,
The wind that blows, that wind is best."
Write al that you can tel about the wind.
What was the direction of the wind during the last snow-storm? Why is the north wind cold?
Why is the south wind warm?
LESSON VII.
HOW TO TELL DISTANCE.
To tel where a place is, we must know its direction. But this is not al; we must also know how far it is from us; that is; its distance. To find this out we measure.
You have often heard of an inch, a foot, and a yard. This line is one inch long: Your ruler is twelve inches long, that is a foot. Three lengths of your ruler make a yard. A www.gutenberg.org/files/12228/12228-h/12228-h.htm
10/73
8/10/12
The Project Gutenberg eBook of Home Geography for Primary Grades
yard stick is three feet long.
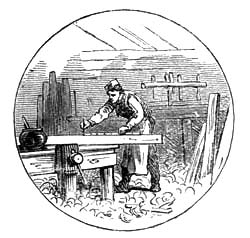
With these measures you can tel how long
your slate or your desk is, or how long and
wide the schoolroom is.
The inch, foot, and yard are used for
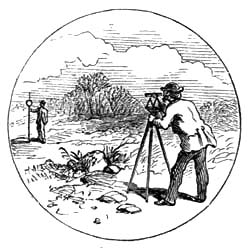
measuring short distances. But when we wish
to tel the distance between objects far apart,
we use another measure caled a mile. A mile
is much longer than a yard.
Think of some object that is a mile from our
schoolhouse. How long would it take you to
walk that distance?
MEASURING SHO RT DISTANCES.
ORAL EXERCISES.
How many inches long is your slate? How long
is your desk? How many feet long is your
room? How wide is it? What is the distance
around the room? How many feet wide is each
window? Each door? How many yards wide
is the nearest street or road?
About what is the height of the schoolroom?
Of the schoolhouse? Of the talest tree near
by? Of the nearest church spire?
About how long is the longest street in the
MEASURING LO NG DISTANCES.
town where you live? Do you know how many
blocks or squares make a mile? Name the nearest river or creek. Give its direction from the school. In what direction does the water run? Give the direction and distance of the nearest church. What must you know to go to any place?
NOTE.--Have pupils estimate distances by the eye, then verify by actual measurement.
Continue the exercises until the work becomes quite accurate. Correct ideas of distance are necessary in order to understand how large the world is, and how far apart places are on its surface.
LESSON VIII.
PICTURES AND PLANS.
www.gutenberg.org/files/12228/12228-h/12228-h.htm
11/73
8/10/12
The Project Gutenberg eBook of Home Geography for Primary Grades
You al know what a picture is. But do you know what a plan is?
A little boy wanted to show his cousin, who lived some miles away; the shape and size of his house, and how the rooms were arranged. How could he do this?
On a large sheet of white paper, he placed lines of blocks in the form of his house. Then, with a lead pencil, he drew a line on the paper along the sides of the blocks. He next took up the blocks, and there, on the paper, was a plan of his house.
THE PICTURE SHO WS THE O BJECTS.
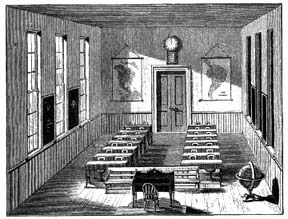
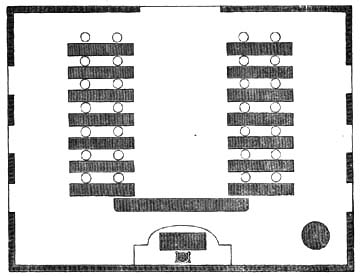
Here is a picture of a schoolroom. We see desks, the teacher's table, a chair, a clock, globe, and two maps, in the picture. The picture shows these objects as they would appear if we
stood at the door behind the teacher's table and looked in.
This is a plan of the schoolroom, a picture of which is shown above. You see, the plan and picture are quite different.
www.gutenberg.org/files/12228/12228-h/12228-h.htm
12/73
8/10/12
The Project Gutenberg eBook of Home Geography for Primary Grades
THE PLAN SHO WS WHERE THE O BJECTS ARE.
The picture shows the objects as we see them before us. The plan shows where the objects
are, and their direction from one another.
Now let us see if we can make a plan of the same schoolroom on the blackboard.
The first thing is to measure the sides of the room. We wil suppose the two long sides are each forty feet long, and the two short sides each thirty feet long. Now we wil draw four
straight lines on the board for the four sides. Of course, the lines must be much shorter than the sides themselves, else our plan wil be too large.
Make one inch in the plan stand for one foot in the room. So the lines for the long sides wil each be forty inches long, and the lines for the short sides thirty inches long.
The next thing is to make spaces in the sides for the door and the windows, and oblongs for the desks. But we must remember that an inch in our plan stands for a foot in the object itself, and therefore we must alow as many inches for the width of doors and windows, and for the
length and width of the desks, as there are feet in the objects themselves. Thus, if the door is three feet wide, we must make it three inches wide in our plan.
And lastly, we wil draw a circle for the globe, and an oblong and square for the teacher's table and chair, that shal show just where and just how long these objects are.
We have now a plan of the schoolroom. Let us put N. to show the north side of the room, S.
to show the south side, E. to show the east side, and W. to show the west side. We can now tel the direction of one thing from another in our plan.
LESSON IX.
WRITTEN EXERCISE.
www.gutenberg.org/files/12228/12228-h/12228-h.htm
13/73
8/10/12
The Project Gutenberg eBook of Home Geography for Primary Grades
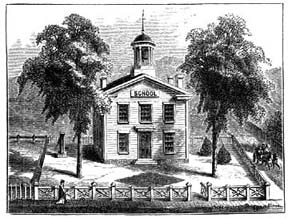
PICTURE O F SCHO O L GRO UNDS.
Write the answers to the folowing questions, in ful sentences:
What is the name of your school? On what street or road is it? Which side of the street?
Between what streets? In which direction does the building face?
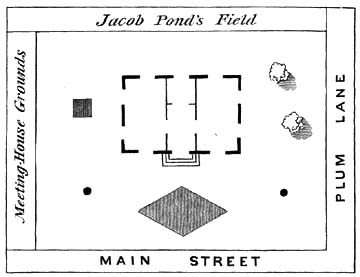
PLAN O F SCHO O L GRO UNDS.
How many rooms has the building? In what part of the building is your room? How large is it?
How many doors and windows? How many seats?
In what direction is the school from your home? How far is it? How long does it take you to walk to school?
EXERCISES IN DRAWING PLANS.
Draw a plan of the schoolroom on your slates. It cannot be drawn on your slates as large as it was drawn on the board. So let one inch stand for ten feet, instead of for one foot; that is, use a scale of one inch for every ten feet. Your plan wil not be as large as mine, but it wil show the position of everything as correctly.
www.gutenberg.org/files/12228/12228-h/12228-h.htm
14/73
8/10/12
The Project Gutenberg eBook of Home Geography for Primary Grades
Draw a plan of the top of the teacher's table, showing two books and an inkstand upon it.
First, measure the sides. Then decide to what scale you wil draw your plan.
Now draw a plan of the schoolhouse and grounds. You must measure not only the house, but
the width and length of the yard. The plan must show the size, shape, and place of everything upon the grounds. (While drawing a plan of this kind, it is better to let the pupils face the north. The top of the plan should be the north side of the grounds.)
Draw a plan of your own room at home, showing the table, bed, chairs, and other objects in it.
ORAL EXERCISE.
If the shape of a room is shown on the blackboard, what have we drawn? Is a plan the same
as a picture? What is the use of a plan? Mention some things of which plans can be drawn.
NOTE.--It is wrong to teach that the top of a map or plan is always north; as often as not, the bottom is north, in plans especialy.
LESSON X.
GOD MADE THEM ALL.
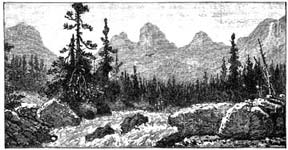
THE PURPLE-HEADED MO UNTAIN, THE RIVER
RUNNING BY.
Al things bright and
The tal trees in the
beautiful,
greenwood,
Al creatures great and
The pleasant summer
smal,
sun,
Al things wise and
The ripe fruits in the
www.gutenberg.org/files/12228/12228-h/12228-h.htm
15/73
8/10/12
The Project Gutenberg eBook of Home Geography for Primary Grades
wonderful,
garden--
The good God made
He made them every
them al.


