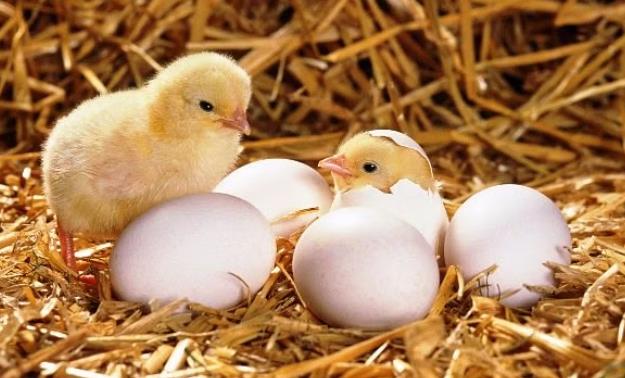
Since earliest history keeping there are accounts on how this was accomplished. From the earliest 52
Egyptians as recorded by Aristotle in 400 BC.
Those incubators were made of mud brick and look like enormous kilns. The exactness of the eggs temperature was tested by holding the egg to the eye lid. This skill is so precise it is still practiced and handed down through generations. These methods and kilns are still used to this day. I have read that hatch rate is very often 80%! Not bad. Not bad at all.
Since mankind started domesticating poultry, it became apparent waiting for a broody to get in the mood was not going to supply enough eggs and chickens for a growing population year round.
Incubation has gotten a bit easier for us in this day Page 52 of 223
INCUBATION
53
and time. With so many more folks wanting to hatch just a few eggs or hundreds, electricity and finely calibrated thermometers and hygrometers helps a lot.
53
Types of Egg Incubators
Egg incubation is a process that helps promote embryonic development in birds, reptiles, and amphibians. This process is crucial for the survival of these species. There are two types of incubation: natural incubation and artificial incubation. Natural incubation makes use of broody birds while artificial incubation makes use of egg incubators. Egg incubators are devices used to hatch eggs by maintaining optimal temperature, humidity, and ventilation.
There are different types of egg incubators classified based on various factors such as the number of eggs that can be incubated at a time, Page 53 of 223
INCUBATION
54
ventilation or airflow systems and mode of operation.
Types of Incubators Based on Airflow or 54
Ventilation Systems
Developing embryos in eggs breathe in oxygen and breathe out carbon dioxide consecutively. Hence, an egg incubator requires a good airflow to constantly get rid of carbon dioxide as well as replenish oxygen. All incubators come with vent holes to take in the fresh air and remove the stale air inside them. Large incubators and some smal incubators use an inbuilt fan to circulate air. On the other hand, some small incubators use natural ventilation. They depend solely on gravity to let warm, humid air escape through the top air vents while fresh air comes in through the bottom air vents.
Page 54 of 223
INCUBATION
55
According to airflow, there are two types of incubators which are:
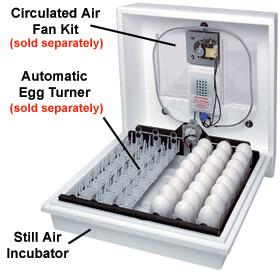
Still air incubators
Forced air incubators
55
Still-Air Incubators
This incubator type does not use fans but relies on gravity or natural draft to expel carbon dioxide and take in oxygen. Incubators under this classification Page 55 of 223
INCUBATION
56
are also called gravity-ventilated or gravity-flow incubators.
One major drawback of still-air incubators is that 56
ununiformed temperature through the device and humidity is less accurate.
Forced air incubators
Forced air (also known as ‘fan assisted’) incubators come with in-built fans that pull out carbon dioxide and suck in oxygen. The fan also helps in circulating Page 56 of 223
INCUBATION
57
warm air within the device and makes the temperature and humidity uniform and accurate.
These are important to record a high hatch rate.
57
Types of Incubators Based on stages
Single stage incubators
Single-stage incubation runs specific incubation programmes such that the climate in the incubator is programmed to match the specific needs of the developing embryos. Single-stage incubators can Page 57 of 223
INCUBATION
58
also be cleaned after each incubation cycle and thus meet high hygienic standards of today’s food production industry.
58
Often, the transition from multi-stage to single-stage incubation is initiated by the replacement of aged multi-stage incubators by new single-stage equipment, without an awareness that hatchery management too will need to be adjusted.
Management in a single-stage hatchery is certainly not based on a routine, but rather adjusted to accommodate the needs of a specific egg type.
Consequently, hatchery managers need to learn about variation in needs of embryos from different egg types, as defined by strain, flock age and the duration of storage.
Page 58 of 223
INCUBATION
59
Advice
Plan size of setters in accordance with size of batches of eggs. A batch of eggs is the total number of eggs produced on a specific day by one flock in one farm
Create an overview of the egg types incubated in your 59
hatchery
Do not mix different batches of egg types. If separating egg types for incubation is not possible:
Fill setters with batches of eggs that have similar characteristics with respect to strain, flock age and days of storage.
Avoid filling one incubator with eggs from flocks more than five weeks apart in flock age.
Avoid filling one incubator with eggs from one flock but with more than five days’ storage difference.
If the incubator has to be filled with more than one batch of eggs, do not combine fresh eggs with eggs stored for more than five days.
Follow manufacturer’s guidelines carefully when starting the first incubation cycle in the single-stage incubator.
Page 59 of 223
INCUBATION
60
Keep records for each incubation cycle, per egg type used and showing the different management steps taken per type.
Use data with respect to hatchability, incubation time and chick quality from recording forms to fine-tune 60
your incubation programmes.
Train hatchery personnel so that they are fully advised regarding the different management steps required when using single-stage practices.
Highlight the need for change: make sure hatchery personnel understand that single-stage management requires a different approach to multi-stage management to succeed.
Page 60 of 223
INCUBATION
61
Multi stage incubators
61
On the face of it, multi-stage incubation is an easy procedure. The setter is loaded with a new batch of eggs as the oldest batch in the setter reaches the point of needing to be transferred. A fully loaded machine contains eggs at all stages of incubation, and the average incubation age will be about 9 days.
Page 61 of 223
INCUBATION
62
At this stage in a single-stage incubation programme, the eggs do not produce a lot of heat and their oxygen demand is limited.
62
Multistage incubation does not present great technological challenges. The setter can work at constant, fixed settings, aiming to create acceptable conditions for all batches. The trouble is that this
'average load' consists of batches that are in very different phases of incubation: from eggs that have just been loaded to eggs about to be transferred.
The average set points might be close to the optimum for the middle groups, but they will be far from optimum for the extremes. And it is the extremes that determine the results. Too low a temperature at the beginning will cause an increase in early embryonic death. Overheating during the last days will lead to late mortality and poor chicken quality.
Page 62 of 223
INCUBATION
63
The eggs themselves offer a solution, however.
Their opposing requirements can be utilised for mutual benefit. Fresh eggs are cool when loaded and need to be heated. Eggs containing advanced 63
embryos must be cooled. Placing these two groups next to each other creates an opportunity for mutual heat exchange.
Although all incubator manufacturers claim that their machines create a very uniform environment, breaking the laws of physics is not that easy.
Differences in air speed, distance to the coolers, heaters, humidifiers and air inlets matter, and are reflected in egg shell temperature. Cooler and warmer zones can be defined in all types of equipment, and this can be made use of in a multistage system by placing the egg batches accordingly.
Page 63 of 223
INCUBATION
64
Temperature is of course not the only important parameter. Selection of the correct humidity setting, in line with the local egg shell quality, is critical for achieving 11-13 percent weight loss.
64
Typically, the standard settings for a multistage incubator are: Temperature 99.5oF, Relative Humidity 50 percent, valve 50 percent (or Carbon dioxide 0.4 percent). The value of the parameters can vary quite widely, however. For example, optimum temperature can range from 99.0 to 99.9 oF.
So, how to select the optimum setting? The advice will depend on local measurements and
observations, which must be carried out routinely: measuring egg shell temperature, calculating egg weight loss, and monitoring the machine's behaviour.
Page 64 of 223
INCUBATION
65
n a smoothly working incubator, internal devices will show low activity, the machine appearing to do nothing. Loading a new batch of eggs will activate heating, but this will stabilise again within a few 65
hours.
Overheating presents a higher risk than slightly too low temperatures. Egg shell temperature between 99.4 and 99.7oF will slow down the process, while a temperature above 102.0oF poses a risk.
Advice
Define the cooler and warmer parts of the setter, specific to the equipment type.
Load the fresh eggs accordingly and place them next to the older eggs.
Prewarm the eggs before loading (for at least 12 hours at 25-26 oC) to mitigate the resulting drop of temperature.
Avoid egg shell temperatures below 99.0 oF and above 102.0 oF.
Page 65 of 223
INCUBATION
66
Check egg weight loss to select the relative humidity setpoint.
Select the maximum valve position within the 30-60
percent range at which the machine remains stable.
Opening too wide activates the humidifiers, which is 66
undesirable, and opening too little can cause too high carbon dioxide (CO2) levels.
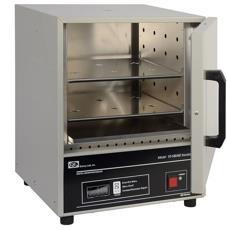
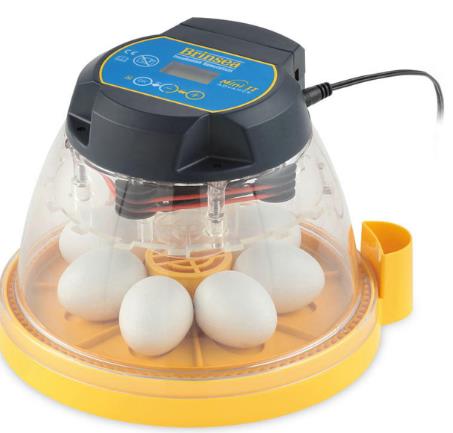
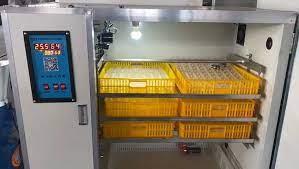
Types of Incubators Based on size or Capacity Small or mini incubators
Page 66 of 223

INCUBATION
67
Small incubators are a type of egg incubator designed to hatch a small number of eggs (usually less than 50 eggs) at a time. Small egg incubators are a necessity for those who wish to hatch chicken 67
eggs or other poultry eggs on a small scale.
Small incubators are sometimes referred to as tabletop incubators or mini incubators. They are also useful for educators who wish to use them in the classroom to teach about the process of incubation and hatching birds’ eggs.
Page 67 of 223
INCUBATION
68
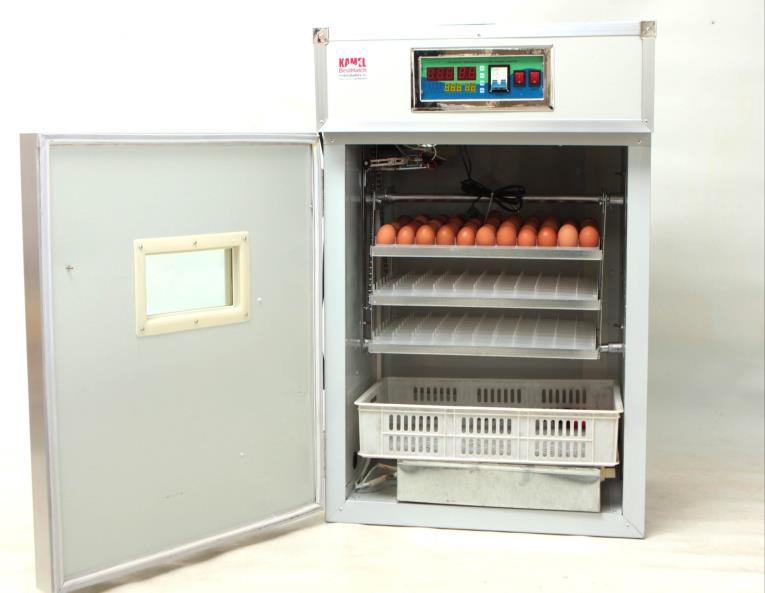
Medium incubators
68
Medium incubators are designed to hatch a medium range of chicken eggs (generally 50-200 eggs at one time). A medium incubator is the most ideal for those with a medium-sized flock, or for those who wish to hatch a larger amount of eggs on a smaller budget than a large incubator.
Page 68 of 223
INCUBATION
69
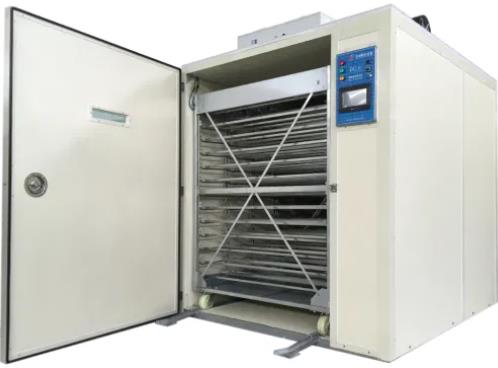
Large or industrial incubators
69
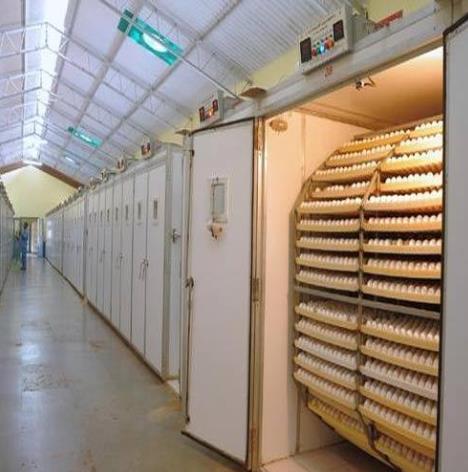
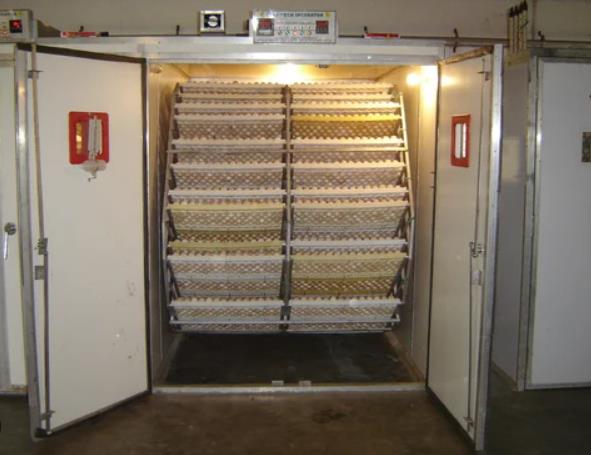
Large incubators are designed to hatch large numbers of chicken eggs (usually more than 200
eggs at one time). A large or industrial incubator is generally the most suitable for big breeders or farms with a lot of fertile eggs to hatch. An industrial incubator can accommodate up to 5000
eggs at a go.
Page 69 of 223
INCUBATION
70
Types of Incubators Based on mode of operation
Egg incubators are also classified according to their mode of operations or how they carry out vital 70
operations. The types of incubators based on operating mode are:
Manual incubators
Semi-automatic incubators
Automatic incubators
Manual Incubators
As the name suggests, the manual incubator is an incubator that the user has to manually do everything from turning the eggs to managing the temperature and humidity.
Semi-Automatic Incubators
In semi-automatic incubators, the user does not have to turn the eggs manually. There is a Page 70 of 223
INCUBATION
71
motorized system in place for this. However, the user will still have to monitor and control the temperature and humidity manually.
71
Automatic Incubators
Automatic incubators are the most advanced type.
They come with pre-programmed settings for temperature and humidity. The user only has to load the eggs and the incubator will take care of the rest.
Getting Started with Egg Incubator
A farmer needs to become acquainted with the incubator before starting incubation. Incubators may or may not have internal fans to circulate the air, and the two types operate at slightly different temperatures. A small wood and glass incubator works fine for the later periods of the incubation and hatching process so long as reasonable care is provided in tending the incubator and eggs.
Page 71 of 223
INCUBATION
72
Polystyrene and metal desktop incubators work reasonably well if manufacturer's instructions are followed.
72
Location
Choose a location for the incubator that is free from drafts, out of direct sunlight and not too close to heating ducts and radiators. A sturdy table on which to place the incubator as well as access to an electrical outlet will be needed.
Sanitation
Sanitation is very important. Before setting any eggs, clean the incubator. It is essential that the incubator and related equipment be cleaned thoroughly between hatches. This may be done by wiping, sweeping or vacuuming. Heavily soiled areas such as the wire rack on which the eggs were placed may require thorough washing and scrubbing to remove heavy soil.
Page 72 of 223
INCUBATION
73
Before working inside the incubator, be certain to disconnect its electrical cord from the outlet to avoid possible electrical shock. A dilute solution of household bleach and water (20 drops of bleach per 73
quart of water) makes an inexpensive cleaning and disinfecting agent. Take care not to introduce moisture or water into the electrical system of the incubator and allow all surfaces to dry before again reconnecting the electrical cord to the outlet.
Calibration
It is important that an incubator be calibrated for temperature and humidity control. Allow several hours preferably overnight for temperature and humidity inside the incubator to reach equilibrium.
Temperature
With a properly functioning unit, there will be a regular cycle of temperature fluctuations. A poultry breeder should try to maintain an average within Page 73 of 223
INCUBATION
74
the recommended range. If the average
temperature is too high or too low, adjust the thermostat accordingly. In the still-air incubator, one without a circulating fan, adjust the wafer 74
thermostat to maintain an average incubation temperature of 100 to 102 degrees Fahrenheit dry-bulb temperature, with an acceptable range from 97
to 102 degrees Fahrenheit. The target for forced-air incubators is usually 99.50F. The temperature control wafer expands with increasing temperature and shrinks as it cools. A defective snap switch or a leaky wafer will make the temperature control malfunction. New very precise temperature control designs are becoming available, but these also need checking for accuracy.
Humidity
Relative humidity is calculated by using a wet-bulb thermometer to measure the temperature inside the Page 74 of 223
INCUBATION
75
incubator. A web bulb thermometer has a dampened wick covering the bulb. A wet-bulb temperature of 88 degrees Fahrenheit and a dry-bulb temperature of 101 degrees Fahrenheit 75
converts to 60 percent relative humidity. This is a good starting humidity.
If the humidity is too low (high wet-bulb temperature) then the size of the evaporation pan must be increased. This can be done either by increasing the size of the pan or by placing a smal sponge in the water so that at least half of its surface is still exposed to the air. If the humidity is too high (low wet-bulb temperature), then the size of the pan must be decreased or water surface area reduced.
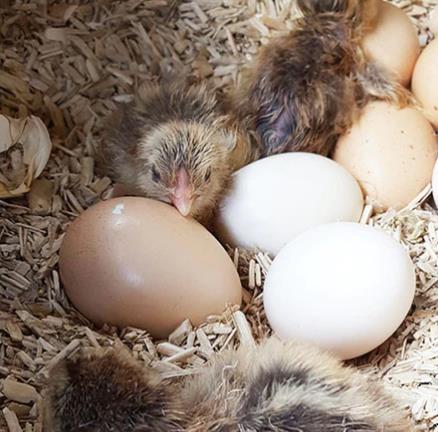
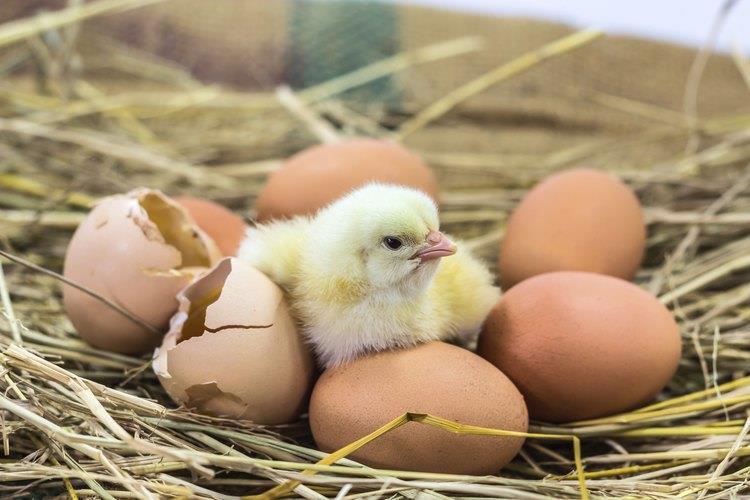
After a chick has hatched, the effectiveness of humidity control can be assessed by examining the location in which the chick pips, pecks through the Page 75 of 223
INCUBATION
76
shell. Ideally about one-third of the shell is removed as the chick hatches.
Incubator Reminders
Place the incubator in a room with a constant temperature, no drafts or direct sunlight.
76
Sanitize the incubator.
Wash hands before touching eggs. Keep germs, dirt and oil away from incubating eggs.
Only incubate eggs together from species with similar incubation periods.
Keep the small end of the egg lower than the large end.
Record of incubator data daily.
Ensure that the humidifier is working or that the water pan is filled.
Verify humidity levels are between 55 to 60 percent.
Check temperature daily and keep it at 99.5°F to 100°F.
Turn eggs at least 5 times a day until 3 days before hatch.
Increase ventilation during the last third of incubation.
Do not turn for the final 3 days. Provide a cloth or rough paper for the chicks to walk on.
Increase humidity to 65 to 70 percent at hatch stage.
Page 76 of 223
INCUBATION
77
Selecting Eggs for Hatching
77
Eggs laid by the hens without mating the cock will not hatch out, as they are infertile without any germ inside to develop into a chick. By rapid development and transformation within an egg, a minute germ can be converted into a chick in 21
days. All of a hen's eggs are unfit for hatching.
Suitable eggs for hatching should be carefully picked on the following criteria.
Fertility. Fresh eggs collected from healthy and well-matured hens between 5- 7 days after Page 77 of 223
INCUBATION
78
mating and within 2 days of separating the cock will be fertile enough to hatch. Eggs taken quickly after letting in the cock for mating or long after the cock has been separated may not 78
be fertile.
Egg size and shape. The size of the eggs used for hatching is important since the size of the hatched chick is strongly dependent on the size of the egg. Depending on the breed, the eggs for setting should be neither too large nor too small.
It is always preferable to choose eggs weighing about 58 g each. Eggs that are uniform in size and shape are preferable.
Choose eggs bred with the right
compatibility. Make sure the batch of eggs being chosen from were bred from unrelated parents. Make sure they are never inbred, such as mating a brother and sister, daughter and father, or son and mother. This usually Page 78 of 223
INCUBATION
79
predisposes the chicks to abnormalities, diseases, and deformities.
Egg shell. The eggshell should be equal in thickness, texture, and color so that warmth can 79
spread uniformly throughout incubation. In the case of white-shel ed eggs, all eggs for incubation should be tint-free. Medium and dark brown eggs hatch faster than light brown eggs when it comes to brown eggs. Low hatchability occurs when the shell texture is poor due to a calcium or vitamin D deficit. All eggs should be checked for cracked shells before being utilized for incubation.
Egg quality: Eggs should be gathered as soon as possible after laying, preferably within a week of lying, to ensure that they are fresh and not stale. Fresh eggs laid on the day of setting should not be set unless they have reached room Page 79 of 223
INCUBATION
80
temperature before being set. Eggs that are 2 to 4 days old are ideal.
Deformity. Eggs with ridges, encrustations, projections, depressions, cracks, or stains 80
should not be chosen. Very thin shells may break during rotating and fail to maintain a consistent temperature for the embryo's
development. If the shell is too thick, the chick will struggle to chip it with its fragile beak and escape.
Soiled eggs. Soiled eggs should not be washed in water before setting since doing so opens up the pores and interferes with the hatching process. If the dirt is not too thick, it should be removed with a knife. Eggs that have been heavily stained should not be utilized.
Storage. To achieve the best results, eggs collected for setting should be kept in a dry, cold, and airy environment. Eggs should not be Page 80 of 223
INCUBATION
81
kept for more than three days in hot
temperatures, although they can be maintained for up to ten days in cold weather or on hillsides.
81
As eggs absorb odor very easily, it is not good to store them near smelly substances like onion, garlic, kerosene, etc. Eggs should be stored in a cool place with the broad ends up. Eggs shaken very much during transport will not be good for hatching.
Page 81 of 223
INCUBATION
82
Farmers’ Frequently Asked Questions Answered What happens to a hen when her eggs are taken for artificial hatching? Does that frustrate her?
When a hen's eggs are taken away for artificial hatching, it can have both positive and negative effects on her. On 82
one hand, she may experience frustration and a sense of loss as she is separated from her chicks. This is because hens are maternal creatures and have a strong instinct to protect their young.
When eggs are removed from a hen's nest, she may show signs of distress such as vocalizations, pacing, or loss of appetite. These behaviours can indicate that she is experiencing emotional distress. The hen may also become aggressive or protective around the nest area, as she is trying to protect her eggs and any potential intruders.
On the other hand, artificial hatching can provide benefits to both the hen and the chicks. It allows the eggs to be incubated in a controlled environment, which can improve chances of successful hatching. Additionally, it Page 82 of 223

INCUBATION
83
allows eggs to be hatched outside of breeding season, enabling the hen to focus on producing more eggs.
Overall, the removal of eggs from hens for artificial hatching can be an emotional experience for them.
83
However, it can also provide positive outcomes for both the hen and the chicks involved. It is important to consider the hen's well-being and provide appropriate care and attention during the process.
Incubator Set-up
Page 83 of 223
INCUBATION
84
It is a good idea to wrap the cheaper, Styrofoam-type incubators in some sort of insulating material.
A blanket will work, or a box lined with insulation.
These incubators can be sensitive to temperature 84
changes in the room they are in, so if it is possible, set them up in an interior room where there is no direct sunlight. If the house temperature changes throughout the day in the winter, it is a good idea to set up a small, temperature-sensitive heater to try to keep the incubator room at a steady temperature.
Get the incubator set to the proper temperature at least 3 days before setting the eggs.
Page 84 of 223
INCUBATION
85
Use a digital, human grade thermometer for best results. If a farmer wishes to use a good quality digital thermometer that will stay inside the incubator, he/she should be sure to get TWO.
85
Thermometers can be off a bit and if a variance between the two thermometers is noticed, a third thermometer should be got to be sure. Place a record sheet near the incubator for daily note taking. Records are helpful to keep track of the days of incubation, time eggs are turned, incubator temperature, weight of eggs set, and other notes.
The vent plugs should be pulled out of the incubator because they will not be used for this hatch. The temperature should be set where the farmer thinks it will be right, and leave it alone for 24 hours. If a farmer is using a digital thermometer made for taking human body temperature, he/she should wrap it in whatever he/she has on hand Page 85 of 223
INCUBATION
86
(fabric, toilet paper, whatever) to allow the thermometer to fit in the hole and sit there comfortably, with the hole plugged by the wrapping material.
86
The bulb of the thermometer should be put anywhere from the bottom of the fan to about where the middle of an egg would be to get the most accurate reading. (With circulated air, the temperature should be pretty close to the same throughout the incubator, but that is a good area to test. Be sure the thermometer(s) are far enough from a heating element to prevent incorrect readings when testing the temps.)
The cheap digital thermometers a farmer can get anywhere are just that. They are cheap and can be unreliable. A lab grade thermometer can be verified/calibrated two ways (and we recommend using both). First, put it in a cup of ice water, Page 86 of 223
INCUBATION
87
stirring the water constantly. It should read 00C or 320F. Second, put it in a pot of water and bring it to a boil, again stirring constantly so the water does not get hot spots. It should boil at 1000C or 2120F.
87
Whatever thermometer a farmer has, he/she should learn how it works and how long its recording cycle (if digital) is. Be aware if it only goes up to the high stable temp or if it shows variable temps, etc. Then put it in the incubator (through the vent hole so it can be read easily) and start watching it. Write down the temperature it is reading (once it's been in there maybe 10 minutes) when the heating element comes on. Time the heat cycle (does not have to be exact but helps to know how long it's cycling) and take another reading when the element goes back off. Again, time how long the element is off. . ideally it should be on for a shorter time than it's off. Figure out, over 5 or 6
Page 87 of 223
INCUBATION
88
cycles, if the incubator temperature stays pretty consistent. the highest and lowest temps you record will actually be AFTER the heating element turns off and on, since it's got enough thermal mass 88
to continue heating slightly even after it turns off, and the coolest will be after the thermostat turns it back on, again because it takes a second to start building up more heat. .
Taking a number of readings will tell a farmer roughly what the temperature range will be. If it is high or low overall from 99.5 (average temperature) then the farmer needs to adjust the incubator. (A LITTLE AT A TIME!) Do not do more than a quarter turn on the adjuster at a time, and not more than once every 5 or 6 hours at least.
Once the farmer has got the incubator set well, he/she should use the lock nut (a second wing nut Page 88 of 223
INCUBATION
89
at the bottom of the stem against the incubator) to lock it down so it does not turn accidentally. Then test the temperatures again, in case the incubator was moved. (Not all incubators have this locking 89
feature.) Run it for a good 24-48 hours and just check periodically to make sure it is in the right range each time.
Setting Eggs
Once the incubator is set-up and have analyzed the settings to ensure accuracy, the farmer is ready to place the eggs inside the incubator. This process is called “setting the eggs.”
Plan to set a minimum of six eggs at one time.
Setting fewer eggs, especially if the eggs were shipped, often results in one or no hatchlings. The number of chicks that hatch together is especially important for the newborn chicks because chickens are flock animals and need companions to be Page 89 of 223
INCUBATION
90
happy. Place the eggs in the egg tray of the incubator, with the larger end facing up and the narrow end facing down in the incubator. Set the temperature to 100.5 degrees Fahrenheit with 50-90
55 percent humidity.
Before handling the eggs, the person going to pick them should also wash his/her hands and anything the eggs will come into contact with. Incubators are a great environment for growth of harmful bacteria and other germs. Good sanitation is important in obtaining a good hatch.
To avoid excessive thermal shock to the eggs, allow them to warm to room temperature before placing them in the incubator. In incubators without turning devices, place incubating eggs either on their side or with the small end down.
Never cool eggs again after starting incubation.
Cooling can occur at temperatures below 80
Page 90 of 223
INCUBATION
91
degrees. In case of a power outage, small incubators may be covered with a blanket to conserve heat for short periods.
91
For hatches of small groups of eggs, use a pencil to mark on the side of each egg the date on which the eggs are set. Then holding the pencil against the shell at the date mark, rotate the egg half a turn, drawing a line to the opposite side. Mark an X on the shell at the end of the line opposite the date mark. By marking the egg in this way, one will be able to keep track of the direction and rate of turning.
When placing the eggs in incubators without egg-turning devices, lay eggs on their side and space them as evenly as possible allowing room for turning.
Do not place the egg with the small end above the large end. If the incubator has a mechanical egg-Page 91 of 223
INCUBATION
92
turning device, set the eggs according to the manufacturer's instructions. This is usually with the large end up.
92
Do not allow the eggs to touch the side of the incubator or get too close to the heat source, which will cause uneven heating and lead to a poor hatch.
Managing the Incubation Process
During incubation, eggs found to be leaking, cracked, or moldy should be removed and disposed off. Such eggs may explode because of high microbial populations. The released odor is very offensive and would require expedient removal of all the eggs.
The normal incubation time of most chickens is 21
days to 21 days, 6 hours. Incubation time may vary according to weather and incubator, size of egg, Page 92 of 223
INCUBATION
93
fertility of egg and vigor of the embryo, and a host of other factors.
Several factors affecting the duration and success of 93
incubation are within the breeder’s control. There are important considerations to keep in mind during incubation and these are temperature, humidity, ventilation, incubation period, position of eggs and turning, setters and hatchers, testing of eggs (candling).
The aforementioned factors are further explained as below:
Temperature
Temperature is probably the most important single factor influencing the development of the embryo.
Near the optimum incubation temperature ranges, a higher temperature will advance the hatch and a lower temperature will delay hatch. A one-half-degree change in average incubation temperature Page 93 of 223
INCUBATION
94
will move the average hatch time by about 5.4
hours.
To monitor the temperature, place a calibrated and 94
accurate thermometer 1 inch above the wire mesh screen on which the eggs sit. This location corresponds approximately to the top of the eggs, where the temperature should be measured.
Temperature too high. Younger embryos are especially susceptible to high temperatures because the upper lethal limit is very close to the optimum incubating temperature. Operating the incubator at 105 degrees Fahrenheit for 30 minutes will seriously affect, if not kill, the embryos. High temperature will lead to nervous problems, heart and circulatory problems, and kidney problems and will cause the embryonic membranes to dry out too soon. Chicks that hatch may have clubbed, wiry down and unsteady gait.
Page 94 of 223
INCUBATION
95
Temperature too low. Slightly low temperatures for short periods will have a less severe effect on the embryo than high temperatures. Subnormal temperatures lower the metabolism of the embryo, 95
slowing its growth until the temperature returns to normal. Low temperature for short periods leads to disproportionate growth, because organs and tissues respond differently to temperature variation.
Low temperature can also cause heart and circulatory problems, reduce membrane growth and nutrient uptake by the embryo, and cause slower growth after hatching. Older embryos are more susceptible to low temperature.
Humidity
Proper humidity is important because it keeps the egg from losing too much or too little moisture during the incubation process. Eggs should lose between 11 and 14 percent of their weight from day Page 95 of 223
INCUBATION
96
1 to day 18 of incubation. This weight loss is a direct indicator of humidity control.
Humidity should be balanced with temperature; 96
different temperatures require different relative humidities. Relative humidity should be 60 to 65
percent for the first 18 days of incubation, and 70
percent for the last three days. The water pan in the incubator should be kept full at all times. Use warm water to fill the pan. Humidity adjustments are made as discussed above in the calibration section.
Opening the incubator to turn the eggs will cause a loss of humidity. In very dry environmental conditions, sprinkle the eggs with a little warm water after turning them. The rate of dehydration can be determined by using a flashlight or slide projector to candle, or shine through, an egg so that the contents can be examined. If the air cell is too large, the humidity must be increased. Low Page 96 of 223
INCUBATION
97
humidity can cause the chick to stick to the shel and membranes at hatching. If the air cell is too small, the humidity must be decreased. Excessive humidity will weaken the chick to the point that it 97
cannot emerge from the shell at hatching.
From day 19 on, condensation on top of the incubator indicates adequate humidity is present.
The amount of condensation varies depending on the temperature of the room where the incubator is located.
It is best not to open or move the incubator during the last three days of incubation for more time than it takes to add water to the pan.
Ventilation
The embryo is a living tissue and as such needs to exchange oxygen and carbon dioxide throughout the growth process. The amount of air exchange Page 97 of 223
INCUBATION
98
needed increases as the embryo develops. As the embryo develops, it uses oxygen and gives off carbon dioxide. Thus, sufficient ventilation within the incubator is required to assure an adequate 98
supply of oxygen and proper removal of carbon dioxide.
The optimum concentration of oxygen is 21%.
Oxygen concentration above or below 21%
negatively affects hatchability. Likewise, the carbon dioxide concentration should not exceed more than 0.5%. Proper ventilation is maintained with the help of fans fitted to the rear side of the incubator.
The vents which are located above and below the eggs should be opened gradually until they are fully opened during the final three days of incubation.
Ventilation rates that are too low prevent normal moisture evaporation and cause large weak chicks Page 98 of 223
INCUBATION
99
or death. High ventilation rates remove too much moisture and can cause the shell to stick to the chick, making hatching difficult. 1000 eggs require 143ft3 of fresh air per day (oxygen in the air at 21%) 99
on the 18th day of incubation.
Hatchability will drop about 5% for each 1% drop of oxygen content in the air below 21%. Gaseous exchange rate during incubation varies with the age of the embryo.
Incubation Period
The phrase incubation period designates the time from the commencement of incubation to
hatching.
One of the miracles of nature is the transformation of the egg into the chick.
Not every avian eggs hatch in 21 days. See the table below for incubation periods for different avian Page 99 of 223
INCUBATION
100
species. Never incubate the eggs of wild birds; these chicks will not live without their mother’s care if they do hatch.
100
Incubation Periods (species and days required to hatch)
Species
Days Required to Hatch
Pigeon
16-18 Days
Pea Fowl
28 Days
Chicken
21 Days
Turkey
28 Days
Pheasant
24-26 Days
Goose
28-33 Days
Guinea
26-28 Days
Muscovy duck
35-37 Days
Duck
28 Days
Ostrich
42 Days
Bobwhite Quail
23-24 Days
Swan
35 Days
Dove
14 Days
Parrots
28 Days
Crane
30 Days
Page 100 of 223
INCUBATION
101
Position of Eggs and Turning
After setting the eggs, the incubation process begins. An important part of this process is turning or rotating the eggs.
101
It is believed that turning the egg prevents adhesion of the embryonic membranes, facilitates movement of the embryo into the normal hatching position (thereby reducing abnormalities and malposition), stimulates the growth of the membranes, and increases the heart rate. The increased heart rate and membrane growth facilitate absorption of the nutrients from the yolk, albumen, and shell, and improves gaseous exchange.
It is necessary to turn the eggs at least three times a day to ensure that the embryo remains close to the center of the egg and does not stick to the shell membranes. Turn the eggs the first thing in the morning and the last thing in the evening and at Page 101 of 223
INCUBATION
102
least one or two times in between. Turning the eggs an odd number of times (5, 7, 9) each day is recommended. Avoid rotating the egg in a full circle, which can cause the embryo and egg 102
components to become tangled and twisted.
Turning should be done through day 17 of incubation, after which the chick is positioning itself for the hatching process. The most important period is from day 1 through day 12, when the chorion and allantois are developing and eventually fuse, forming the chorioallantois. During this time the most critical period is from day 3 through day 7, when the circulatory system is developing and beginning to function. Researchers have found that turning is not necessary past as early as day 14 of chicken egg incubation, although most systems continue to turn the egg through days 17 to 19.
Page 102 of 223
INCUBATION
103
Key Takeaway
Be sure to wash hands or wear clean gloves before touching the eggs to prevent the transfer of skin oils or germs to the developing chick.
103
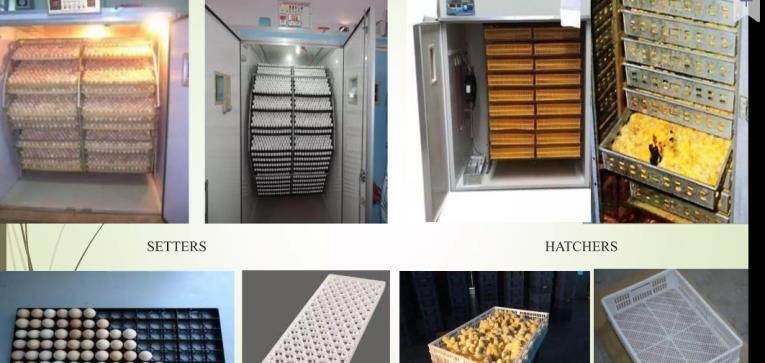
Setters and Hatchers
Two separate machines are used during the incubation process.
Setters
Page 103 of 223
INCUBATION
104
Chicken eggs require to be turned from time to time; hence the importance of an egg setter. When eggs are placed in the setter, the setter turns them automatically every hour for 18 days before they are 104
moved to the hatcher. The eggs only spend between 3 and 4 days in the hatcher at a different temperature and humidity, usually higher than the temperature in the setter.
Hatchers
On day 18, eggs have to be transferred from the setters to the hatchers. The hatchers will have a lot of heating. Hatcher and hatcher baskets always should be dry before they are used. As soon as the eggs are in it from day 18 to 21, the hatcher will mainly cool down because the developing chicks produce the most amount of heat. In this stage, it is crucial to avoid risks of overheating or overcooling else, it may result in head over wing Page 104 of 223
INCUBATION
105
malposition which results even when there is uneven cooling process due to lack of air flow.
105
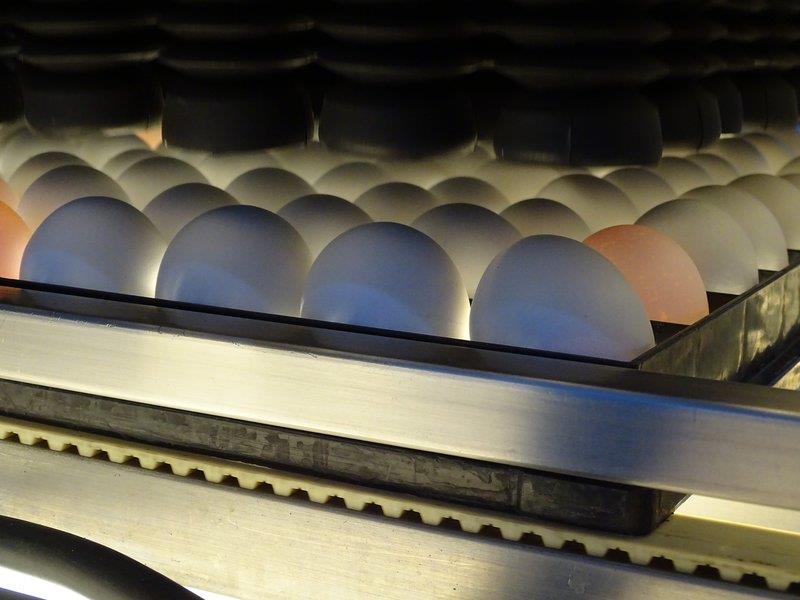
Candling and Assessing Egg Development
Egg candling is a process commonly used in commercial hatcheries to assess the fertility and development of eggs, particularly during the incubation period. It involves shining a light source, typically a bright and focused beam of light, through an eggshel to observe the internal contents of the egg. This illumination allows hatchery workers to visually inspect the egg's contents, which can reveal important information about the egg's viability, such as the presence of a developing Page 105 of 223
INCUBATION
106
embryo, signs of early mortality, or infertility.
Infertile eggs and those with deceased embryos, are collectively referred to as 'clears'. Initially, this inspection can occur as early as day 5 or 6 of 106
incubation, where an individual light is used to illuminate the eggs. However, this method is time-consuming and carries the risk of errors, such as accidentally removing a viable egg.
The potential for candling errors can be minimized by conducting the examination on day 9 or 10 of incubation. At this point, an alternative approach known as a 'candling table' can be employed. This involves illuminating the entire tray of eggs from beneath. While using a candling table is quicker than individual egg inspection, it may sacrifice a degree of accuracy. This is particularly evident when there is a high number of 'clears', as light passing through empty spaces in the tray can make Page 106 of 223
INCUBATION
107
it challenging to definitively identify remaining clear eggs. Many hatcheries opt to candle eggs on the day they are transferred from the incubators to the hatchers, as this proves to be the most efficient in 107
terms of time and labor. When eggs are examined in this manner, automatic candling equipment can be utilized, which illuminates all eggs before any clears are eliminated. This approach avoids the drawback of reduced accuracy caused by light flooding.
The primary purposes of egg candling in commercial hatcheries include:
Fertility Assessment: Candling helps identify infertile eggs that do not contain developing embryos. These infertile eggs will not hatch and can be removed from the incubation process, preventing unnecessary incubation resources from being used.
Page 107 of 223
INCUBATION
108
Early Mortality Detection: Eggs with embryos that have died at an early stage can be identified and removed. This prevents the potential for contamination from decomposing embryos and
108
allows the hatchery to allocate resources more effectively to viable eggs.
Early identification of issues on breeder farms, during egg handling, and throughout
incubation, especially when combined with egg break-out analysis.
Hatchery Efficiency: By identifying non-viable eggs early on, hatcheries can optimize the use of incubator space, reduce the risk of
contamination, and improve overall hatchery efficiency.
Chick Quality: Candling can help improve the quality of hatched chicks. Removing non-viable eggs and identifying potential issues can contribute to higher hatch rates and healthier Page 108 of 223
INCUBATION
109
chicks. It also helps to estimate the expected percentage of viable chicks. Clear eggs introduced to the hatcher baskets create an unstable environment as they do not generate 109
metabolic heat. When automatic chick
separators are used, there is a risk of clear eggs breaking and leading to 'painted' chicks.
Data Collection and Analysis: Hatcheries can gather data on hatch rates, fertility rates, and other important metrics by tracking candling and break-out results over time. This
information is valuable for evaluating hatchery performance
and
making
necessary
adjustments.
Waste Reduction: Removing non-viable eggs reduces waste and the need for disposal. In some cases, clear or infertile eggs may have alternative uses, such as for pet food or other products.
Page 109 of 223
INCUBATION
110
Egg candling is typically performed at various points during the incubation process, such as around day 5-6, day 9-10, and sometimes closer to the day of transfer to the hatcher. The timing of 110
candling can affect its accuracy and the information it provides. As mentioned earlier, more advanced techniques such as using candling tables (illuminating entire trays of eggs) or automatic candling equipment have been developed to improve efficiency and accuracy.
Page 110 of 223
INCUBATION
111
Below we have listed some extra guidelines for the hatching egg candling process:
Avoid candling of hatching eggs between days 11 and 14 of incubation, as this disrupts embryo 111
movement along the egg's length axis.
When candling hatching eggs on day 9 or 10, fil empty spaces on the setter tray by shifting remaining eggs backward to create complete rows, leaving the front rows empty.
Remove clear eggs if they exceed 10-15% of the total. If the clear percentage is under 10%, there's no immediate need for removal before transfer.
If more than 30 eggs are removed during candling on the day of transfer from a tray containing 150 eggs, add eggs from another tray to ensure hatcher baskets are adequately filled.
Ideally, eggs should touch each other within the basket, as vibrations caused by the first chicks Page 111 of 223
INCUBATION
112
pipping can stimulate other chicks to start hatching.
In summary, egg candling is a critical practice in 112
commercial hatcheries to ensure the highest possible hatch rates, optimize hatchery operations, and produce healthy chicks for the poultry industry.
Page 112 of 223
INCUBATION
113
Preparing for the Hatch
113
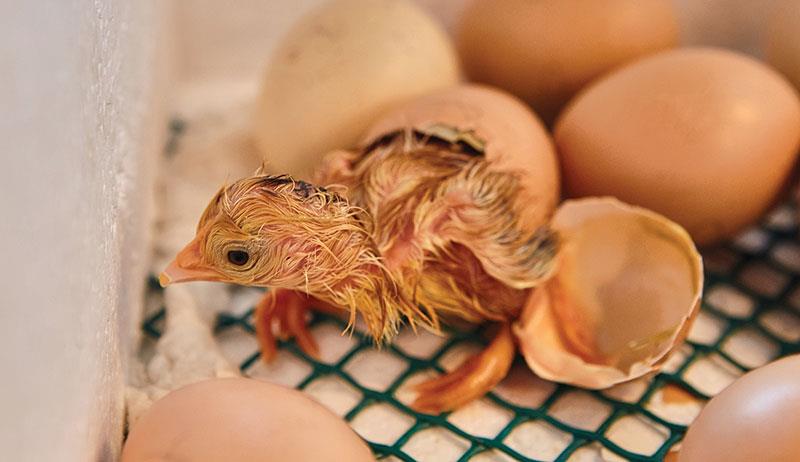
By day 18, the embryo has developed into a chick and will take up most of the space in the egg. The chick is preparing to hatch. A few things can be done to best help the baby chick prepare:
Stop egg-turning at day 18 with the larger end of the egg facing up. At this point, the chick will position itself for hatching inside the egg.
Approximately three to four days before hatching is a good time to remove eggs that appear to be infertile or contain dead embryos.
Page 113 of 223
INCUBATION
114
Check the eggs by candling, and handle the nonhatching eggs carefully.
It may be helpful to place several layers of cheesecloth over the wire mesh on the bottom 114
of the incubator four days before hatch. This provides a smooth surface to help keep the chicks from injuring their navels or getting their legs caught in the mesh. This also helps keep the incubator clean and the shells out of the water pan.
Maintain a temperature of 100.5 degrees Fahrenheit but increase humidity to 70 percent.
The hatching process releases much fluffy debris inside the incubator. Care should be taken not to open the incubator in drafts and to carefully remove shells and debris. Wearing gloves and a face mask may help to provide better hygiene while doing this cleanup.
Page 114 of 223
INCUBATION
115
When Eggs Fail to Hatch
Approximately two out of every 10 eggs normally do not hatch. The majority of this expected embryo mortality occurs during the first and last weeks of 115
incubation. Mortality during the last three days of incubation may be the result of an accumulation of factors that weaken chicks to the point that they cannot survive the normal rigors of the hatching process.
Other causes of mortalilty can be related to inappropriate management or function of the incubation process. Common causes of abnormal mortality levels during the first and second weeks of incubation include improper temperature or ventilation. Incubator overheating, for example, can quickly kill the developing embryo. Early in the incubation period, overheating can also contribute to the incidence of exposed viscera (yolk sac and Page 115 of 223
INCUBATION
116
internal organs protruding from body cavity) in the nearly fully developed chick. Overheating, together with rough handling of the eggs, can contribute to malformed head parts, such as a protruding brain, 116
deformed beak or lack of eyes.
Improper temperature or ventilation can also cause death during the pipping stage as chicks peck through their shells. Other possible causes of death at this late stage of development include improper humidity control, disease and even thin egg shells.
Diagnosis of failure to Hatch
A breeder/farmer may be able to learn why some eggs failed to hatch by breaking and examining them for certain diagnostic signs based on the appearance and comparative development of the egg and embryo. Note that this procedure can be dirty and produce unpleasant smells, so care should be taken. Break the egg into a flat container, such Page 116 of 223
INCUBATION
117
as an old plate, and evaluate the contents according to the following criteria:
Clears: Absence of a blood ring or embryo development indicates that either the embryos 117
died early in incubation or the eggs were infertile.
Blood rings: Clear eggs with a formed blood ring or small embryo indicate that death occurred in the first three days of incubation.
Possible causes are incubator malfunction during days 1 to 3 or improper storage of the eggs before setting.
Dead early or midterm embryos: Many factors can cause embryos to die early or in midterm. Possible causes include excessively high or low incubation temperatures, improper turning, low viability of the egg caused by parental nutrition or inheritance, improper ventilation and suffocation, disease, poor egg Page 117 of 223
INCUBATION
118
shell, and contamination. Embryos subjected to overheating will appear red because of
hemorrhaging of blood vessels.
Fully formed and not pipped: When chicks 118
die fully formed without pipping, the usual causes include low average incubation
temperature, weak viability of setting eggs, improper
humidity,
genetic
defects,
contamination or temperature malfunction.
Malformed chicks: Genetic and chance deformities may occur. High temperature
during certain formation times may lead to deformities. Rough handling of incubating eggs may contribute to malformations.
Cull chicks: Dry chicks with egg shells sticking to their down may indicate low humidity after pipping starts. Chicks hatching earlier than usual with bloody navels or navels not healed properly might indicate too high temperature or too wide Page 118 of 223
INCUBATION
119
temperature swing during incubation. Chicks hatching later than 24 hours after the start of hatch are commonly cull chicks that will not grow well and will be more susceptible to stress 119
and disease challenges. Prolonged hatches typically result from poor egg vigor or an unbalanced environment throughout the
incubation period, not just at the time of hatch.
Weak chicks may be placed in special isolation housing for their protection. However, chicks will be more settled if they are placed with other chicks. Some methods to terminate incubating eggs include placing the eggs in a container filled with carbon dioxide or in a low-temperature environment.
Page 119 of 223
INCUBATION
120
Early Chick Care
120
Newly hatched chicks are wet and easily chilled as this moisture evaporates. Chicks should be removed from the incubator when they have dried and the down becomes fluffed. This drying normally takes about 12 hours. The chick also rests following its efforts to cut and exit the egg shell.
Avoid frequent opening of the incubator to remove Page 120 of 223
INCUBATION
121
hatching chicks, because this will cause problems related to chilling and loss of humidity for the remaining eggs in the setting.
121
The newly hatched chick is unable to maintain or regulate its body temperature. The ability to regulate body temperature increases during the first three weeks of the chick's life. The body temperature of a very young chick is below that of the mature fowl. This difference disappears at about three weeks of age. By this time the chick's feathering, metabolism rate, and ratio of surface Page 121 of 223
INCUBATION
122
area to body mass allow the bird to accommodate to a lower environmental temperature. Minimum room temperature is 75 to 80 degrees Fahrenheit for holding the chicks.
122
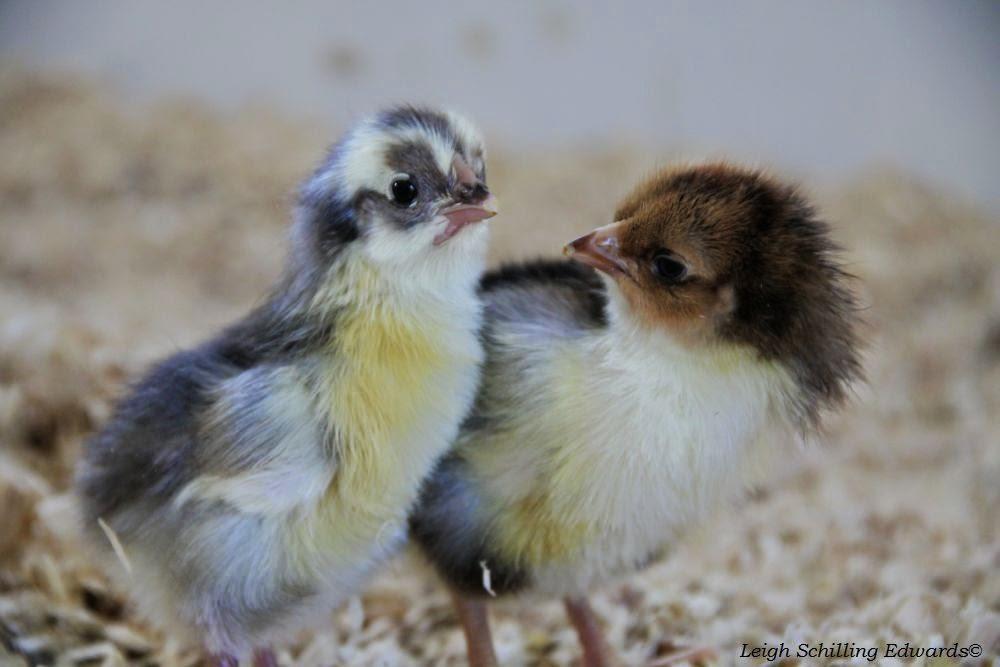
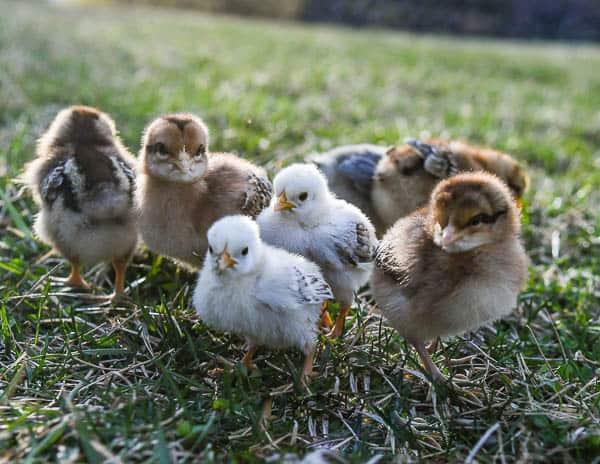
Keep the chicks together. A chick placed by itself usually becomes distressed and will cheep loudly for the other chicks. They are best maintained as a flock.
Page 122 of 223
INCUBATION
123
Chicks should be kept in a draft-free area with plenty of nonstale air for them to breathe. A thousand chicks have about the same oxygen demand as one adult human.
123
Chicks will get a good start if they drink and eat within a few hours after removal from the incubator. The yolk sac they absorb just before hatching can supplement early food needs. If chicks are offered food, they will normally begin eating soon after they are hatched, dried, warm and rested.
Bread crumbs, oatmeal, or hard-boiled eggs can serve as temporary diets for the chicks during the first day or two, but a complete commercial diet is recommended.
Farmers’ Frequently Asked Questions
What is an incubator?
An incubator is a machine which provides an artificial way of keeping eggs at the right temperature and humidity until they hatch. There are several different types, from the home made to manual, semi-automatic and fully automated.
Page 123 of 223
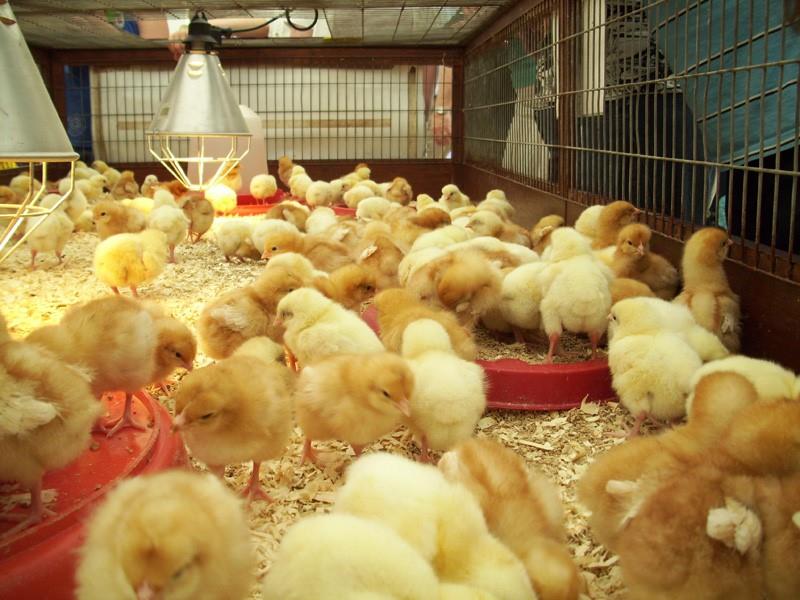
BROODING
124
BROODING
124
At the end of this section, the following topics should have been discussed:
Introduction to Brooding
Types of Brooding in Poultry Farming
Brooder Setup and Equipment
Brooding Environment
Brooding Management
Gradual Transition to the Outdoors
Troubleshooting Common Brooding Issues
Recording Keeping and Evaluation
Sustainable Practices in Poultry Incubation and Brooding.
Page 124 of 223
BROODING
125