• To decide how many measures are across the page in a new Layout.
• To specify the maximum number of bars across a staff after performing a “Bars and Staves” Auto Layout (see page 283).
P If you want to use the “Bars and Staves” Auto Layout function (see page 283), you should do this before you adjust the number of bars manually.
1. Make a Staff active in the system where you want to start making changes. This means that if everything looks fine until for example the fifth system, make one of the staves active in this system.
2. Pull down the Score menu and select “Number Of Bars” from the Format submenu. The Number of Bars dialog appears.
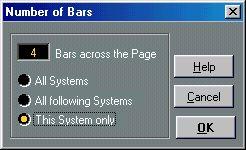 3. Set the desired number of bars across the page.
4. Select one of the options by clicking the buttons:
Select This:
All Systems
If You Want:
All systems on all pages to have this number of bars across the page.
Using the Tools

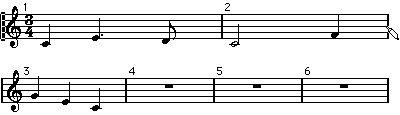
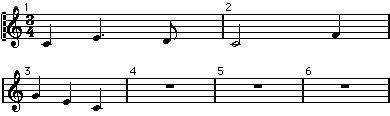 Before and after moving the third measure one staff down.
• To bring the measure back up to the previous staff, use the Glue Tube Tool to click on the last bar line on the upper of the two staves.
This will in fact move all measures in the lower staff up to the upper.