When you are moving and editing notes in the score, you might accidentally move other objects near by. To avoid this, you can assign different types of objects to different “Lock Layers” (up to three) and instruct Cubase VST to “lock” one or two of these layers, making them unmovable.
• To set up which type of object should belong to which Lock Layer, double click on the Lock Layer button on the Status bar.
A dialog opens, where you can select a Lock Layer (1 to 3) for each object type.
 The Lock Layer button.
• To lock a layer, click on its number on the Lock Layer button, so that it goes dark. You can only select or move objects whose layer number is lit. For more detailed information, see page 201.
 Auditioning activated
If you want to hear the pitch of the note while moving, activate the Speaker Icon on the Status Bar. When it is on, you will hear the current pitch of the “dragged” note, as described below.
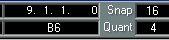
1. Set the Snap value.
The Snap value will restrict your movement in time. You can not place the notes on note values smaller than the Snap value. If Snap for example is set to “8”, you will not be able to move the notes to a sixteenth note position. However, you will be able to put them on any eighth note, quarter note, half note or whole note position.
You can select across several staves if you wish.
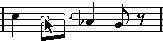
3. Position the pointer over one of the selected notes, press the mouse button and keep it down.
4. Move the mouse.
The horizontal movement of the note is “magnetically attracted” to the current Snap value. The position box shows what the new position for the dragged note will be. The Transpose box shows how much you have transposed the note(s).
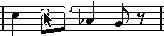
Select one or several notes and hold down and drag the mouse button to the new position.
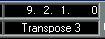
The Transpose box will show you how many semitones you move your note(s)...

 ...and then transpose them when you release the mouse button.
 5. Release the mouse.
The notes appear at their new position.
1. Perform steps 1 to 3 above.
2. Hold down [Shift] and move the mouse (with the mouse button still held). Depending on in which direction you start to drag, the movement will be locked to horizontally or vertically only. You may at any time release [Shift] to be able to move in any direction, and then press it again to lock the movement once more.
3. Release the mouse.The notes appear at their new position.
P If you move notes vertically and the option “Keep moved notes within key” is activated in the Preferences–Score–Editor Behaviour dialog, the notes will be transposed within the current key only.
1. Select one or several notes.
The notes will be moved in steps according to the set Snap value.
3. Hold down [Ctrl] on the computer keyboard.
4. Use the arrow keys to move the note(s).
The left/right keys move notes sideways in Snap value steps. The up/down keys transpose notes in semitones steps (see page 108 for more info).
By dragging
1. Set Snap and select the notes as described above.
You may select notes from several staves, but only the ones on the stave from which you actually dragged will be moved, so this is probably best avoided.
2. Make sure the “L” (Lock) button on the Score Toolbar is deactivated. When this button is activated, you cannot move notes and other objects from one staff to another, which is handy if you for example need to transpose a note very high or low.
3. Click on one of the note(s) and drag them to the new system.The Active Staff rectangle indicates which staff the dragged note(s) will appear on.
By using key commands
1. Select the notes.
2. Use the key commands for “Next/Prev Dynamic/Text Size/String” to move the notes to the next or previous Staff.
By default, these are [+] and [–] on the typewriter part of the computer keyboard.