The first-hand choice for creating and editing all kinds of continuous data would be the Controller Editor. This is specially designed for graphical editing of Events other than notes, including Modulation, Volume, Pitch Bend etc. The Controller Editor is described in detail in the chapter “The Controller Editor”. However, it is also possible to edit and create continuous MIDI data in Key and Drum Edit (both of which have special Continuous Controller displays) and List Edit (which lets you edit the data in several different ways - see the chapter “List Edit”).
For a basic introduction to the Controller Displays in Key and Drum Edit, see the chapter “An Introduction to MIDI Editing” in the Getting Started book. Below, you will find a rundown of the features.
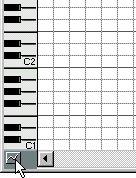
• Change the size of the display by dragging the Divider up or down.
• To select data type to be displayed, press the mouse button with the pointer on the data type icon (to the left in the display).
This opens the data type pop-up menu.
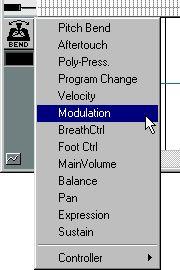 This pop-up menu contains the most common Event types. To see the full list of MIDI Controllers, move the pointer to the “Other” option at the bottom of the list.
 • If you move the pointer up and down in the Controller Display, the value corresponding to the pointer position is shown in the box below the data type icon. This helps you position the Pencil/Line tool when creating or editing Events.
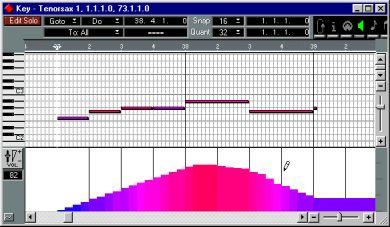
P All values range between 0 and 127, except Pitch Bend, which has a value range from – 8192 to +8191. For Pitch Bend, value 0 is equivalent to no Pitch Bend (the Pitch Bend wheel/lever in center position).
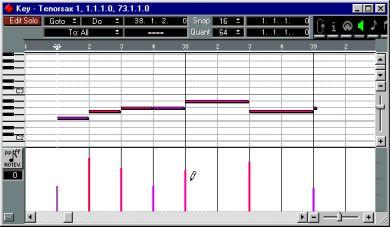
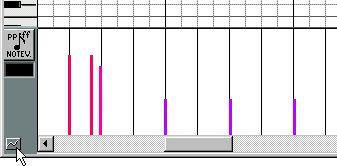
The velocity values of notes are shown as thin vertical bars, with higher bars representing higher velocity values. Since a velocity value always belongs to a note, you cannot create new velocity “bars” in the Controller Display, only edit existing.
• In Drum Edit, only the velocity values for the selected Drum Sound are displayed. You select a Drum Sound by clicking on it in the Sound list.• Selecting a note also selects the velocity bar in the Controller Display. And in the same way, selecting a number of velocity bars, by enclosing them with a selection rectangle, will select the notes in the note display.
• To change a velocity value, click on it with the Pencil tool.
In Drum Edit, you select the Drumstick tool for this; when moved into the Controller Display it automatically takes on the shape of the Pencil tool.
 These Events include all Controllers, Pitch Bend, Sustain-pedal, etc - in other words, all Events that are not associated with a note.
• To create a non-note Event, hold down [Alt] and click with the Pencil tool. The value field to the left helps you get the correct value.
• To draw a ramp of non-note Events, hold down [Alt], click and drag with the Line tool.
• To select a non-note Event, click on it with the Arrow tool in the Controller Display. To select several Events, you may hold down the [Shift] key on the computer keyboard and click, or enclose the Events in a frame, just like when selecting notes.
• To edit existing non-note Events, click with the Pencil tool or create a ramp with the Line tool.• To delete non-note Events, either click on them with the Eraser tool, or select them and use any of the delete options ([Backspace] key, Edit menu or Do pop-up menu). The Delete command on the Do pop-up menu allows you to delete all Events within a certain range, set by the Loop or Cycle.
P Please observe that deleting an Event makes the last Event before this valid up until the next Event. It does not “zero” any Controller changes.Polyphonic pressure data has two values that go with it. The key that was pressed, and the amount of pressure. To edit or create Polyphonic Pressure Events, proceed as follows:
1. Select “Poly-Press.” from the data type pop-up menu.• In Drum Edit, you can instead select the Sound for which you want to edit Poly Pressure, by clicking in the Sound list.
3. Create and edit the Events as with non-note Events.
If you create new Events, they are automatically associated with the note number (pitch) of the selected note.