Cubase vst- Getting into the Details by - HTML preview

PLEASE NOTE: This is an HTML preview only and some elements such as links or page numbers may be incorrect.
Download the book in PDF, ePub, Kindle for a complete version.

Preparations

1. Create an empty Part, as a container for the notes you are about to Step Record. You can of course also use an existing Part.


2. Open the Part in a MIDI editor of your choice.


In the pictures below we will use Key Edit, but it doesn’t matter which editor you select. 3. Click on the Step button.


This automatically activates the MIDI In icon and the Step Position box. Click the Step button...


00273.jpg
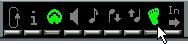
...the MIDI connector is automatically activated...


00274.jpg

Determining Note Lengths and Positions

...and the Step Position box appears.

• To set the length of the notes you are about to input, adjust the editor’s Quantize value.
If you e.g. set this to “16” all notes you input will be sixteenth notes.

• To set the “spacing” between the notes and chords, adjust the editor’s Snap value. If you e.g. set this to “8” all notes will appear on eighth note positions.


Note “spacing”.


00275.jpgNote length.

Setting the Position for the first note

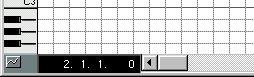
To set the position where you want the first note to appear, adjust the regular Song Position (for example on the Transport Bar) and the Step Position is automatically set to the same value.

Selecting a Track for input

If you are editing several Tracks at the same time, you must decide which Track to enter notes into by making a Part/Track active (see page 168).