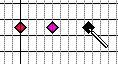
 If you click on the created
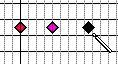
 ...a new note is created.
 ...the note is erased!
This makes it easy to try out rhythmic variations; adding and removing notes without having to switch tools. • If you delete a note this way, you can continue dragging to delete other notes, as long as you don’t release the mouse button.
The Q Value
Exactly where a created note is placed, is determined by the Q value set for its Sound. This works just like Snap value in the other editors, except you can have different settings for each Sound.
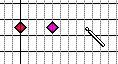
 Pressing the mouse button with the
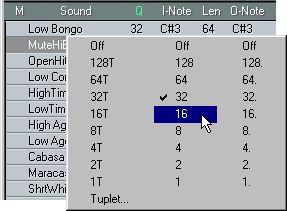
P Note that the Q value only applies when you create notes. When you Quantize notes, the regular Quantize value on the Status Bar applies (with one exception - see page 216), and when you move a note, the Snap value (on the Status Bar) determines its exact position.
The Len ValueYou don’t change the length of created notes with the Drum stick (as you can with the Pencil tool in Key Edit). Instead, you can predefine a length value for each Sound, that created notes automatically get.
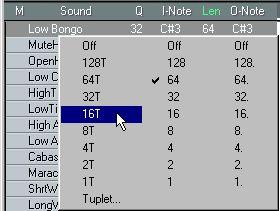

The Len value is specified as a regular note value, while the Note Info Line shows lengths in beats, 1/16th notes and ticks.
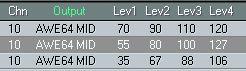
P The length of a drum note may or may not be important, since many drum sounds play to their end regardless of how long notes you play.You can give the notes one of four “levels” (velocity values), by holding down keys on the computer keyboard while you are drawing.
Modifier key Level
[Shift]+[Ctrl] Lev. 1
[Ctrl] Lev. 2
[Shift] Lev. 3
None Lev. 4
The actual velocity value associated with each of the four levels, is set individually for each Sound in the Drum Map. Note that the levels will always be ordered according to velocity value, so that Lev. 1 has the lowest value and Lev. 4 the highest. For example, you cannot set Lev. 2 lower than Lev. 1 or higher than Lev. 3.
• You can set these values via MIDI, as described on page 212.
• Note that the settings in the Preferences–General–Modifiers dialog may conflict with the modifier keys for velocity values!
If one of the above modifier key combinations is specified for use in the Preferences–General–Modifiers dialog, this overrides the corresponding velocity input feature.
You can set a parameter to the same value for all Sounds by holding down [Alt] when you change the value.
• When inputting notes with the brush, you can use the modifier keys to control the note velocity in the same way as when you input notes with the drum stick tool. See above.
• If the To menu is set to Selected Events, Looped Selected Events or Cycled Selected Events, and no Events are actually selected, then the selected Sound will be Quantized after its individual Q value.
In all other cases, quantizing works “as usual”, that is: All Events set to be affected will be Quantized after the Quantize value on the Status Bar.If you have a pattern that is slightly “off”, or if you want to create a special rhythmic feel, you can use the Delay column to shift the timing of a Sound forwards or backwards. Positive Delay values puts the Sound “behind” the beat, negative Delay values puts it “ahead of” the beat.
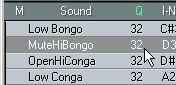
• This feature can also be useful to compensate for varying MIDI response times if you are using different MIDI Instruments for different Drum Sounds.You may mute individual Sounds in the Drum editor. This is done just like muting Tracks in the Arrange Window, by clicking in the M (Mute) column. Please note that the mute state for Drum Tracks is part of the Drum Map, so any other Track or Part using the same map will also be affected. It is also possible to mute individual Note Events, using the Mute Tool.
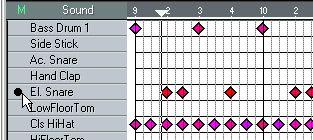 Muting a Sound.
There is also a Solo button, just below the Ed Solo button in the upper left corner of the window. This will Mute all Sounds but the selected one. Solo is automatically deactivated if you close the Drum editor.