All the operations described in the following section can be executed on an individual Part or several Parts simultaneously. You can also use some of the tools on several Parts at the same time, taking into account the relative size and position of the Parts.
• Position the pointer close to the end point, and drag to the left (shorten) or to the right (lengthen).
This changes the length of the Part (without changing its start position).
• Position the pointer close to the beginning, and drag to the left.
This lengthens the beginning of the Part. This does not move the Events in it, it just sizes it as if recording had been activated earlier.
An outline of the Part shows the size while you are dragging. The Mouse box aids you in positioning the pointer so that you can set the length exactly as you want it, and the Snap function helps you to restrict your changes to some even note value (see the Getting Started book).
P If you make a MIDI Part shorter, the Events outside the new length are lost.
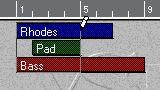
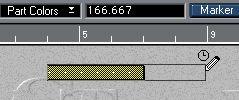
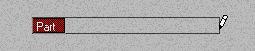
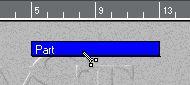
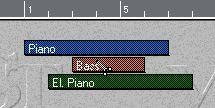
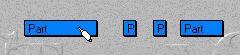
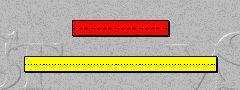
 Shortening a Part with the Pencil.
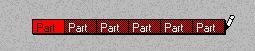
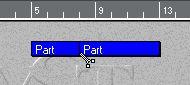
If several Parts are selected
P For this to work, the option “Tools work on All Selected Parts” has to be activated in the Preferences–General–Arrangement dialog.
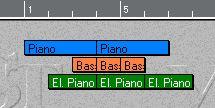
If you have more than one Part selected, and resize one of the Parts with the Pencil tool, all selected Parts are resized, so that they get the same end or start position.
• If you hold down [Ctrl] while resizing several Parts this way, the Parts are resized relatively instead.
This means that the lengths of all Parts are changed by an equal amount.
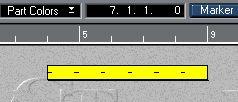
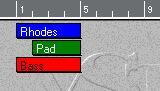 ...all selected Parts get the same
 Resizing Parts and their Events (“Stretching”)
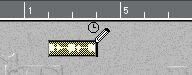
If you hold down [Ctrl] while doing this...

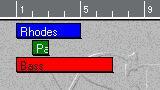 ...they are resized relatively
 If you want to resize a Part and make its contents “fit” the new size, you should use the Stretch tool. Proceed as follows:
1. Select the Stretch tool.
 2. Point close to the end point of the Part you want to stretch.
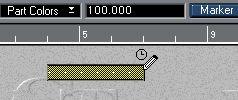
3. Click and drag left or right.
When you move the mouse, the mouse position box indicates the stretch factor as a percentage (where 100% equals the original length). Note that the Snap value applies, as with any Part operation.
 4. Release the mouse button
The Part is “stretched” or “compressed” to fit the new length.
• For MIDI Parts, this means that the Events are moved, so that the relative distances between the Events is maintained.
• For Audio Parts, this means that the Events are moved, and that the referenced audio files are time stretched to fit the new length.
A dialog box shows the progress of the time stretch operation. For more general information about time stretch, see page 403.
P Note that this operation changes the audio file(s) permanently! If you want to use the unprocessed audio file(s) in other Parts (or in other Songs), you must make a copy of each file first (see page 327).
If you hold down [Alt] while lengthening a Part with the Pencil tool, new Parts will be created, all lined up end-to-start after the Previous Part. The new Parts will be copies of the original, including all Events and playback parameters.
 The outline shown when you drag the Pencil can be thought of as a “frame”, that becomes filled with as many copies of the original Part as possible.
If you instead hold down the [Ctrl] key, the repeated Parts will be Ghost Parts (see page 71).
If several Parts are selected
P For this to work, the option “Tools work on All Selected Parts” has to be activated in the Preferences–General–Arrangement dialog.
If you have several Parts selected and use the Pencil tool to repeat Parts as described above, all the selected Parts are repeated as a “block”, with the relative positions of the Parts retained.
 You can also repeat Parts using the Repeat Part(s) function on the Structure menu (see page 72).
This is done with the Eraser tool. Select the Eraser and click on the Parts you want to delete. If you hold down [Alt] while doing this, the Part you click on and all consecutive Parts on the Track will be erased.
If several Parts are selectedIf the option “Tools work on All Selected Parts” is activated in the Preferences–General–Arrangement dialog, clicking on a Part with the Eraser tool will delete all selected Parts.
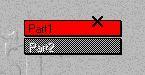
• You can also delete Parts by selecting them and pressing [Backspace] or selecting Delete Parts from the Edit menu.If you delete a Part as described above, the Part is removed from the Arrange window, but its segments remain in the Pool, and the file is of course left on disk. If you wish to also delete all segments and the files referenced by the Part, proceed as follows:
1. Select the Part(s).
2. Hold down [Ctrl] and press [Backspace].
3. Click OK in the dialog that appears.
Click with the Scissors on the
The exact position of the Split is determined by the set Snap value.
Splitting into several Parts
1. Hold down [Alt].
The Part will be split up into many Parts, all with the length of the cut you indicated.
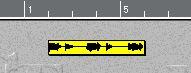
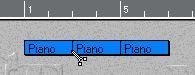
For example, if you have a six bar Part and cut it after the two first bars while pressing [Alt]...
...it will be cut into three
 About Splitting Audio Parts
• When you Split a Part in two you also split the Events at that position and therefore create new segments.
• If Snap to Zero is activated on the Audio Setup submenu on the Options menu, the splitting of the audio will occur at the closest zero crossing. See page 348.
If the option “Tools work on All Selected Parts” is activated in the Preferences–General–Arrangement dialog, you can split all selected Parts at the same time. The following rules apply:
• If you click with the Scissors tool on one of the Parts, all selected Parts will be split at the same position.
For a selected Part to be split, the split position must of course be within the boundaries of the Part.
• If you hold down [Ctrl] and click on one of the Parts, all selected Parts are split at a position relative to their starting point.
This means that if you click one bar into one of the Parts, all selected Parts are split at one bar after their start position.
• If you hold down[Alt] and click on one of the Parts, all selected Parts are split into several Parts.
The lengths of the resulting Parts are determined by the distance between the split position and the start position of each selected Part.
• If you hold down both [Alt] and [Ctrl] and click on one of the Parts, all selected Parts are split into several Parts, starting at a position relative to their starting point. The resulting Parts will have equal lengths, determined by the distance between where you click and the start of the clicked Part.


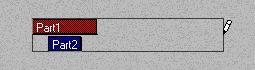
 ...gives you one long Part with the name of the first.
 P
If the Parts overlap, they are merged in the overlapping area. No Events are lost.
P
If the Parts overlap, they are merged in the overlapping area. No Events are lost.If you hold down [Alt] and click on a Part with the Glue Tube tool, all consecutive Parts on that Track will be glued together:
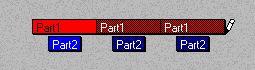
 Joining all Parts on a Track into one
This can be done in two ways:
• Hold down [Alt] and click on the first Part on the Track.
or
• Click with the Glue Tube tool on the Track in the Track List.
For this to be possible, the option “Allow Tools on Track List” must be activated in the Preferences–General–Arrangement dialog.
If the option “Tools work on All Selected Parts” is activated in the Preferences–General–Arrangement dialog, you can select Parts on different Tracks and use the Glue Tube tool on one of them (holding down the [Alt] key if you like). The result is the same as if you had performed the operation on one Track at a time.
From there on, the procedure differs for Audio Parts and MIDI Parts:
2. To monitor the contents of an Audio Part, click anywhere in the Part. You will hear the contents of the Part played back, from the point where you clicked, for as long as you keep the mouse button pressed (or until the end of the Part).
3. To monitor the contents of a MIDI Part, drag the pointer forwards or backwards over the Part.
Notes and other MIDI Events will be played back according to how fast you drag the pointer.
 The Mute tool.
Three of the tools in the Arrange window Toolbox are used to set play parameters (volume, pan and transpose) directly for one or several Parts. This is described in the chapter “Play Parameters” the Getting Started book.
Match Quantizing allows you to match the feel of one Part with the feel of another. If you for instance have made up a great “live” bass drum Part and wish to pass the timing of it on to a hi-hat you should use Match Quantize.
This type of Quantizing takes the positions of the notes in one Part as a reference. It uses them to move some or all notes in another Part to similar positions. By setting a Quantize value you control how far the notes can be moved forward or backwards in time. If you for instance select the Quantize value 8, notes will maximally be moved backwards or forward to the nearest 8th note position in the reference Part, but not beyond.
Say for instance that you have a bass drum playing on every beat (quarter) in a bar. The feel of this is to be passed on to a hi-hat playing eighths.But, you don't want all notes in the hi-hat Part to be moved to the quarters of the bass drum, since this would not give you an eighth note hi-hat Pattern but a strange quarter note one. You only want the notes on the quarter beats to be affected.
To achieve this, you use the Quantize value to put a grid on the Match Quantize effect. In our example, you set Quantize to 8. This will only move the notes in the hihat Part that are positioned near one of the four quarter notes in the bass drum Part. The notes between them will “slip through”, and not get Quantized.
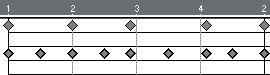
Bass Drum
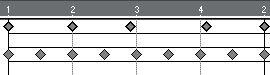 Before Match Quantizing.
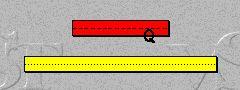
 After Match Quantizing.
The Quantize value is used to put a filter, or grid, on the Quantizing so that notes in the “affected Part” that are close to notes in the “feel Part” are moved, while notes that are closer to one of the Quantizing values between the dots are unaffected. If this all sounds technical, experiment a bit and you will soon get the hang of it.
How to use Match QuantizeSee the explanation above.
2. Select the Match Quantize (Q) tool.
 3. Drag the Part with the desired feel, to the Part you want to Quantize.
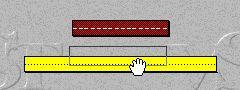 4. Release the mouse button.
A dialog box pops up, asking you if you want to “Include Accents?”
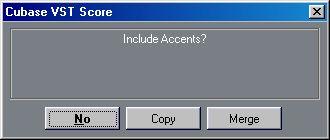
5. Select one of the options in the dialog (See below).
Option Description
No No velocities are copied from the Source Part to the Destination Part.
Merge The velocity values in the Source Part are copied to the Destination Part, but if there are already very strong accents in the Destination Part, these are preserved. Using Match quantize repeatedly on the same two Parts with this option, may give unpredictable results with regards to the velocity value in the Destination Part.
Copy The velocity values in the Source Part are copied to the Destination Part. The feel of the first Part will now be passed on to the second Part.
 If the Source Part is shorter than the Destination Part, the Source Part's contents are repeated so that the whole Destination Part is Match Quantized.
If you are using the Score or VST/32 version of Cubase VST, the Match Quantize tool can also be used to “Scale-Map” MIDI Parts, using the chords and the Scale Events in a Chord Part to determine transposition. For more info on Chord Parts, see the “Score Layout and Printing” document.
P For the Scale-Map operation to work, the “Compute Scale”-function must have been performed for the Chord Track. See the “Style Tracks” document.1. Select the Match Quantize tool.
2. Drag a Part from a Chord Track onto a Part on a MIDI Track.
A dialog will appear, asking you if you want to “Use Chords?”.
• If you click “No”:
The program looks at each note in the MIDI Part, and transposes it so that it fits the scale determined by the Chord Part.
• If you click “Yes”:
The program will transpose notes so that they fit into the chord type, and then transpose them according to the chord root-note.