5. C# Level 1
This book is not meant to cover C# in details but I will cover most of basics to help you get started.
5.1. What is .NET?
.NET Framework was developed to standardize programming. (Note how I am talking about the full .NET Framework and not the Micro Framework.) Once you program in .NET, you are no longer concerned of the underlying operating system. It offers a set of libraries that developers can use from many programming languages.
The .NET Framework runs on PCs and not on smaller devices, because it is a very large framework. Also, the full framework has many things (methods) that wouldn't be very useful on smaller devices. This is how .NET Compact Framework was born. The compact framework removed unneeded libraries to shrink down the size of the framework. This smaller version runs on Windows CE and smart phones. The compact framework is smaller than the full framework but it is still too large for mini devices because of its size and because it requires an operating system to run.
.NET Micro Framework is the smallest version of those frameworks. It removed more libraries and it became OS independent. Because of the similarity among these three frameworks, almost the same code can now run on PCs and small devices, with little or no modifications.
For example, using the serial port on a PC, WinCE device or FEZ works the same way, when using .NET.
5.2. What is C#?
C and C++ are the most popular programming languages. C# is an updated and modernized version of C and C++. It includes everything you would expect from a modern language, like garbage collector and run-time validation. It is also object-oriented which makes programs more portable and easier to debug and port. Although C# puts a lot of rules on programming to shrink down the bug-possibilities, it still offers most of the powerful features C/C++ have.
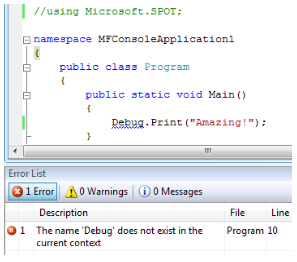
“Main” is the Starting Point
Like we seen before, programs always start at a method called Main. A method is a little chunk of code that does a certain task. Methods start and finish with open/close curly brackets. In our first program, we only had one line of code between our curly brackets.
The line was Debug.Print("Amazing!");
You can see how the line ends with a semicolon. All lines must end the same way.
This line calls the Print method that exists in the Debug object. It calls it while passing the string “Amazing!”
Confused? Let's try to clear it out a bit. Let's say you are an object. You also have multiple methods to control you, the object. One method can be “Sit” and another can be “Run”. Now what if I want you to “Say” amazing? I will be calling your speak method with the sentence (string) “Amazing!”. So the code will look like:
You.Say(“Amazing!”);
Now, why do we need the quotes before and after the word Amazing? That is because C# doesn't know if the text you are writing is actually a command or it is actually text (strings). You can see how it is colored in red when you add quotes, which makes reading code easier for us, humans.
Comments
What if you want to add comments/notes/warnings in your code? Those comments will help you and others understand what the code means. C# completely ignores these comments. There are 2 ways to create comments, line comments and block comments. Comments (Ignored text) are shown in green.
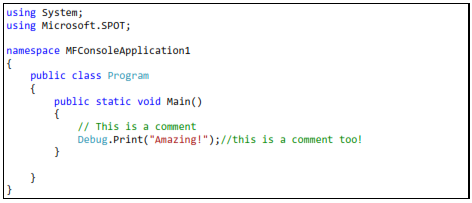
To comment a line, or part of a line, add // before the comment text. The color of the text will change to green indicating that the text is now comment and is ignored by C#.
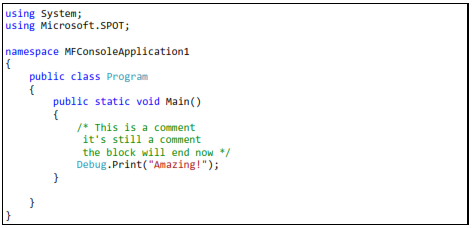
You can also comment a whole block. Start the comment with /* and then end it with */ symbols
while-loop
It is time for our first keyword, “while”. The while-loop starts and ends with curly brackets to contain some code. Everything inside will continuously run while a statement is true. For example, I can ask you to keep reading this book “while” you are awake!
So, let's make a program that continuously prints “Amazing!” endlessly. This endless loop has no ending so it will always be “true”.
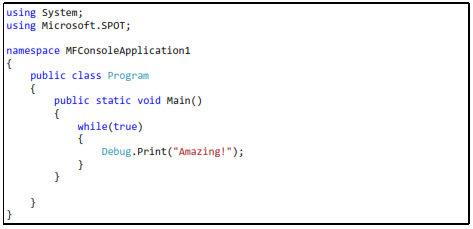
In the code above, execution will start at the “Main” method as usual and then it will go to the next line, which is the while-loop. The while-loop is telling the run time to execute the code inside its brackets while the statement is “true”. Actually, we do not have a statement there, but we have “true” instead which means this loop will always run.
Do not hit F5 to run the program or you will flood the output window with the word “Amazing!”. Instead, hit F11 and step in the code to understand how the loop works. Note that this program will never end so you will need to force stop using shift+F5.
Note: You can reach all these debug shortcuts from the menu under Debug.
Variables
Variables are places in memory reserved for your use. The amount of memory reserved for you depends on the type of the variable. I will not cover every single type here but any C# book will explain this in details.
We will be using an int variable. This type of variable is used to hold integer numbers.
Simply saying:
int MyVar;
will tell the system that you want some memory reserved for you. This memory will be referenced to as MyVar. You can give it any name you'd like, as long as the name doesn't contain spaces. Now, you can put any integer number into this memory/variable.
MyVar = 1234;
You can also use mathematical operations to calculate numbers:
MyVar = 123 + 456;
or you can increment the number by one:
MyVar++;
or decrement it by one:
MyVar- -;
With all that, can we make a program that prints the word 'Amazing!' three times. Here is the code
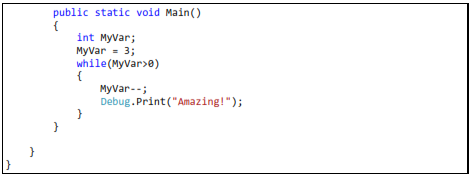
Notice how the while-loop statement is not “true” anymore, but it is MyVar>0. This means keep looping as long as MyVar's value is greater than 0.
In the very first loop MyVar is 3. Inside every loop, we decrement MyVar by one. This will result in the loop running exactly three times and therefore printing “Amazing!” three times.
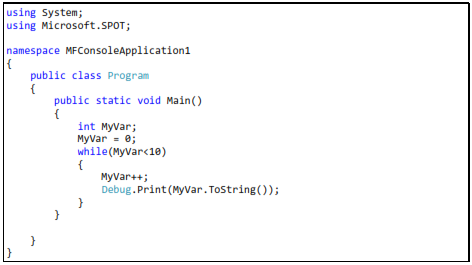
Let's make things more interesting. I want to print the numbers 1 through 10. OK, we know how to make a variable and we know how to increment it but how do we print a number to the debug output window? Simply giving MyVar to Debug.Print will give you an error and it won't work. This is because Debug.Print will only accept strings, not integers. How do we convert an integer variable “ToString”? It is very simple, call MyVar.ToString(). That was easy!
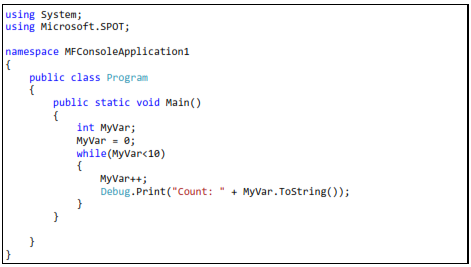
Last thing to add is that we want to make the program print
Count: 1
Count: 2
...
...
Count: 9
Count:10
This can be easily done by adding strings. Strings are added using the + symbol just like how you would add any numbers.
Try the following code
Assemblies
Assemblies are files containing compiled (assembled) code. This allows developers to use the code but they don't have access to the assemblies source code. We have already used Debug.Print. Who made the Debug class/object and who made the Print method that is in it? Those are made by the NETMF team at Microsoft. They compile the code and give you an assembly to use it. This way, users are not messing with the internal code but they can still use it.
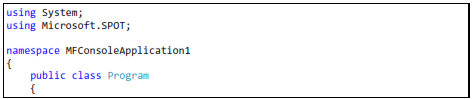
At the top of the code used before, we see using Microsoft.SPOT;
This tells C# that you want to use the “namespace” Microsoft.SPOT. Okay, but what is a namespace? Programs are split into regions or “spaces”. This is very important when programs are very large. Every chunk of code or library is assigned a “name” for its “space”. Programs with the same “namespace” see each other but if the name space is different then we can optionally tell C# to “use” the other name space.
The “name” for our program's “space” is namespace MFConsoleApplication1
To “use” another name space like "Microspft.SPOT" you need to add using Microsoft.SPOT;
What is SPOT anyways? Here is a short story! A few years ago, Microsoft privately started a project called SPOT. They realized that this project was a good idea and wanted to offer it to developers. They decided to change the product name to .NET Micro Framework but they kept the code the same way for backwards compatibility. In short, SPOT is NETMF!
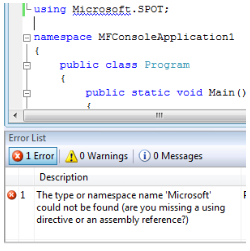
Back to coding, now try to remove or comment out using Microsoft.SPOT; and your code will not work anymore.
Here is the error message shown after I commented out using Microsoft.SPOT;
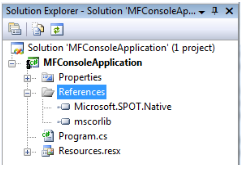
We used the assemblies but where are they added?
Uncomment the code and make sure it still works. Now take a look at the “Solution Explorer” window. Click the little + sign by the word “References” and you should see two assemblies.
Now, right-click on “Microsoft.SPOT.Native” then click “Remove”
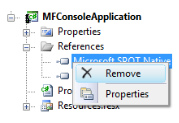
Our program will still be exactly the same as before, but now it's missing a very important assembly. Try to run it and you will see something like this
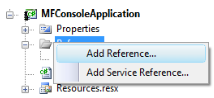
Let's add it back and make sure our program still runs. Right click on the “References” folder and select “Add Reference...”
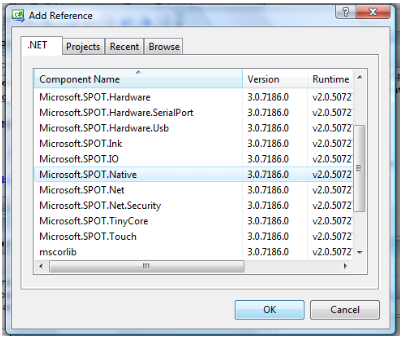
In the new window, select “.NET” tab and then select “Microsoft.SPOT.Native” and click OK.
Run the program to make sure it's working again. If you have any errors, please go back and repeat the steps to fix it before moving on.
What Assemblies to Add?
Throughout this book, I provide many examples but I do not tell you what assemblies I am using. This is really easy to figure out from the documentation but you may find it difficult sometimes. Why not just add them all? As a beginner, your applications are still very small so you will have a lot of memory even if you add all of the assemblies, even if you are not using them.
The assemblies below are most commonly used. Add them for all of your projects for now. Once you know where everything belongs, you can start removing the ones you don't need. These assemblies do not include the ones needed for networking or graphics.
Microsoft.SPOT.Hardware
Microsoft.SPOT.Native
Microsoft.SPOT.Hardware.SerialPort
Microsoft.SPOT.Hardware.OneWire
Microsoft.SPOT.Hardware.PWM
Microsoft.SPOT.IO
mscorlib
System
System.IO
If a sample code did not compile with an error about a missing assembly then please check the library documentation for the name of the assembly (DLL) needed.
Threading
This can be a very advanced topic. Note that only very basic information is covered here.
Processors/programs only run one instruction at a time. Remember how we stepped in the code? Only one instruction got executed and then the flow went on to the next instruction. Then how is it possible that your PC can run multiple programs at the same time? Actually, your PC is never running them a once! What it is doing is running every program for a short time, stops it and goes on to run the next program.
Generally, threading is not recommended for beginners but there are things that can be done much easier using threads. For example, you want to blink an LED. It would be nice to blink an LED in a separate thread and never have to worry about it in the main program.
Also, adding delays in the code require the threading namespace. You will understand this better in upcoming examples.
By the way, LED stands for Light Emitting Diodes. You see LEDs everywhere around you. Take a look at any TV, DVD or electronic device and you will see a little Red or other color light bulb. These are LEDs.
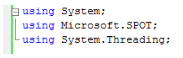
Add “using System.Threading” to your program.
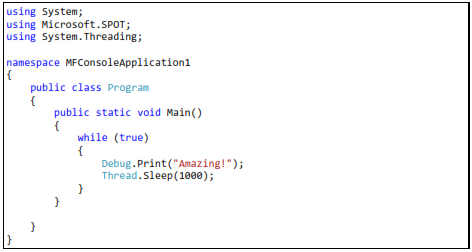
That is all we need to use threads! It is important to know that our program itself is a thread. On system execution start-up, C# will look for “Main” and run it in a thread. We want to add a delay in our thread (our program), so it will print the word 'Amazing!' once every second. To delay a “thread”, we put it to “Sleep”. Note that this “Sleep” is not for the whole system. It will only “Sleep” the “thread”.
Add:
Thread.Sleep(1000);
To our While-loop.
The “Sleep” method takes time in milliseconds. So, for 1 second we will need 1000 milliseconds.
Try to run the program and look at the output window. If you've tried it on the emulator and it wasn't exactly 1 second, don't worry about it. Try it on real hardware (FEZ) and it will be very close to 1 second.
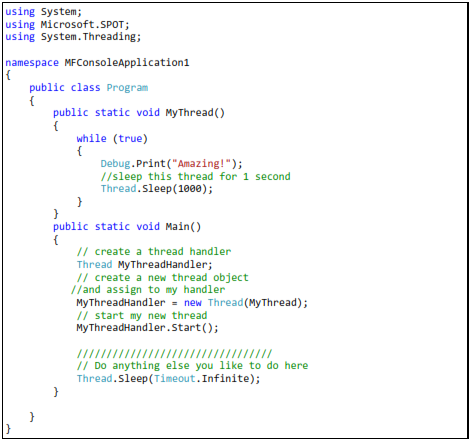
Let's create a second thread (our first was automatically created, remember?) We will need to create a new thread object handler (reference) and name it something useful, like MyThreadHandler. And create a new local method and name it MyThread. Then, run the new thread.
We are not using the “Main” thread anymore so I will put it in an endless sleep.
Here is the code listing. If you don't understand it then don't worry about it. All that is needed at this point is that you know how to “Sleep” a thread.