Working with sensor, temperature humidity
now it's time to bring out the breadboard, wires you purchased for iot prototyping
the sensor i used is Sivy DHT11, sensor which i bought it from amazon , it has 3 pins
it looks like this
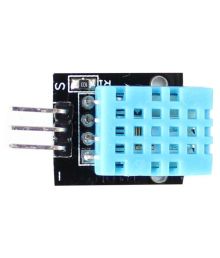
notice the marks at the end of the pin, S and -, we are going to start pining from -
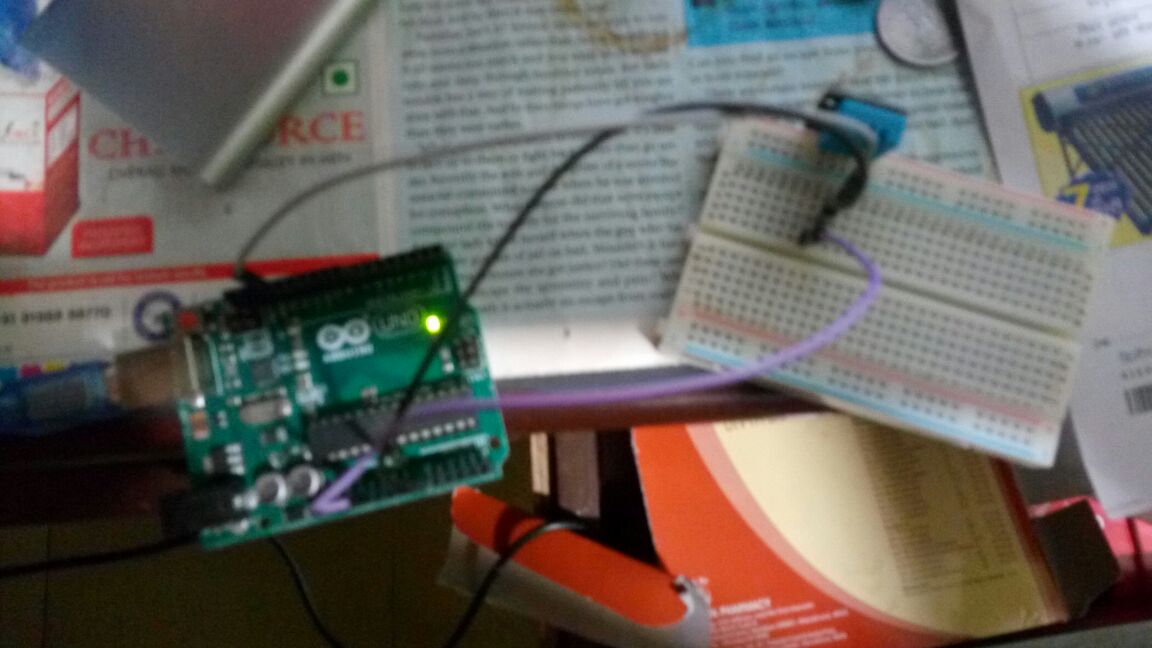
this is how i designed
now erase the program of blinky from your arduino
===== code starts================
void setup() {
// initialize digital pin LED_BUILTIN as an output.
}
// the loop function runs over and over again forever
void loop() {
// wait for a second
}
===== code ends================
have these functions empty and then upload those sketches, done now?
now when you are using breadboard, you need to learn some of the things about breadboard, the line from blue, they are connected vertically, check on the last slot i have put the sensor, and on another i have plugged wires, because they are connected line by line vertically.
temperature sensor has 3 pins, i am starting from negative, negative pin i am connecting through wire to gnd pin on arduino board, and 5 volts pin iam connecting it to the positive pin of the sensor, and A0 pin of arduino board iam connecting it to the middle pin of weather sensor,
thats it, its done, check out the image i posted above, how to pin the wires to the sensor and the board, make sure pins are properly inserted and in proper line, so they are in the same flow.
now add the code there, make a sketch(code) to upload to the arduino board
i have uploaded the code and library required on my blog
http://www.aminnagpure.com/2016/06/internet-of-things-ebook-for-free.html
======== code starts here====
#include <dht.h>
#define dht_apin A0 // Analog Pin sensor is connected to
dht DHT;
void setup()
{
Serial.begin(9600);
delay(500);//Delay to let system boot
Serial.println("DHT11 Humidity & temperature Sensor\n\n");
delay(1000);//Wait before accessing Sensor
}
//end "setup()"
void loop()
{
//Start of Program
DHT.read11(dht_apin);
Serial.print("Current humidity = ");
Serial.print(DHT.humidity);
Serial.print("% ");
Serial.print("temperature = ");
Serial.print(DHT.temperature);
Serial.println("C ");
delay(5000);//Wait 5 seconds before accessing sensor again.
//Fastest should be once every two seconds.
}
// end loop()
==================== code ends here ====================
now that you have run the code, error will occur, because you have not added the library
Menu/Sketch/Include Library/Add .Zip Library
iam pasting an image on how to add library to your code file

now once you add the library, your code will be working, then upload your code to the arduino board, and voila your work is done here.
to check the results, we need to click on serial monitor, which is at extreme right of the arduino software IDE.

there you will see results, like this
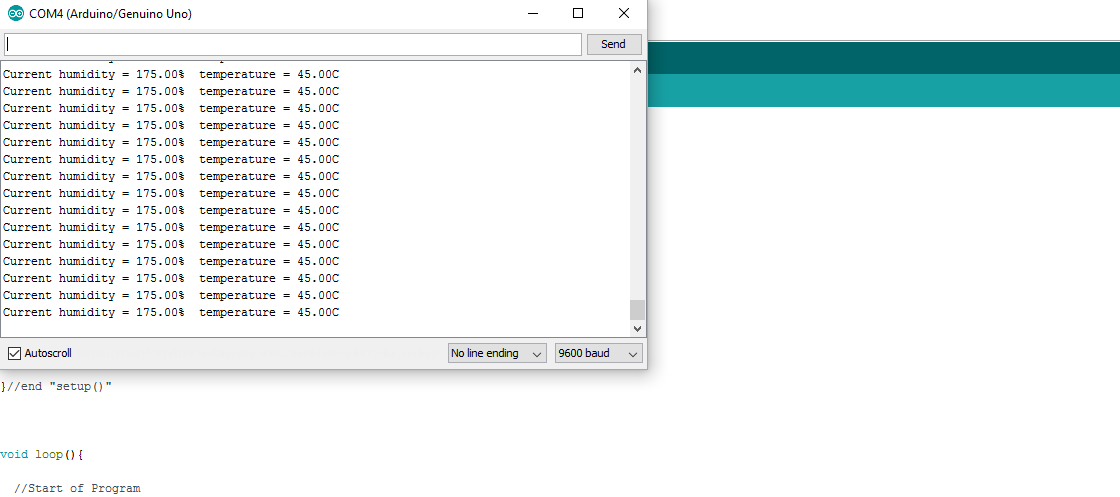
that's great, everything is done and the code is working
now sending data to the cloud