Now let's Start doing our own sample basic project, we will be using arduino uno device, you can buy that from amazon.com.
when you buy, buy the original, make sure there is a golden mark just besides the USB socket, if it is golden then that's the original, rest clones will have blue, green mark.
best part of arduino is it is open source, you can make your own arduino board by purchasing separate parts of it and then assembling it.
arduino “UNO” has two microcontrollers.
arduino uno has its own details, i will explain some of them, or you can buy ebook about arduino, after you purchased arduino, take a photograph of it from your mobile phone, so that you can enlarge it and see the details
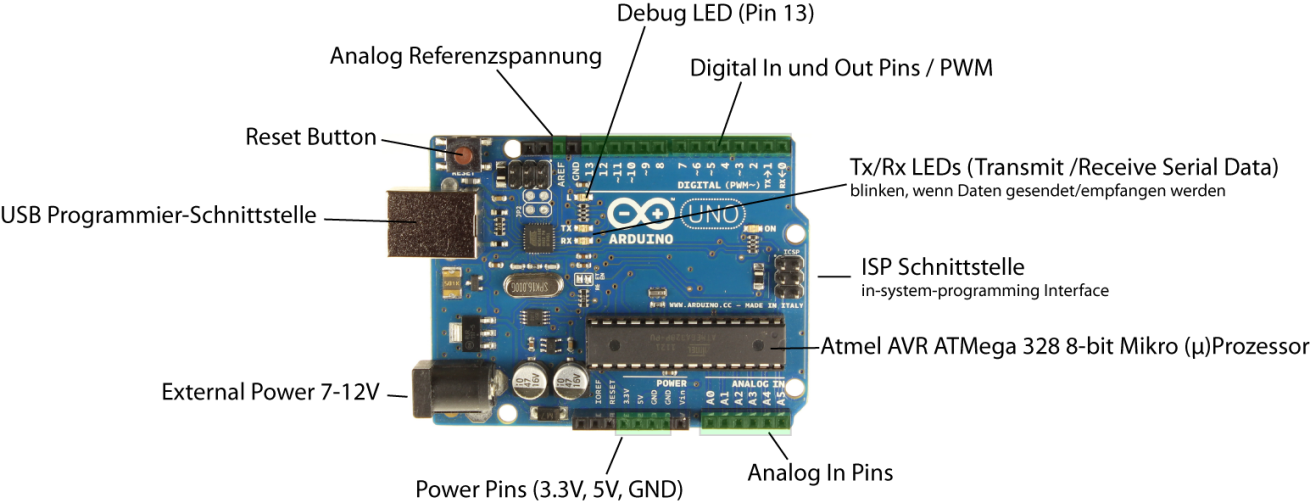
details check out the image of the arduino board, it has some details explained, best thing to do is search for image on google with details of arduino uno board, it will explain, and also take photograph of your arduino board and zoom it to see more details.
it is programmed with bootloader program in the microcontroller memory, it is basic C, you can write c programs and upload it on the microcontroller
look at the usb port in arduino, there you will plug your USB cable and connect it to your computer
Arduino comes with its development IDE, you can download it from
it is very easy to use software with example code in it. in fact it is way too easy to get started, once you connect your arduino board to computer and run the arduino IDE, it will self select type of board and port connected to it.
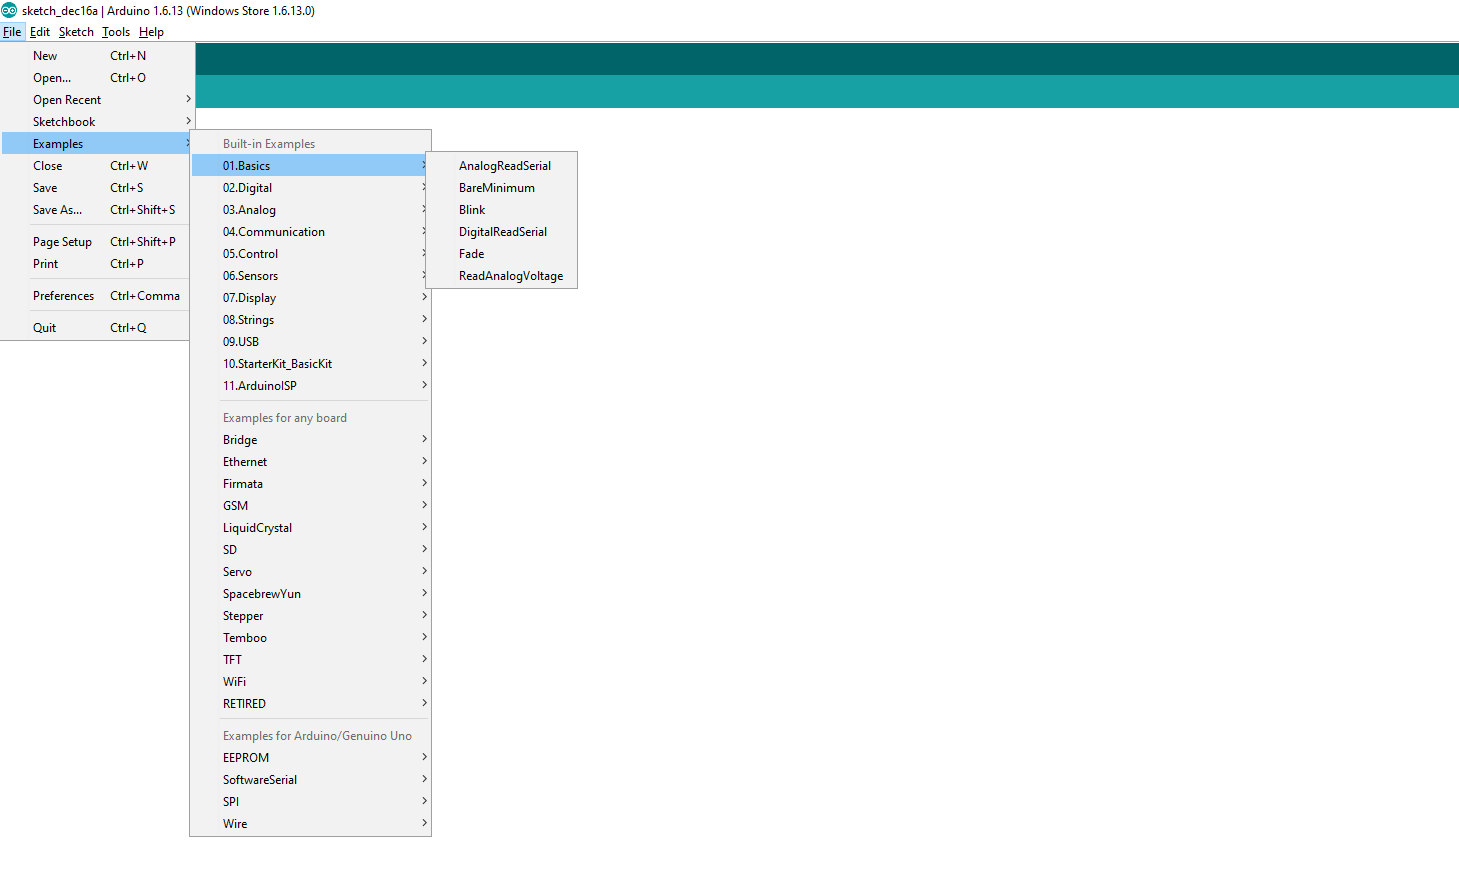
the above image shows types of examples available for arduino board, just select any of these and it will load the code needed to it.
now we are going to do a very simple project of blinky, we are going to select if from the examples provided by the software, below is the image how to select example of blinky.
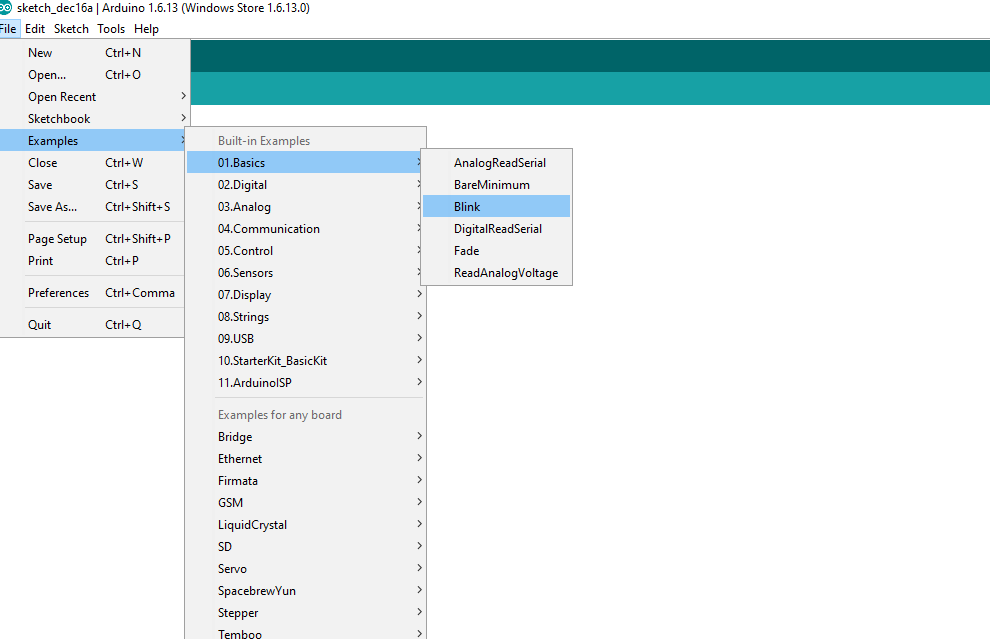
you are going to go into file menu/examples/01 basics/blink
it will load the sample code in the IDE, code will look like this
==== code starts==========
void setup() {
// initialize digital pin LED_BUILTIN as an output.
pinMode(LED_BUILTIN, OUTPUT);
}
// the loop function runs over and over again forever
void loop() {
digitalWrite(LED_BUILTIN, HIGH); // turn the LED on (HIGH is the voltage level) delay(1000); // wait for a second
digitalWrite(LED_BUILTIN, LOW); // turn the LED off by making the voltage LOW
delay(1000); // wait for a second
}
===========code ends==========================================
in the setup function, we are specifying pinmode, that is led light built in the Arduino board, the above code will blink the arduino built in light.
in the loop function, which will be running continuously we are specifying to light it, then wait for 1 second and then again light it.
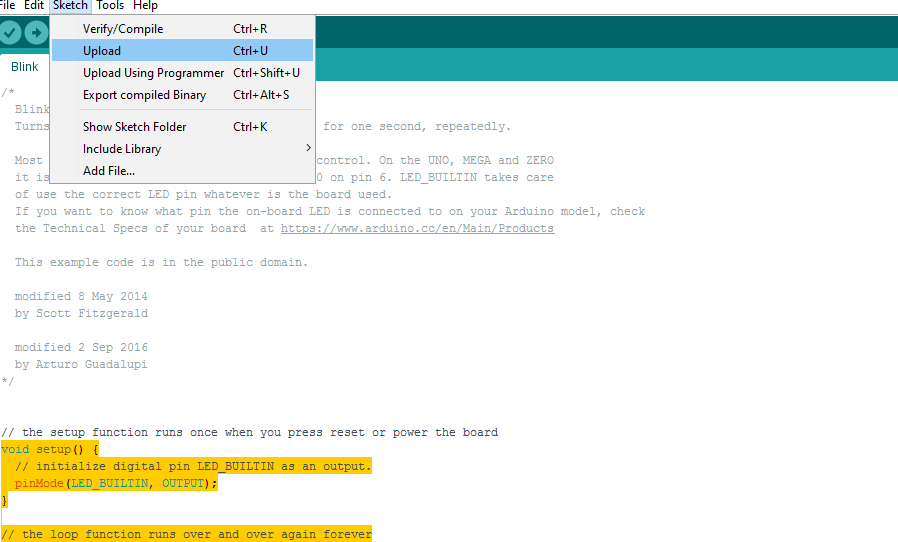
iam pasting the image, on how you are going to upload it to your board.
here we go
Sketch/Upload
but before uploading sketch/verify/compile to check your code for errors and then upload.
this was your first program a very pretty basic example to get hang on arduino board.
there are only five constructs available to program on arduino boards
setup is the construct which runs only once.
loop is the construct which continuously runs.
pinmode is the construct which we use to specify input output pins.
digitalwrite is used when we are going to write to a specific port.
delay construct is like sleep in programming.
there are also libraries available for arduino board, which can be used if you have any sensors on the board.