Top 5 Google Analytics Pro-Tips
What we’ve mentioned so far should be enough to get you started with Google Analytics. At this point, you can imagine how immensely flexible and multifaceted this tool can be. To make the most of your first experience with Google Analytics, follow the pro-tips listed below.
 Set Up Shortcuts and Dashboards
Making your way through the countless reports may seem like a tedious process. Luckily, there are smarter ways to deal with routine checks. Whenever you find yourself using the same report over and over again, just add it to your shortcuts. To do this, find the Shortcut button in the menu located directly above your report. This way, you can add the report to the Shortcut menu in your sidebar.
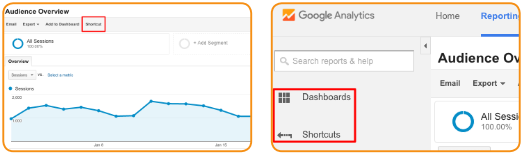
Dashboards provide another great tool for organizing your reports. Go to Dashboards menu and click+ New Dashboard to organize several reports on one screen.

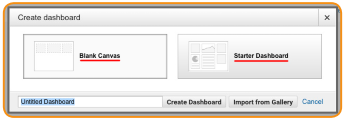
You can use a Blank Canvas or a Starter Dashboard that comes pre-loaded with some basic reports:
 Leave the All Website Data View Alone
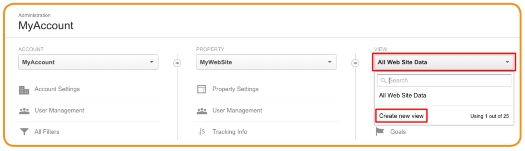
All Website Data is the default view that you get after creating a Google Analytics account. Some people consider it a good practice to leave this view unaltered. Instead of amending it, create a new view for any filtered reports by clicking on All Website Data  Create New View:
 Don’t Track Yourself
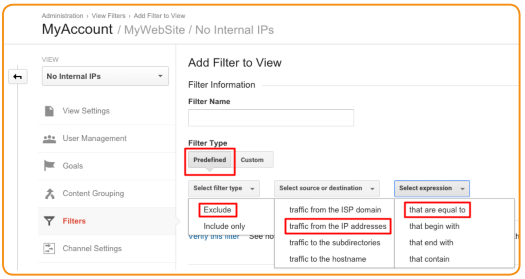
If you plan to create a site for your business, the visits from your employees or colleagues will mix with the visits from your customers. To avoid distorting your data, exclude your own IP (or IPs) from your reports.
You can do this by going to Filters  +ADD FILTER Predefined Select Filter Type Exclude.. You also need to press Select source or destination and click on select traffic from the IP addresses. In the Select expression field select that are equal to:
If your company uses a subnet of IP addresses, follow the steps described in the manual from Google.
 Get Rid of 404 Errors
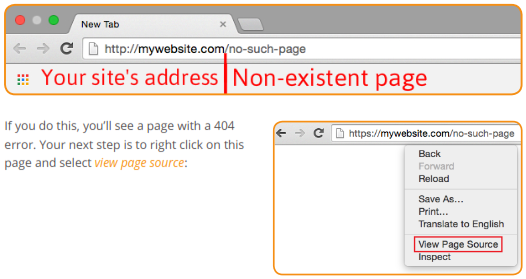
To put it mildly, 404 errors are bad for your site’s user experience and SEO. The good news is Google Analytics can help you track pages with 404 errors and fix them in no time. To do this, you’ll need to set up a custom Behaviour report. Start with going to your site and typing a non-existent URL into the search bar of your browser. Don’t forget to hit the Enter key:
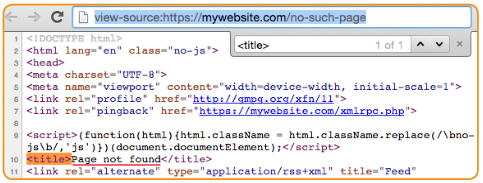
What you’ll see next, is, essentially, a huge pile of code. While this might seem intimidating to a non-programmer, your task is pretty simple: press Ctrl+F (or Command+F) and type "<title>" into the search bar. This way, you will highlight the <title> tag in your HTML. Now, copy the text between <title> and </title>:
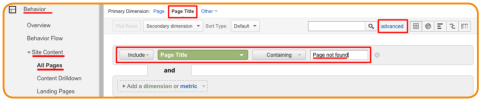
Did the previous step make you feel like a real hacker? Now, go to your Google Analytics account and select Reporting  Behavior Site Content All Pages and click on Page Title. After that, click on Advanced,, select Include Page Title Containing,, and paste the text you’ve copied into the input field. Finally, you need to click on Apply::
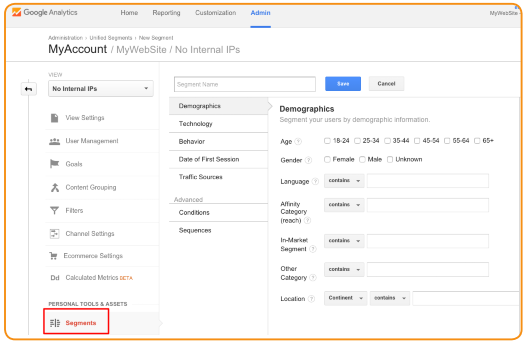
 Segment Your Audience
Some websites have multiple target audiences. This means that in some cases you’ll need to distinguish between people belonging to particular age or gender groups, desktop and mobile users, etc. To do this, go to Admin Segments + NEW SEGMENT and have a look at the criteria that you can apply to your target audience: