CHAPTER 8
Thunderbird and Enigmail
Mozilla Thunderbird is an email client similar to Microsoft Outlook, and Enigmail is an addon of Thunderbird that brings encryption to it. Both softwares are software libre and they are distributed completely free of cost, so you can easily obtain them online.
8.1. Installation
The first step to use both programs is to install them. In this section we cover Mozilla Thunderbird installation in Microsoft Windows and *NIX distributions, but it is also available to other systems such as Apple OS X.
8.1.1 – Windows Installation
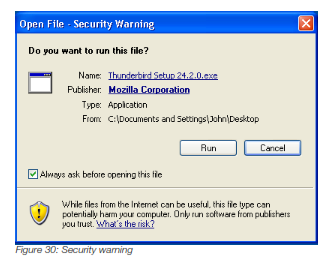
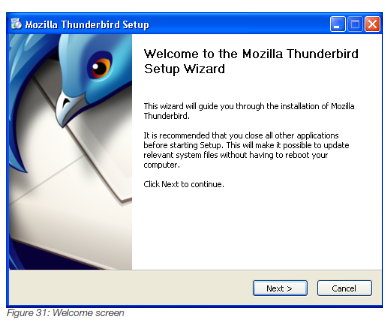
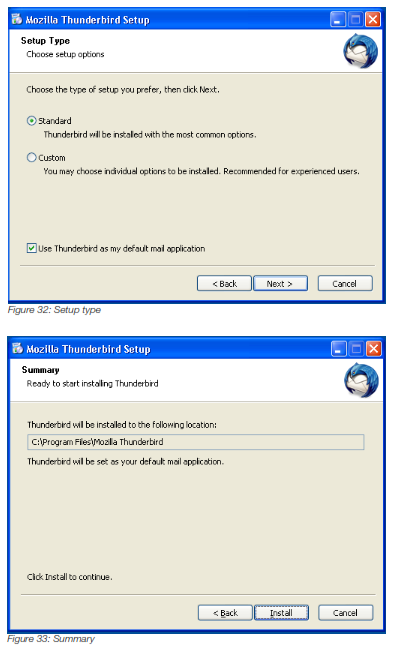
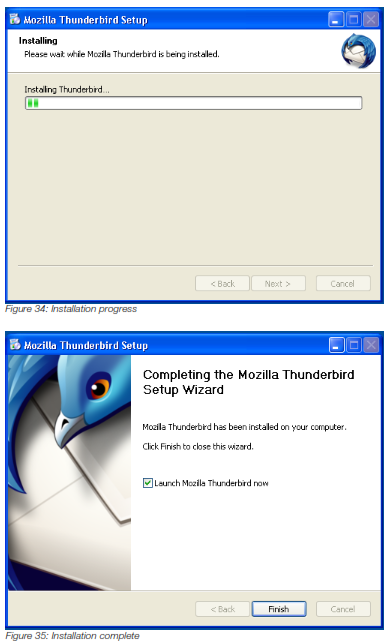
1 – Download Thunderbird
Mozilla Thunderbird can be downloaded from the official Mozilla website:https://www.mozilla.org/Thunderbird

2 – Install Thunderbird
Thunderbird installation is a very straightforward process, as indicated below:
8.1.2 *NIX installation
Below are the commands for the most common *NIX distributions:

8.2. Configuring your e-mail account
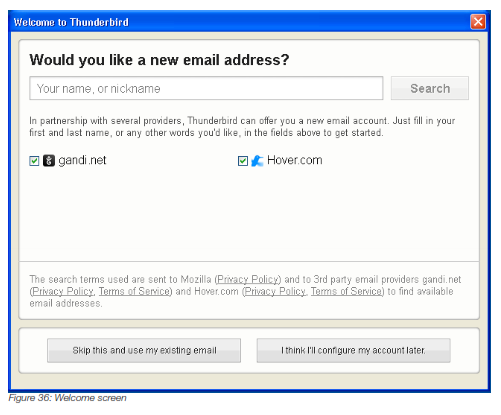
Open Thunderbird and in the Welcome screen click on button Skip and use my existing email.
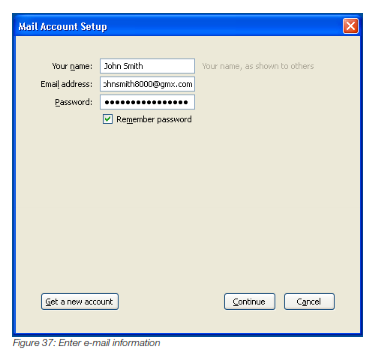
Enter your name, email address and email password in the fields below. You are configuring an account to be used with the key pair you created in chapter 6, so use the same email address you have created your key for. Check 'Remember password' if you want that Thunderbird automatically remembers your password every time you open it.
When you are done click on Continue button.
Thunderbird automatically tries to guess the correct configuration for your email account. It usually gives you two choices: IMAP and POP3. We recommend that you use IMAP.
If for any reason Thunderbird cannot set up your account correctly, or you would rather use a different configuration, then click on the button Manual config to manually insert the custom configuration. In this case you can check the help section of your email provider, they usually offer instructions on how to use accounts with other email clients like Thunderbird.
When you are finished click on Done button.

That's it, your account is now created. Now you will be taken to Thunderbird's main screen where your messages will be synchronized with the ones you have in your webmail. If you are using IMAP your messages will remain stored in your email provider, so you can still access them from other computers or from the web browser.
If you wish to have the old menu bar just rightclick on menu area in Thunderbird and choose Menu bar, as shown in the images below.
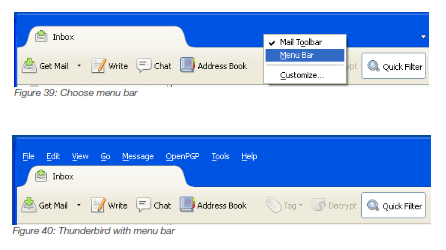
That's it, now you have the old menu bar.
8.3 Configuring Enigmail
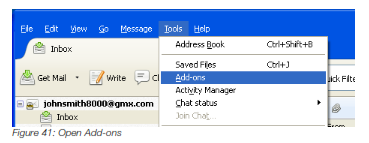
1 – Open Add-ons
Click on menu Tools → Addons. In *NIX systems this is changed to Edit → Preferences.
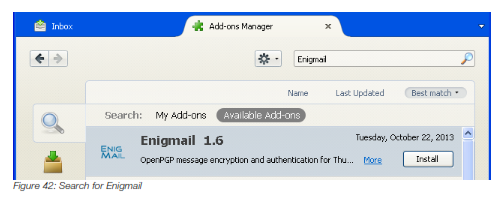
2 – Search for Enigmail
In the search field on the upper right corner enter Enigmail and press  .
.
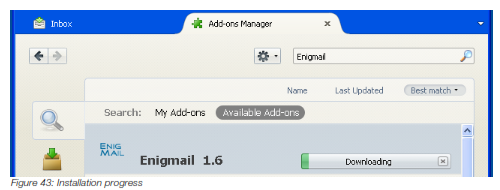
3. Install Enigmail
Click on Install button and wait until the installation finishes.
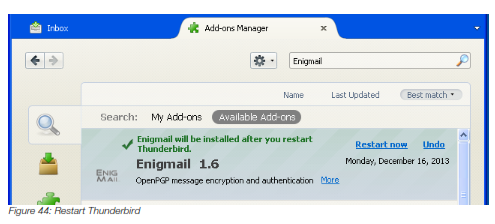
4. Restart Thunderbird
Click on Restart now button, or close and open Thunderbird again.
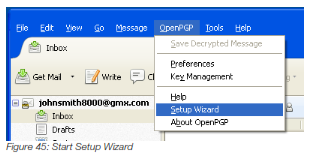
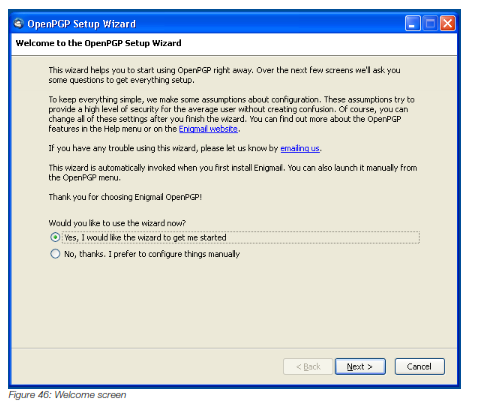
5. Start the Wizard
Click on OpenPGP menu and choose Setup Wizard. When the Wizard pops up select the first option 'Yes, I would like the Wizard to get me started' and click on Next.
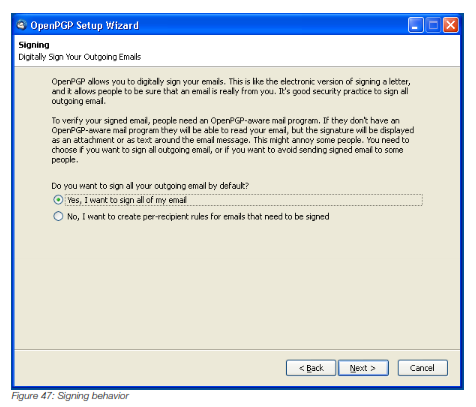
6. Choose signing behavior
It is a good practice to sign all outgoing emails, so we will choose this option.
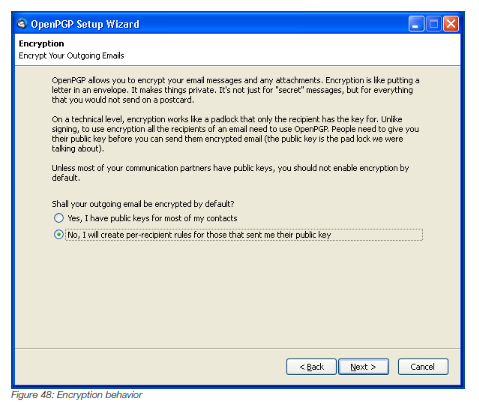
7. Choose encryption behavior
You can choose between encrypting all outgoing emails by default, or creating custom rules for each one of your contacts. You should only choose the first option if you have the public key of all or almost all your contacts, otherwise choose the second option.
Here we will choose the second option because we don't have the public keys of our contacts, and we want to create custom rules for each one of them.
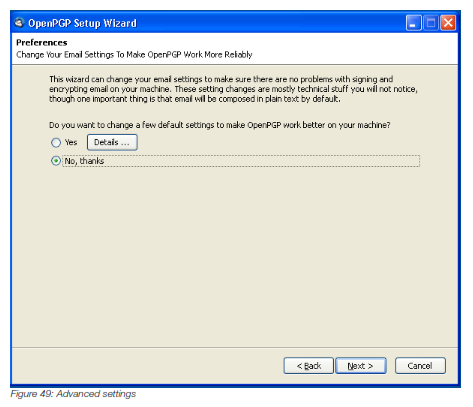
8. Preferences
Here you can change advanced settings of encrypting and signing behavior. We will use the default configuration, so leave it the way it is and select the second option.
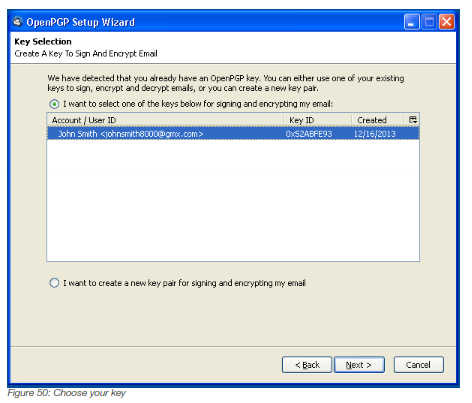
9. Choosing your private key
Now you will choose the key that you will use with your emails. If you have created your key in chapter 6 it should appear here now, so you can choose it. If you have multiple keys, select the one you are configuring your account to.
It is possible to create a key pair through Enigmail instead of using Kleopatra, Seahorse or the command line, but we prefer the other methods because Enigmail may sometimes present bugs in this process.
11. Conclusion
Here will be presented a summary. Click Next button.
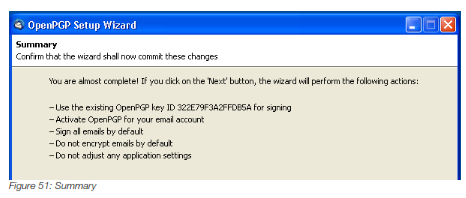

That's it, Enigmail is now installed and ready to be used with encrypted emails.
8.4. Testing messages
1 – Write a message
Now let's do a test, you will write a message to one of your contacts and send your public key to him, and request his public key. Your message will not be encrypted because you do not have his public key. Your message will be signed, but he will probably not notice it because he may not use GnuPG, neither Thunderbird.
In Thunderbird go to menu File → New → Message, or press  to write a new message.

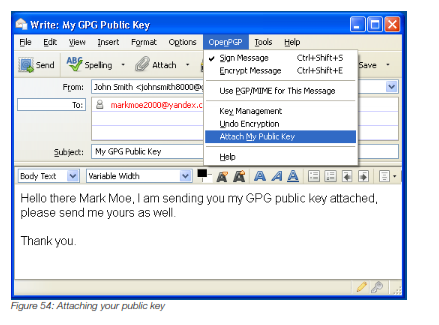
2 – Attach your public key
To attach your public key just go to OpenPGP menu and select Attach My Public Key. Initially you will notice nothing different on screen, but when you click on Send you will see your key showing as an attachment on the right side of the screen.
To attach another public key, or more than one public key, click on OpenPGP menu and select Attach Public Key. This way the attachment board will appear on the right side.
NOTE: This second option will only be available if Enigmail is set to display advanced configurations, otherwise you will not be able to access it (as in the image below). To do it, in Thunderbird's main window click on OpenPGP menu and select Preferences, and click on button Show Advanced Preferences.
3 – Send the message
Just click on the Send button to send the message.
If the OpenPGP Prompt pops up as in the image below, select last option to use PGP/MIME and check the box below to use this method from now on.

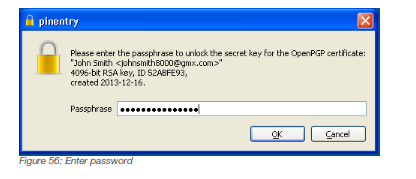
Enter the password of your key if requested.
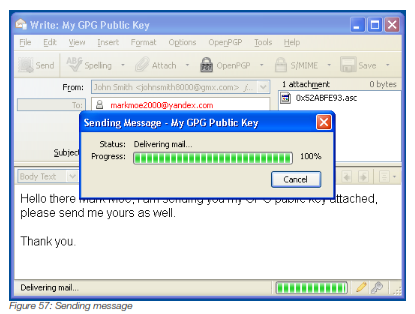
That's it, your message has been sent. Now your contact must send his public key as well, which will be done in next step.
8.5 Importing public key
1 – Verify the answer
After you have sent your public key to your contact in the previous step, let's consider that the person decided to use GnuPG too, so he created a key pair for himself, replied your message and attached his public key as well. It would look similar to the image below:
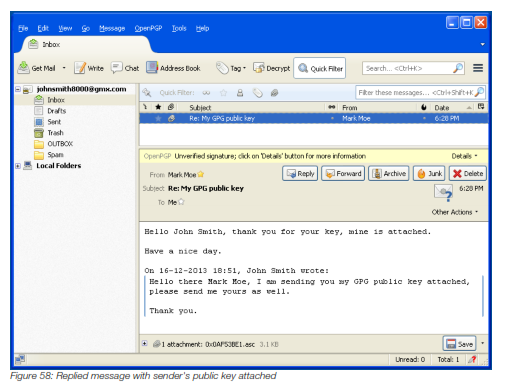
Your contact also signed the message with his private key, but since you have not imported his public key yet, you see the yellow bar prompting “Unverified signature”.
2 – Import the public key
After receiving the public key attached on the message you have to import it. Rightclick on the file's name and select Import OpenPGP Key.

A confirmation message will be prompted showing a summary of the imported key. Just click OK to proceed.
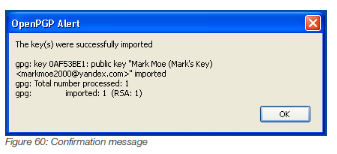
That's it, your key is now imported.
Now you will notice that the yellow bar turns blue and it says the signature is good and untrusted (if nothing happened and the bar is still yellow, try clicking on another folder or message, and then selecting his message again).
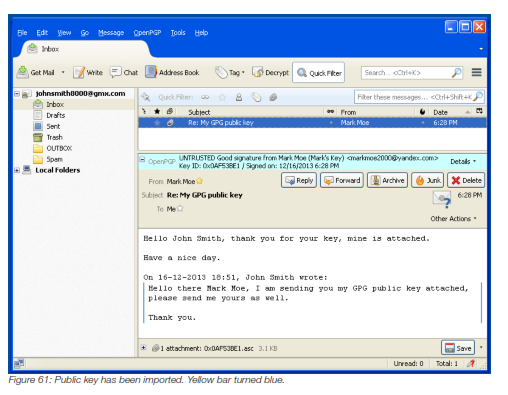
It says the signature is good because Thunderbird can now compare the signature in the message with the key you have imported, and it is correct, which means that the message is really from whom it claims it is (your contact).
It says it is untrusted because you have not defined the trust level yet, which you will do in section 8.6, but before doing it you need to verify the key's fingerprint.
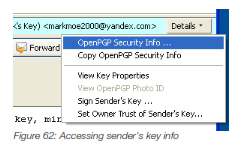
3 – Verify the key's fingerprint
Click on the Details button on the blue bar and select OpenPGP Security Info.
It will pop up a window similar to the one below, showing details about his key.
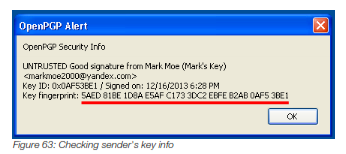
The number highlighted in red is the key fingerprint. You should verify this number with your contact. This number is the only guarantee that you have received the correct key, and it was not modified along the way by an attacker or an intruder. Both of you should have the same number.
When you send your public key to others (as you did in section 8.4), they should also verify your key's fingerprint with you.
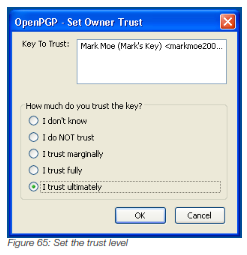
8.6 Setting trust level
The trust level is a value you define for each public key you have in your keyring of how much you trust the key's owner. For example: if a work colleague sends you his public key by email, you verify the key's fingerprint with him and it is correct, then you can set the trust level to ultimately.
However if you obtain someone else's key from a dubious website or key server, and you cannot contact the owner to verify the key's fingerprint then you should choose a lower trust level for that key.
The trust level is a local classification and the key's owner will not know the value you have assigned to their key.
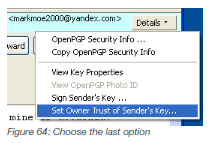
Click on Details button on the blue bar and select Set Owner Trust of Sender's Key.
Now set the trust level you have on the sender's key.
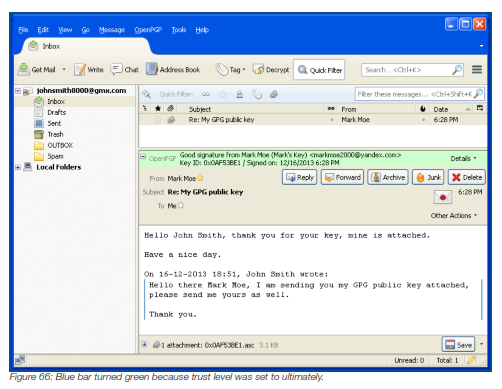
If you have set the trust level to ultimately, you will notice that the blue bar now becomes green and it says trusted. In our example below the bar is expanded. You can expand it by clicking on the '+' (plus) sign at the left.
8.7 Setting rules for your contacts
Rules are basically a combination of keys, email addresses and actions (encrypting, signing, attaching) that you set for your contacts (or recipients). It is through rules that Thunderbird and Enigmail know how to behave with the recipient.
Enigmail is flexible and allows you to create very customized rules, but for simplicity sake all our rules will be the same for every recipient. You can modify them if you want.
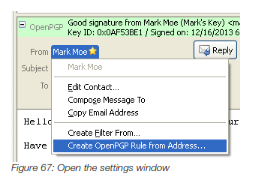
1 – Open the settings window
Click on the name of your contact and select Create OpenPGP Rule from Address.
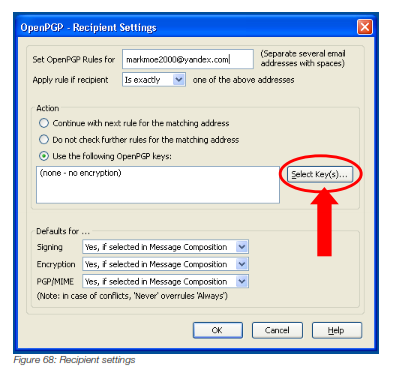
2 – Select the right key
An advanced configurations window opens up. It shows your contact's email address on top, which is the recipient you are creating a rule for. Ensure the second field is selected 'Is exactly'. You can leave all configurations the way they are for the moment. Click on Select Keys button.
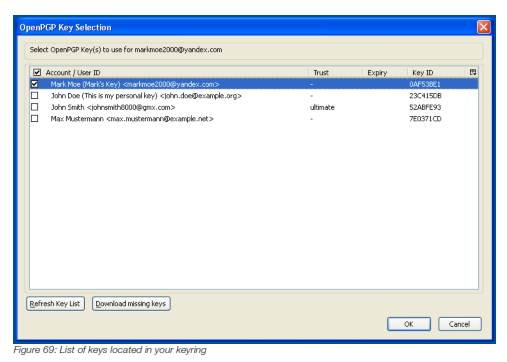
A new window pops up showing the public keys you have in your keyring. Choose the contact's public key you are setting the rule for, and then click OK.
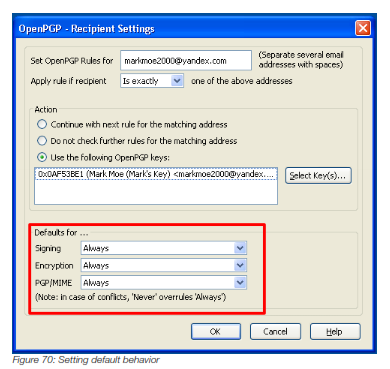
3 – Set default behavior
Now you can see the field Action shows the key you have chosen in the previous step.
In the field “Defaults for...” set all fields to Always, as shown in the image below. This means that for this recipient you are setting the rule for, all messages will be sent always signed, always encrypted, and attachments will always be treated as PGP/MIME.
When you are done click on OK button.
Now the rule is set for this recipient. Every time you obtain someone else's public key all you have to do is to repeat the process of this section and make the necessary adjustments.
Although rules can be customized a lot, keep in mind that the current configuration shown in this section is one of the safest possible.