CHAPTER 7
Create a key pair
A key pair is the basic element of public key cryptography and it consists of a private key and a public key. They are necessary for you to communicate securely with other users. Here we explain how to create a key pair in three different ways: text mode (works in both systems) and graphical mode (separate versions for Microsoft Windows and *NIX systems).
7.1 Text mode
1 – Start GnuPG key generation wizard
Type the command below to start the GnuPG key generation wizard.

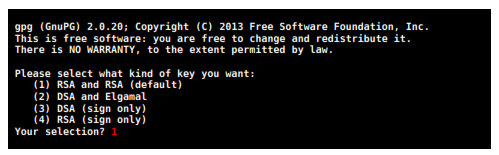
2 – Choosing the key type
The first step is to choose the type of key you want. We will choose the first option which is the default option, RSA and RSA. Enter 1 and press. 
3 – Choosing the key length
Now you will choose the length of your key. As a general rule, the larger the length of the key, the more secure and harder it is to crack it, so we will choose 4096 bits which is the maximum allowed. Enter 4096 and press.

4 – Choosing the expiry of the key
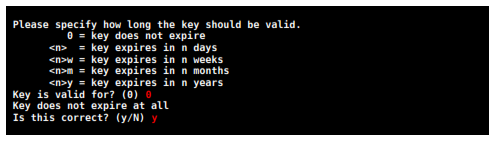
The key may have an expiry that ranges from days until years, or simply not have any expiry at all. To create a key with expiry just follow the example below:
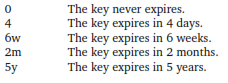
You can choose the period that is more adequate to your needs by following this pattern, just change the values accordingly. It is always possible to change the values later.
In our case we will make a key without expiry, so enter 0 (zero) and then press Y to confirm.
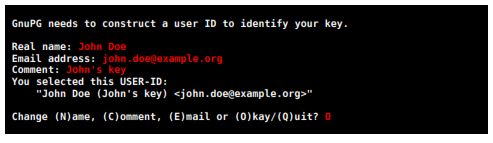
5 – Entering personal data of the key
Here you will enter your data as shown below. They will be used to create your key and will be associated with it. The comment is optional.
If you have more than one email address you can associate them later to your key, instead of having to create a new key pair for each email address. When you finish type O (letter O) and press  to confirm.
6 – Entering your password
This is one of the most important steps of the whole process. The strength and security of your key are directly related to your password. There is no point in using the best encryption system in the world if you use a weak password, so choose a VERY STRONG password!
Enter your password twice and press  Depending on how GnuPG is set up in your system you may have to type your password on the terminal or in a new window. If you type it in the terminal it does not show up while you type.

7 – Generating a new key
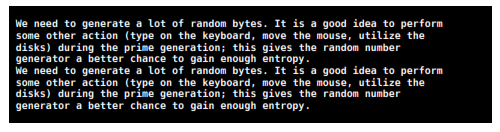
Now that you entered all your data GnuPG will generate a new key. To generate a really secure key it needs unexpected data chains, and the best way to obtain it is realizing diverse activities during this process.
Try opening and closing some heavy programs, move the mouse cursor a lot, or open a text editor and type many random text.
This process takes about 5 minutes, so have patience. During this time GnuPG may show text similar to the image below.
8 – Key generated
Congratulations, you have just created your first key pair! :)
9 – Verify your key
To verify your key just type the command below:
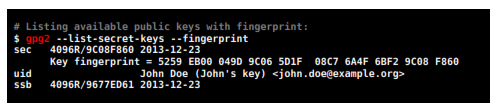
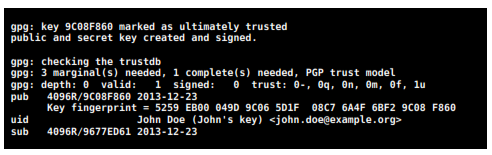
If you did everything correctly you should see a summary of your key on the screen, include ing the key's fingerprint, which is a unique code that only this key in the world has. When you send your public key to other people, the only way they can be certain that the key they received is yours and was not twisted along the way is by confirming the key's fingerprint with you.
7.2 Microsoft Windows
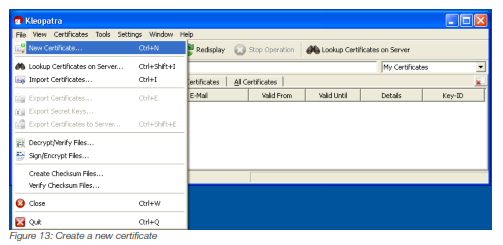
1 – Open Kleopatra
Open Kleopatra and click on File → New Certificate, or press 
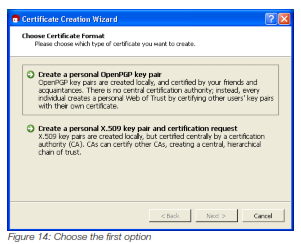
2 – Choose the first option
Choose the first option 'Create a personal OpenPGP key pair'.
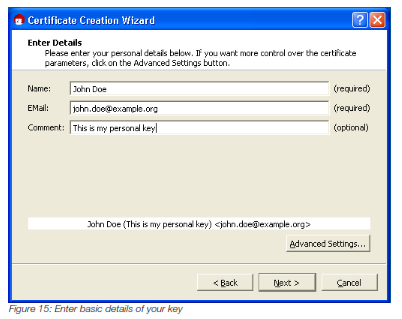
3 – Enter basic details of your key
Here you will enter your basic personal details which will be part of your key and will be visible to anyone who has your key. The name and email address are required, while the comment is optional. When you are done click on Advanced Settings button.
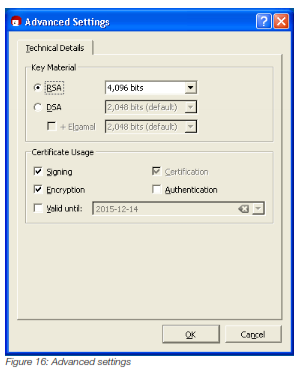
4 – Set advanced settings
Here you will set the advanced settings of your key.
Key Material: Select RSA as the key type and set the key length to 4,096 bits.
Certificate Usage: Check options Signing and Encryption.
Valid until: You can define any value you want. Uncheck it if you want no validity.
When you are done click on OK button. You will return to the previous screen. Just click Next to proceed.
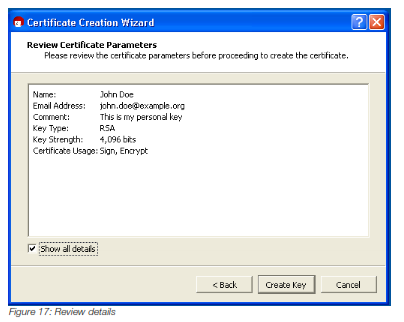
5 – Review details
Review all details that will be part of your key. If you would you like to change anything just click on the Back button, otherwise click on Create Key button to create your key.
6 – Choose a password
This is one of the most important steps of the whole process. The strength and security of your key are directly related to your password. There is no point in using the best encryption system in the world if you use a weak password, so choose a VERY STRONG password!

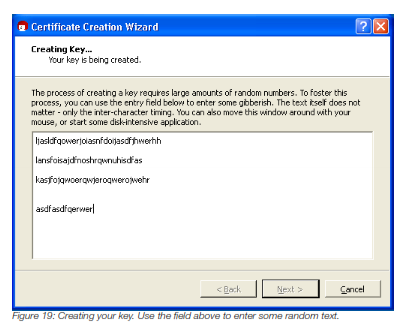
7 – Wait for the key creation
During the key creation process it is necessary to generate random numbers, so it is important that you do activities that stimulate this process, such as typing on the keyboard, moving the mouse, opening and closing programs, etc.
Kleopatra offers a white space where you can type whatever you want on it to stimulate this process. It does not matter what you type because it will not be considered on the key creation and will not be part of it.
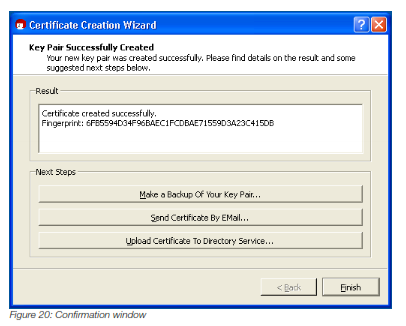
8 – Confirmation
Congratulations, you have just created your first key pair! :)
A confirmation window will show up showing your key's fingerprint, which is a unique code that only this key in the world has. When you send your public key to other people, the only way they can be certain that the key they received is yours and was not twisted along the way is by confirming the key's fingerprint with you.
You can choose any of the three options suggested below, or just finish the process. We will finish the process, so click on Finish button.
9 – Verify your key
Now you will notice that your recently created key appears in Kleopatra.
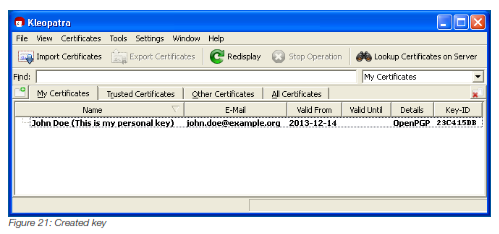
Every time you want to check details about your key, or make changes in it, just select your key and click with right button of the mouse on top of it and select Properties in the menu.
7.3 *NIX systems
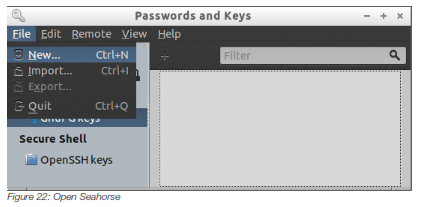
1 – Open Seahorse
Open Seahorse and click on File → New Certificate, or press 
2 – Choose PGP Key option
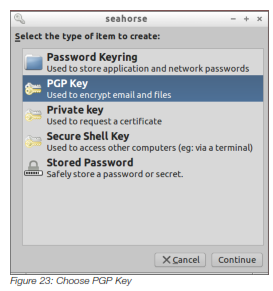
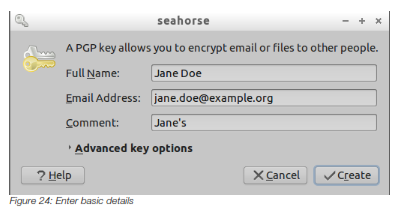
3 – Enter basic details of your key
Here you will enter your basic personal details which will be part of your key and will be visible to anyone who has your key. The name and email address are required, while the comment is optional. When you are done click on Advanced key options.
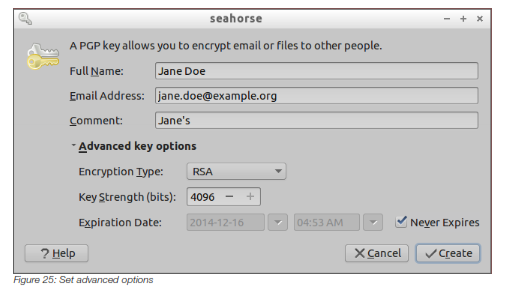
4 – Set advanced details
Here you will set the advanced settings of your key.
Encryption Type: Select RSA.
Key Strength (bits): Set the key length to 4096.
Valid until: You can define any value you want. Uncheck it if you want no expiry.
When you are done click on Create button to create your key.
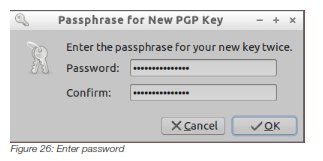
5 – Choose a password
This is one of the most important steps of the whole process. The strength and security of your key are directly related to your password. There is no point in using the best encryption system in the world if you use a weak password, so choose a VERY STRONG password!
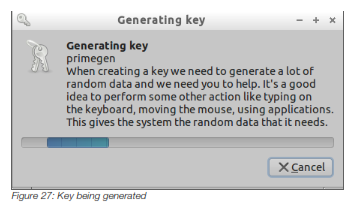
7 – Wait for the key creation
During the key creation process it is necessary to generate random numbers, so it is important that you do activities that stimulate this process, such as typing on the keyboard, moving the mouse, opening and closing programs, etc.
8 – Confirmation
Congratulations, you have just created your first key pair! :)
Now you will notice that your recently created key appears in Seahorse.
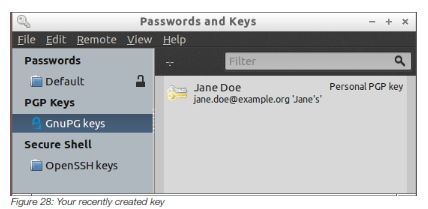
Every time you want to check details about your key, or make changes in it, just select your key, rightclick it and select Properties in the menu.