CHAPTER 13
Encrypting and Signing Files
A digital signature has two purposes: to ensure that who sent the information is really who he claims to be (and not someone impersonating him), and to guarantee that the information is original and was not modified along the way.
In a way it is similar to a physical signature in a cheque or in a contract, but it also stamps the time the signature was made, thus offering double security for the receiver.
Digital signatures are often used together with encryption.
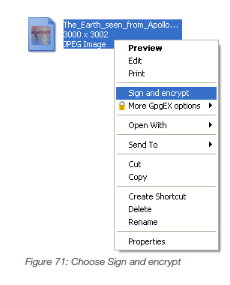
1. Choosing the file
Rightclick on the file and choose Sign and encrypt, as shown in Figure 1.
It is also possible to realize the same process through Kleopatra's main window by clicking on menu File → Sign/Encrypt files.
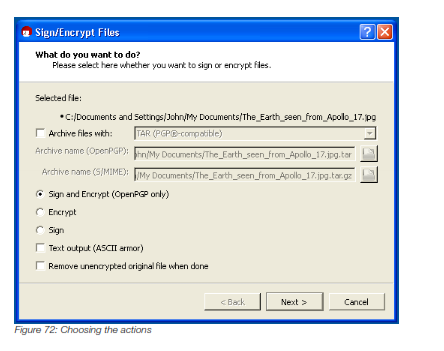
2. Choosing actions
You have the option to Sign, to Encrypt or to do both actions. It is a good practice to always encrypt and sign, so we will do both. Choose Sign and Encrypt (OpenPGP only).
If you want to send the file by email, or you would like to have it available in pure text, choose the option Text output (ASCII armor).
You can also change other options if you want, but we will leave them as default.
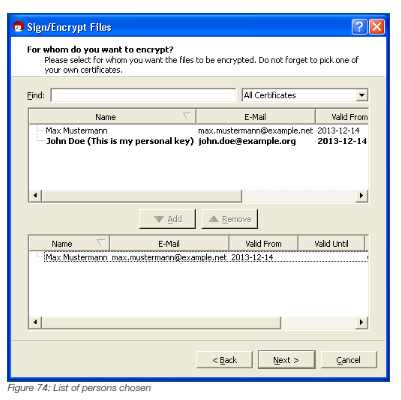
3. Choosing the receiver(s)
In the above field choose the person to whom you are sending the file by clicking on the person's name, and then click on Add button. The person's name and address will be shown on the field below which is the field of the receivers.
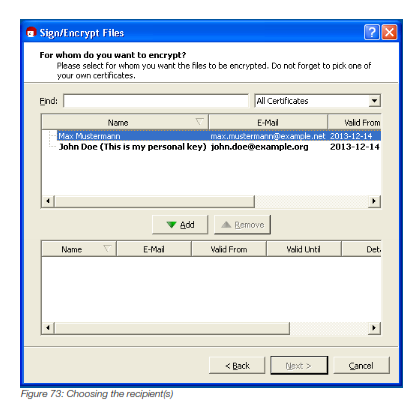
You can choose as many recipients as you want, including yourself. In our example we chose only Max Mustermann, as shown in Figure 4. If you want to remove a person from the receiver's field just select the person and click on the Remove button.
When you are done click on the Next button.
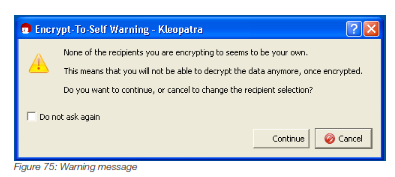
4. Warning
If you did not add yourself to the receiver's field, Kleopatra will issue a warning informing you that you will not be able to decrypt the file you are sending to another person. It is of ten a good practice to add yourself too, so you can go back and add yourself if you want.
However if you keep a copy of the original file, or you do not mind not being able to decrypt it, you may click on Continue button to proceed. and/or check Do not ask again so Kleopatra will not issue this warning again in future.
We will click on Continue button.
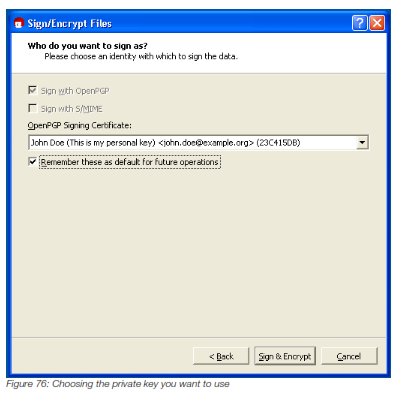
5. Choosing the private key
Now you have to choose which private key you want to use to encrypt and/or sign the file. If you have more than one key – or intend to have more than one key in the future – you may just choose the one you want to use now and leave the check box unchecked.
However if you only use a single key you may choose it and check the check box below so Kleopatra will not prompt you about it anymore.
When you are done click on Sign & Encrypt button.
6. Password
Enter your private key password if requested.

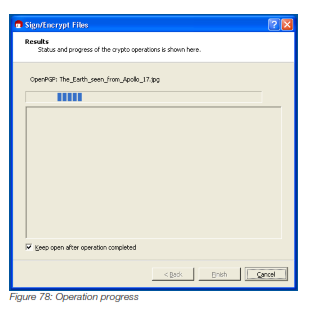
7. Wait for the operation to finish
Wait for the signing and/or encryption operation to finish.
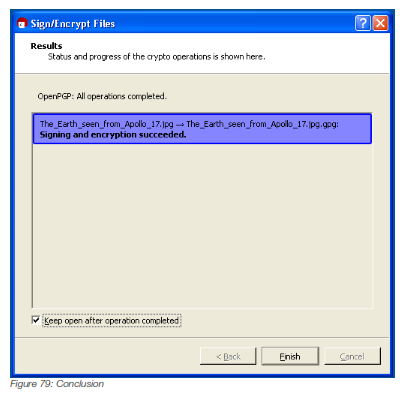
7. Conclusion
After the operation is finished, it will be created an encrypted file in the same folder of the original file, or in a different place if you have chosen one.
Just click on the Finish button or close the window.