How to target your Facebook ads to business locations
Do you want to get your Facebook posts in front of an audience at a specific physical location? Have you considered targeting people based on where they work?
Using workplace targeting makes it easy to get your content in front of the right people at the right company.
Discover how to use workplace targeting to serve Facebook ads to people who work at specific companies.
Why use workplace Targeting?
Simply put, it works. It’s one of the most effective ways to target users on Facebook, especially when it comes to informing the media and other influencers.
There are other uses, too.
If you own or manage a restaurant, publish posts about your daily specials and promote your posts to people who work at the businesses within walking distance.
If you’re promoting an article about the top events in your town, you could target people who work at the local university and other companies, too.
If you run a PR agency, you can post links to successful client stories you were involved with and promote them to decision makers who work at companies you’d like to represent.
If you’re pitching to investors or journalists, you can amplify your best content to impress people before your meeting.
The possibilities are endless, and here’s how you can get started:
#1: Create your targeted campaign
First, you’ll need to decide what you want to achieve out of this Facebook ad campaign. Based on that goal, choose the content you want your target audience to see. If you want to highlight external content, create a post that links to an article, video, or image. You can also use this technique to drive engagement on native posts like this one.
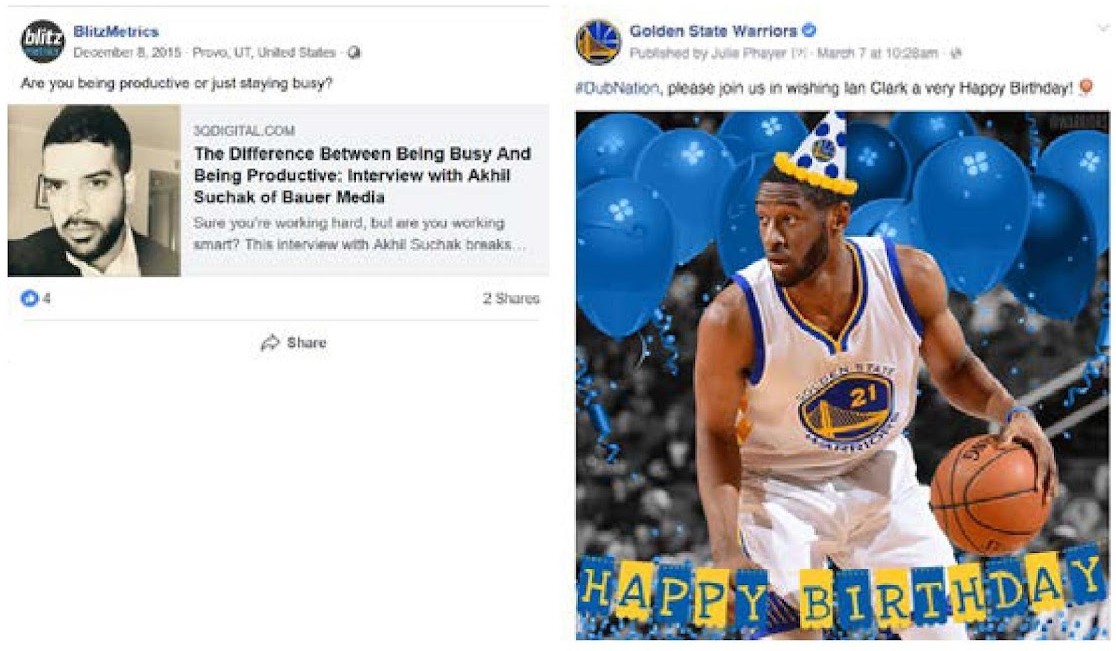
After you’ve posted to your page, you’re ready to get your page post in front of the right people at the right company. Open up your Ads Manager, either directly or through Business Manager, and click Create.

You’ll then be taken to a screen with many marketing objectives to choose from. For this example, the best option is, “Post Engagement”. Click on Boost your posts objective and you’ll see a sidebar come out on the right. Use the sidebar to select the post you’d like to promote.

You can also give your campaign a name. Then, click the Set Audience and Budget button to continue.
#2: Define your campaign audience
Here’s the fun part. This is where you get to target the people who you want to see your ad.
You want to target the workplace. To find that option, click the Browse drop-down menu, click on Work and select one of the workplace targeting options. This example targets Employers.
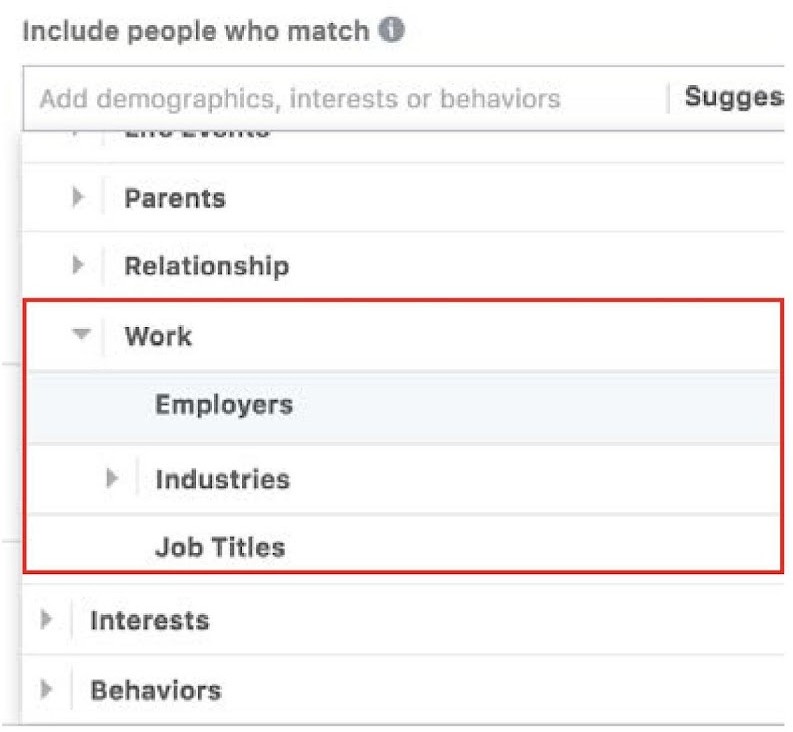
Enter the name of the company you’d like to target in the box that appears. You’ll also want to change the location targeting to match the geographic location of the company you’re targeting. If your target has multiple offices, this helps ensure you’re targeting the right audience.
#3: Set your campaign budget
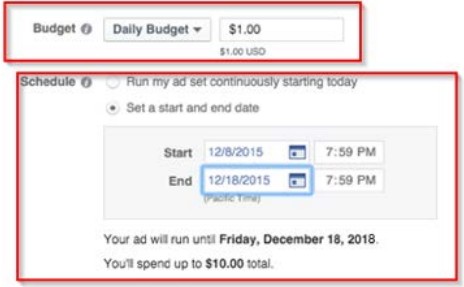
Start with spending $1/day for around two weeks. As you learn more about how your ads perform, you can adjust your budget and scheduling as needed.
This campaign example is set to run for 10 days at $1/day.
You’ll notice the option to give your ad set a name down at the bottom of the page. This is helpful when you’re dealing with multiple ad sets under a single campaign.
#4: Create your ad
Double-check that everything looks the way you want it to.
Don’t worry about optimization, bid amount, when you get charged, ad scheduling, or delivery type; just make sure that your budget, duration, and campaign name are set. When you’re satisfied, click Choose New Ad Creative.

#5: Choose your ad creative
After creating your campaign, it’s time to make an ad for the page post you made in Step 1. You can select that post from the “Select an Existing Page Post” drop-down list to the left of the preview.
This is where you can preview how your ad will look. When you’re satisfied with the ad, review your order and place it. Once your ad is approved and active, you’ll find your ad in your Campaign view.
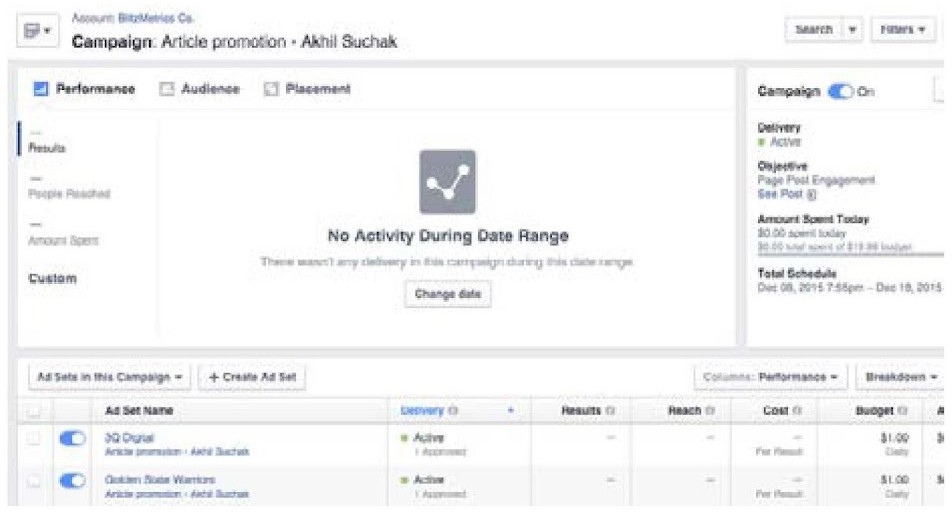
#6: Measure your results
Check the Campaign folder every few hours until the ad’s run ends to see the performance for each ad set. You’ll be able to track metrics such as post engagement, the number of people reached, and your ad spend.
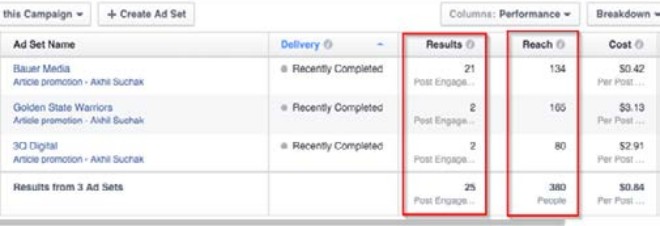
Pay attention to engagement and clicks to verify that your content is actually being served to people within your targeted audience, and to see how many people have interacted with your content.
Now imagine how you can use this technique to build rapport with influencers in your industry and the media.