Image 1 . Graphic output near the beginning of the simulation.
Image 2 . Graphic output near the middle of the simulation.
Image 3 . Graphic output near the end of the simulation.
Image 4 . Output for the harmless blue sprite scenario.
Listings
Listing 1 . Beginning of the class named Slick0210.
Listing 2 . Beginning of the init method.
Listing 3 . Add a red sprite to the ArrayList object.
Listing 4 . Populate the ArrayList object.
Listing 5 . Beginning of the update method.
Listing 6 . Test for a collision.
Listing 7 . The isCollision method of the Sprite01 class.
Listing 8 . Process a collision
Listing 9 . Remove dead objects from the ArrayList object.
Listing 10 . The render method.
Listing 11 . Source code for the program named Slick0210.
Listing 12 . Source code for the class named Sprite01.
12.3. Preview
In an earlier module titled Slick0200: Developing a sprite class , we encountered a baseball coach that had been attacked by a swarm of vicious ladybug sprites. I promised you that we would
later find a way to save the coach. That time has come.
In this module, I will explain a program that uses the Sprite01 class from the earlier module to
produce a simulation program with the output shown in Image 1 , Image 2 , and Image 3 .
A swarm of insects
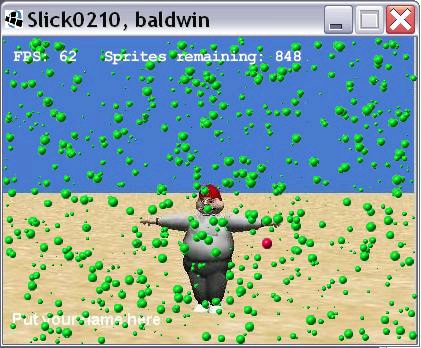
Once again, the coach has been attacked by a swarm of 1000 insects. However, in this case, the
ladybug sprites have been replaced by vicious green beetle sprites.
A red predator beetle
Fortunately for the coach, a red predator beetle sprite with a taste for green beetles has come along
and is gobbling up green beetles as fast as he can collide with them. (According to the text at the
top of Image 1 , 152 of the 1000 beetles had been consumed by the time the screen shot in Image 1
was taken.)
Figure 12.1. Image 1. Graphic output near the beginning of the simulation.
Image 1. Graphic output near the beginning of the simulation.
A fat and happy predator beetle
Image 2 shows the situation some time later when all but 173 of the green beetles had been eaten.
Note that the process of eating those nutritious beetles has caused the red beetle to gain some
weight in Image 2 .
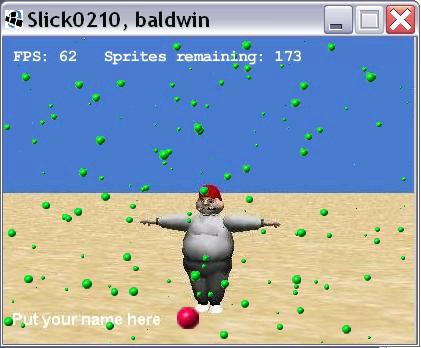
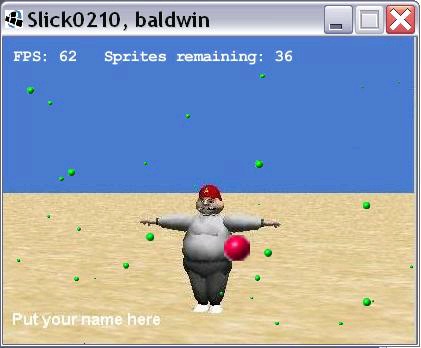
Figure 12.2. Image 2. Graphic output near the middle of the simulation.
Image 2. Graphic output near the middle of the simulation.
Cleaning up the scraps
Image 3 shows the situation with only 36 green beetles remaining. Collisions between the beetles is rare at this point, so quite a bit more time will probably be required before the red beetle can
collide with and eat the remaining green beetles.
Figure 12.3. Image 3. Graphic output near the end of the simulation.
Image 3. Graphic output near the end of the simulation.
What you have learned
In the previous module, you learned how to develop a sprite class from which you can instantiate
and animate swarms of sprite objects.
What you will learn
In this module, you will learn how to use the Sprite01 class developed in the earlier module to write a predator/prey simulation program involving thousands of sprites, collision detection, and
sound effects.
12.4. General background information
Actually, it may have been more appropriate to describe this program in terms of jellyfish, (which
eat on the basis of opportunity) instead of beetles, (which are more deliberate in their actions) .
In this program, the red sprite consumes a green sprite only when the two happen to collide by
chance. The sprites are not attracted to one another. (That would be a good exercise for a student
project - attraction plus collision.)
Two scenarios
A baseball coach is attacked by a swarm of fierce green flying sprites. Fortunately, a red predator
sprite comes along and attacks the green sprites just in time to save the coach.
There are two scenarios that can be simulated by setting the variable named dieOnCollision (see
Listing 1 ) to either true or false .
Harmless blue sprites
In one scenario ( dieOnCollision = false) , the vicious green sprites become harmless blue sprites
when they collide with the red sprite. A screen shot of this scenario is shown in Image 4 .
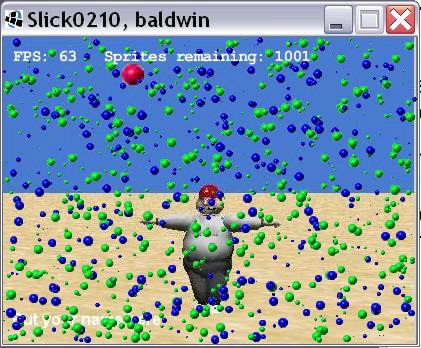
Figure 12.4. Image 4. Output for the harmless blue sprite scenario.
Image 4. Output for the harmless blue sprite scenario.
Green sprites get consumed
In the other scenario ( dieOnCollision = true) , the green sprites are consumed by the red sprite
upon contact and are removed from the population. This is the scenario shown in Image 3 .
Get fat and happy
In both scenarios, contact between a green sprite and the red sprite causes the red sprite to
increase in size.
If you allow the program to run long enough, the probability is high that all of the green sprites
will have collided with the red sprite and will either have turned blue or will have been consumed.
12.5. Discussion and sample code
The isCollision method of the Sprite01 class
The class named Sprite01
The class named Sprite01 is shown in Listing 12 . I will explain only those portions of that class that I use in this program that weren't explained in the earlier module.
The class named Slick0210
Will explain in fragments
A complete listing of the class named Slick0210 is provided in Listing 11 . I will break the code down and explain it in fragments.
Beginning of the class named Slick0210.
The beginning of the class named Slick0210 , down through the main method is shown in Listing
public class Slick0210 extends BasicGame{
//Set the value of this variable to true to cause the
// sprites to die on collision and to be removed from
// the population.
boolean dieOnCollision = true;
//Store references to Sprite01 objects here.
ArrayList <Sprite01> sprites =
new ArrayList<Sprite01>();
//Change this value and recompile to change the number
// of sprites.
int numberSprites = 1000;
//Populate these variables with references to Image
// objects later.
Image redBallImage;
Image greenBallImage;
Image blueBallImage;
//Populate this variable with a reference to a Sound
// object later.
Sound blaster;
//Populate these variables with information about the
// background image later.
Image background = null;
float backgroundWidth;
float backgroundHeight;
//This object is used to produce values for a variety
// of purposes.
Random random = new Random();
//Frame rate we would like to see and maximum frame
// rate we will allow.
int targetFPS = 60;
//----------------------------------------------------//
public Slick0210(){//constructor
//Set the title
super("Slick0210, baldwin");
}//end constructor
//----------------------------------------------------//
public static void main(String[] args)
throws SlickException{
AppGameContainer app = new AppGameContainer(
new Slick0210(),414,307,false);
app.start();
}//end main
Figure 12.5. Listing 1. Beginning of the class named Slick0210.
Listing 1. Beginning of the class named Slick0210.
ArrayList
There are two things that are new in Listing 1 . First there is the instantiation of an ArrayList object in place of the array object used in the program in the earlier module.
The use of an ArrayList instead of an array provides more flexibility in managing a collection of
Sprite01 objects. If you are unfamiliar with the use of ArrayList objects, just Google the
keywords baldwin java ArrayList generics and I'm confident you will find explanatory material
that I have published on that topic.
Sound
The second new item in Listing 1 is the declaration of a reference variable of the Slick2D Sound class. That variable will be used to hold a reference to a Sound object, that will be played each
time the red sprite collides with a green sprite.
Otherwise, the code in Listing 1 is straightforward and shouldn't require further explanation.
The init method
The init method begins in Listing 2 .
public void init(GameContainer gc)
throws SlickException {
//Create Image objects that will be used to visually
// represent the sprites.
redBallImage = new Image("redball.png");
greenBallImage = new Image("greenball.png");
blueBallImage = new Image("blueball.png");
//Create a Sound object.
blaster = new Sound("blaster.wav");
//Create a background image and save information
// about it.
background = new Image("background.jpg");
backgroundWidth = background.getWidth();
backgroundHeight = background.getHeight();
Figure 12.6. Listing 2. Beginning of the init method.
Listing 2. Beginning of the init method.
An object of the Sound class
The only thing new in Listing 2 is the instantiation of the object of type Sound . As you can see, the syntax for instantiation of a Sound object is essentially the same as for instantiating an Image
object.
Add a red sprite
Listing 3 calls the add method of the ArrayList class to add a red sprite to the beginning of the ArrayList object. (Actually it add a reference to that object and not the object itself.)
You are already familiar with the constructor parameters (shown in Listing 3 ) for a Sprite01
object.
sprites.add(new Sprite01(
redBallImage,//image
backgroundWidth/2.0f,//initial position
backgroundHeight/2.0f,//initial position
(random.nextFloat() > 0.5) ? 1f : -1f,//direction
(random.nextFloat() > 0.5) ? 1f : -1f,//direction
0.1f+random.nextFloat()*2.0f,//step size
0.1f+random.nextFloat()*2.0f,//step size
0.5f+random.nextFloat()*1.5f,//scale
new Color(1.0f,1.0f,1.0f)));//color filter
Figure 12.7. Listing 3. Add a red sprite to the ArrayList object.
Listing 3. Add a red sprite to the ArrayList object.
Populate the ArrayList object
Listing 4 uses a for loop and the value of the variable named numberSprites (see Listing 1 ) to add 1000 green Sprite01 object references to the ArrayList object.
for(int cnt = 0;cnt < numberSprites;cnt++){
sprites.add(new Sprite01(
greenBallImage,//image
backgroundWidth*random.nextFloat(),//position
backgroundHeight*random.nextFloat(),//position
(random.nextFloat() > 0.5) ? 1f : -1f,//direction
(random.nextFloat() > 0.5) ? 1f : -1f,//direction
0.1f+random.nextFloat()*2.0f,//step size
0.1f+random.nextFloat()*2.0f,//step size
random.nextFloat()*1.0f,//scale
new Color(1.0f,1.0f,1.0f)));//color filter
}//end for loop
gc.setTargetFrameRate(targetFPS);//set frame rate
}//end init
Figure 12.8. Listing 4. Populate the ArrayList object.
Listing 4. Populate the ArrayList object.
Listing 4 also sets the target frame rate and signals the end of the init method.
The update method
The overall behavior of the update method is to use a for loop to process the red sprite against
each of the green sprites and to take appropriate actions when a collision between the red sprite
and a green sprite occurs.
The update method begins in Listing 5 .
public void update(GameContainer gc, int delta)
throws SlickException{
//Access to the first sprite in the ArrayList object.
Sprite01 redBallSprite = sprites.get(0);
//Do the following for every sprite in the ArrayList
// object
for(int cnt = 0;cnt < sprites.size();cnt++){
//Get a reference to the Sprite01 object.
Sprite01 thisSprite = sprites.get(cnt);
//Ask the sprite to move according to its properties
thisSprite.move();
//Ask the sprite to bounce off the edge if it is at
// an edge.
thisSprite.edgeBounce(
backgroundWidth,backgroundHeight);
Figure 12.9. Listing 5. Beginning of the update method.
Listing 5. Beginning of the update method.
Mostly same as before
The code in Listing 5 is mostly the same as code that you have seen before, so further explanation should not be necessary.
Test for a collision
The code in Listing 6 is new to this module. This code calls the isCollision method of the Sprite01 class to test for a collision between the current green sprite and the red sprite.
boolean collision =
thisSprite.isCollision(redBallSprite);
Figure 12.10. Listing 6. Test for a collision.
Listing 6. Test for a collision.
What is a collision?
There are many ways to define and implement collision detection in game and simulation
programming. In this program, a collision is deemed to have occurred if any portion of the
rectangular redBallImage overlaps any portion of the rectangular greenBallImage . (Even though
these images appear to be round, they are drawn on a transparent rectangular background.)
The isCollision method of the Sprite01 class
The isCollision method of the Sprite01 class is shown in Listing 7 .
public boolean isCollision(Sprite01 other){
//Create variable with meaningful names make the
// algorithm easier to understand. Can be eliminated
// to make the algorithm more efficient.
float thisTop = Y;
float thisBottom = thisTop + height*scale;
float thisLeft = X;
float thisRight = thisLeft + width*scale;
float otherTop = other.getY();
float otherBottom = otherTop + other.getHeight()*other.getScale();
float otherLeft = other.getX();
float otherRight = otherLeft + other.getWidth()*other.getScale();
if (thisBottom < otherTop) return(false);
if (thisTop > otherBottom) return(false);
if (thisRight < otherLeft) return(false);
if (thisLeft > otherRight) return(false);
return(true);
}//end isCollision
Figure 12.11. Listing 7. The isCollision method of the Sprite01 class.
Listing 7. The isCollision method of the Sprite01 class.
Methodology
This method detects a collision between the rectangular sprite object on which the method is
called and another rectangular sprite object.
The methodology is to test four cases where a collision could not possibly have occurred and to
assume that a collision has occurred if none of those cases are true.
Given that as background, you should be able to use a pencil and paper along with the code in
Listing 7 to draw some rectangles and understand how the code in Listing 7 works.
Although I can't guarantee that the method won't call a collision when no collision actually
occurred, I am pretty sure that it won't miss any collisions that do occur.
Process a collision
The code in Listing 8 is executed when the call to the isCollision method returns true. Therefore, this code processes a collision only when one has occurred.
The code excludes collisions between the red sprite and itself, (which is an artifact of the
algorithm) . It also excludes collisions between the red sprite and blue sprites (if they exist) .
if((collision == true)&&
(! thisSprite.getImage().equals(redBallImage)) &&
(! thisSprite.getImage().equals(blueBallImage))){
//A collision has occurred, change the color of
// this sprite to blue and maybe cause it to
// die and be removed from the population.
thisSprite.setImage(blueBallImage);
if(dieOnCollision){
thisSprite.setLife(0);
}//end if
//Cause the redBallSprite to change direction on
// a random basis.
redBallSprite.setXDirection(
(random.nextFloat() > 0.5) ? 1f : -1f);
redBallSprite.setYDirection(
(random.nextFloat() > 0.5) ? 1f : -1f);
//Cause the redBallSprite to change stepsize on a
// random basis.
redBallSprite.xStep =
0.1f+random.nextFloat()*2.0f;
redBallSprite.yStep =
0.1f+random.nextFloat()*2.0f;
//Cause the redBallSprite to grow larger
redBallSprite.setScale(redBallSprite.getScale() +
(redBallSprite.getScale()) * 0.001f);
//Play a sound to indicate that a collision has
// occurred.
blaster.play();
}//end if
}//end for loop
Figure 12.12. 8. Process a collision
8. Process a collision
Not complicated code
Although the code in Listing 8 is long and tedious, it isn't particularly complicated. It consists mainly of calls to the accessor methods of the two sprite objects involved in the collision to
modify their property values in some way.
Turn a green sprite into a blue sprite
For example, near the top of Listing 8 , there is a call to the setImage method of the green sprite to change it to a blue sprite.
Kill the green sprite
This is followed by a call to the setLife method to set the life of the (now blue) sprite object to 0,
but only if the dieOnCollision variable belonging to the object is true. Later on, all sprite objects
with a life property value of 0 will be removed from the population.
And so forth
I could continue down the page describing the calls to various other accessor methods, but that
shouldn't be necessary. The embedded comments should suffice for the explanation.
Play a sound
Finally near the end of the code in Listing 8 , there is a call to the play method belonging to Sound object referred to as blaster .
Each time there is a collision between the red sprite and a green sprite, the sound loaded earlier
from the file named "blaster.wav" is played.
The end of the for loop
Listing 8 signals the end of the for loop, but does not signal the end of the update method. There is one more task to complete before the update method terminates.
Remove dead objects from the ArrayList object
The code in Listing 9 uses an Iterator to remove all objects having a life property value that is less than or equal to zero from the ArrayList object.
//Remove dead objects from the ArrayList object
Iterator <Sprite01> iter = sprites.iterator();
while(iter.hasNext()){
Sprite01 theSprite = iter.next();
if(theSprite.getLife() <= 0){
iter.remove();
}//end if
}//end while loop
}//end update
Figure 12.13. Listing 9. Remove dead objects from the ArrayList object.
Listing 9. Remove dead objects from the ArrayList object