LESSON 04
SWEEVA
AFFILIATE PROGRAM USED IN THIS LESSON:
Sweeva
Sweeva takes your surfing experience a step further by combining it with social networking. It allows you to comment on other member’s websites as they are being displayed. It also allows you to go to a member’s profile and post messages to them. Likewise they can comment on your website and post messages to you too. Sweeva also has a points system that gives you extra benefits such as the ability to share websites you view in Twitter, Facebook and IM Faceplate. You can also contact the member via their Skype address so you can communicate with them directly.
As you surf in Sweeva you will see a chat window open on the right hand side whilst displaying the current site in rotation on the left. Any member currently logged in can view your website and post comments as it is being displayed. These comments will be based on various points such as the appearance of your website and suggestions for improvement, allowing you to make changes if needed. This is a great opportunity to test your websites to see how popular they are.
The screenshot below shows a typical surfing session in Sweeva.
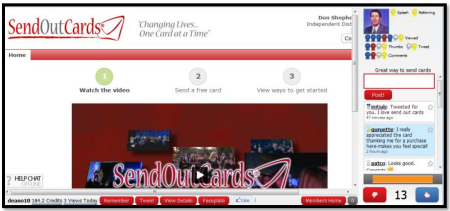
When your website is displayed Sweeva displays your photo. This excellent feature allows you to brand yourself so people get to know and trust you. You can also ask other members if they have any questions about your website. This Live Support feature along with your photo display will improve your relationship with potential customers as they know they are connected with a real person.
In the chat window you will see other member’s usernames appear as a link. By clicking on their username you can go straight to their profile page where you can view their websites. You can also leave them a private note. You can use this feature to follow up on any member who shows an interest in their site. A personal note is better than a reply in the chat room.
Sweeva uses a bidding system to display your websites. You simply choose what time and day of the week you want your website to be displayed and bid some of your credits. The more you bid the more chance you have of getting your website displayed. Sweeva makes this easy for you by allowing you to use the recommended bid for that particular hour. Once your bid is accepted you can choose to have your website displayed up to four times an hour.
On other traffic exchanges you spend a credit to show your website to just ONE member. So if 100 members view your website then you spend 100 credits. If you bid 100 credits in Sweeva then it is possible that MORE than 100 members will be viewing your website at once. Also bear in mind that most exchanges only display your website for 5-10 seconds so it can be easily missed. Sweeva displays websites for 30 seconds so you are more likely to gain more benefit from your credits.
Sweeva gives you one credit for every website viewed (two for pro members) which means you can build credits pretty fast. You can also buy credits for a reasonable price which will save you a lot of time. Many Sweeva members buy credits so you could be earning a nice commission if you build a downline. Like other exchanges you are provided with affiliate links to promote Sweeva with.
Now I will take you through setting up Sweeva.
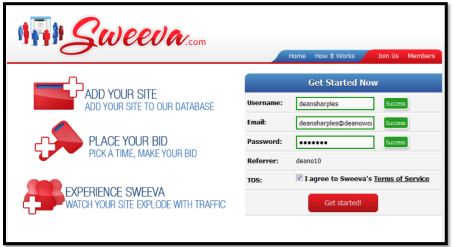
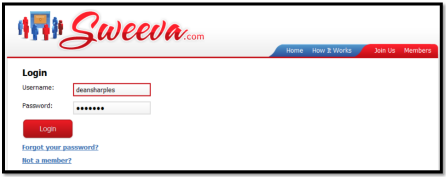
Choose a username for yourself. I recommend you use your own name. Next enter your email address and password. Click on the box where it says TOS to say you agree to Sweeva’s Terms of Service then click the Get Started button. You will now be asked to log into your email account to verify your email address. Log into your account and enter your username and password.
Once logged in you will be directed to your member’s area. The member’s area will give you all the information you need to know. Along the top you will see a selection of links that will take you to various parts of the system. Here is a screenshot of the member’s area.
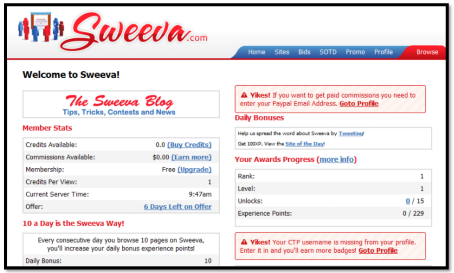
Look under the Member Stats section. This is where you can see how many credits you currently have along with a link to buy more. Also the commissions you have earned with a link to the promotional sites page where you can also view your downline. At present we are on a free membership but you have the opportunity to upgrade to PRO where you will gain more benefits. Note the current server time. You will need this information when placing your bids.
When you first logged into Sweeva you will have been presented with an offer to receive a huge discount on a PRO membership. If you didn’t take advantage of this then you have six days to change your mind. Just click on the 6 Days Left on Offer link to get your bargain membership. Believe me, it really is worth it and will benefit you greatly over the next year.
Navigation around the various sections is made possible via the Menu Bar at the top.
![]()
The first step is to go to your Sites Page. So click on the Sites link on the Menu Bar.
ADDING WEBSITES
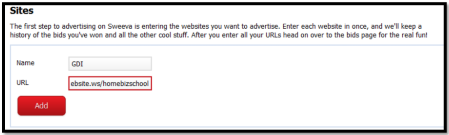
You can add one or more websites to Sweeva and choose the ones you want to display. To add a site clickon the Click Here To Add A Site button. Now enter a name for the website along with the URL. I amusing GDI for my example.
When you have finished, click the Add button. Once you have added a site it will be displayed in your sites area like in the screenshot below.
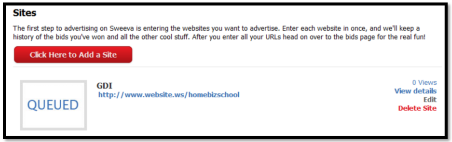
Sweeva takes some time to display a screenshot of your website. In the meantime it will display the QUEUED image. You can go ahead and add more sites or go to the bidding section without waiting foryour website screenshot to appear.
EDITING COMMENTS
People will add their comments when your website is displayed. These comments will be displayed eachtime the website is shown. However there may be comments you don’t like. If not then you can removethem. You can even add an opening message before your website is displayed. To do all this, click on thelink that says View Details on the right hand side of the Sites page.
On this screen you will be able to view all the posts people have made when your website was displayedto them. As you have just added this site then you will want to post an opening message. This messagewill appear as the first message in the chat window. You could add some extra information that you think might encourage people to take you up on your offer or you could offer a discount which is available to Sweeva members only. For example:
Special deal for Sweeva members – Join GDI and I will send you a free guide worth $87.
I will use the following message for my GDI website.
GDI is not just an hosting company, it is an AWESOME income generating opportunity. Millions of happy customers.

You can remove any post by clicking on the X sign in each window. This is useful for removing weak comments such as: “Ok, Good Site, Not Bad, I love GDI etc...” Keep any good comments that recommend the program you are promoting. Testimonials are great for encouraging prospects to sign up.
As I said before, you can visit someone’s profile by clicking on their username which appears in their posting. This is useful if someone has posted a question or shown some interest in your website. You can post them a note and ask them to post a note back to you on your profile.
It is recommended to do this while you are surfing so you can follow them up straight away. However, you may not always be at the computer when your website is displayed. Many members will set their website to display for a few hours and go and do something else. Then they can log on later, go into the View Details screen for each site and check on any posts they have received.
BIDDING

Sweeva displays so many websites per hour. It uses a bidding system to choose the sites it is going to display in that particular hour. To do this it checks all the websites that have been put forward to be displayed and displays them in order of bid size. The website with the highest bid is displayed first followed by websites with an equal bid, then the ones with the lower bids. After the hour ends any remaining sites for that hour are ignored.
So for example, if you bid 90 credits to have your website displayed between 2-3pm and other members made a bid of 100 credits, then their websites will be displayed before yours. So if Sweeva runs out of time before it gets to bids LOWER than 100 credits then your website doesn’t get shown. The only thing you can do is to try again with a higher bid.
AVERAGE BID
So how many credits should you bid? Sweeva solves this problem by providing an Average Bid. By calculating the number of bids people are making at a particular time Sweeva estimates an average bid which you can use as a guideline. In the screenshot above we see that the average bid is 110 credits. We also see the current date and time.
Therefore it is recommended that you bid (on this occasion) 110 or more credits. I recommend you assign an extra 10-50 credits to ensure your website is displayed as many members will probably assign the average bid. Assigning a few extra credits will give you an advantage over the other members.
ADDING A BID
Click the Click Here to Add a Bid button to place your bid. Note: you will need some credits before you do this so you either need to surf for a while or buy some credits. You can start surfing by clicking on the
Browse button on the Menu Bar. More on this later.
Your first step is to choose a website from your list to have displayed. I have chosen GDI.
CHOOSING TIME AND DAYS
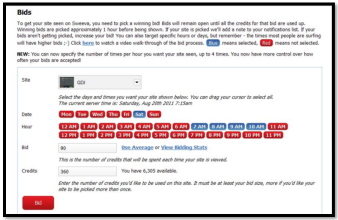
The next step is to choose the time and days you want your website to be displayed. Looking at the current server time which is displayed on this page I see that it is Saturday 20th and the time is 7:15am. I have chosen to have my GDI website displayed today - so I click on Sat in the Date buttons.
Now I choose the hour I want to have my website displayed. I want it displayed as soon as possible so I have selected 7am in the Hour buttons.
In this example I have set my website to be displayed between 7-10am. I can choose to display it for longer by clicking on more buttons in the Hour buttons. In the screenshot above I have clicked the 7AM, 8AM, 9AM and 10AM buttons. So now my website will display once an hour between 7-10am on Saturday. I can also change it so that my site displays on Sunday and Monday this week between 7-10am just by clicking the Mon and Tues buttons.
If a button is blue then it means that day or hour is selected. If a button is red it means it is not selected. In the screenshot above the Sat button and the five hour buttons are blue so Sweeva knows I want my GDI website displayed on Saturday between 7-10am.
You can select an Hour or Day button by clicking on it or you can quickly select a group of buttons at once by holding down the left mouse button and moving the mouse over the buttons.
Note that the sever time on Sweeva and the current time in your country may be different. All you need to do is subtract or add the time difference. So if the server time says 2pm and your clock says 5pm then you know that your site will be displayed between 5-6pm in your time and 2-3pm in Sweeva’s server time.
CHOOSING BID VALUE
The next step is to choose how many credits to bid. If you click on the Use Average link then the current bid average will appear in the text box. It is recommended to adjust this to a higher value.
You can also click on the View Bidding Status link which will give you statistics on the average bids placed on certain days and times. This will give you an idea of when to bid. For example, if only a small amount of people bid on a Tuesday morning then the average bid will be quite small. However it also means less people see your website. I recommend building up plenty of credits first so you can display at the busier times to more people.
CHOOSING CREDIT VALUES
By default Sweeva displays your website once in an hour. But it also allows you to display it up to FOUR times an hour. Each time it displays your website in the hour Sweeva will use the amount of credits you bid. Therefore you need to tell Sweeva how many credits you want to use in total.
So for example, imagine you have bid 110 credits to have your website displayed once between 5-6pm but you wanted it displayed twice. All you need to do is enter enough credits. So enter twice as many credits. Add 220 (110*2) in the Credits textbox. 110 credits for each display.
Once you have finished selecting your bidding information click on the BID button. You should now see a page similar to the screenshot below.

There is one more thing to do. Click on the Edit Bit link. The following box appears.
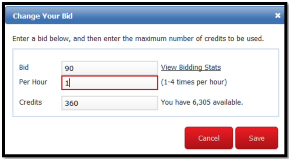
In the box that says “Per Hour”, enter a value between 1 and 4. This tells Sweeva how many times you want your website displayed. Now click the Save button.
Sweeva will now display your website to its members for the time specified. You will receive notification of when your website will be displayed while you are surfing.
SITE OF THE DAY
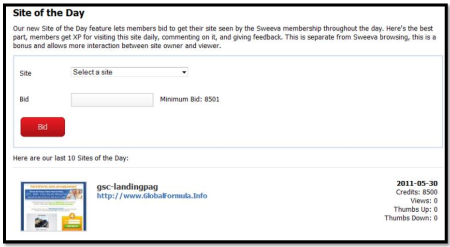
If you have a lot of credits then you can use the Site of the Day feature. This means that every Sweeva member that logs into their account on a certain day will be presented with a link to view the Site of the Day. Each member that does view it is awarded 100XP (experience points). This is a quick way to guarantee lots of views to your website. As soon as I log into Sweeva I always view the site of the day so I can build my points quickly.
To view the Site of the Day page, click on SOTD on the Menu Bar.
PROMOTIONAL TOOLS
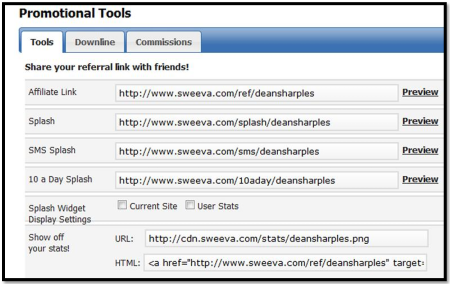
Sweeva is a powerful resource for free traffic and meeting new prospects so why not share it. Sweeva provides affiliate pages and banners for you to use. The URLS in this section are already embedded with your Sweeva username so you can simply copy and paste them into any other advertising media.
The Downline section can be accessed by clicking on the Downline tab. All your personal referrals will be listed here along with their membership type. The Commissions section contains details on all your downline teams’ purchases and your percentage. Note: Pro members get a bigger percentage.
Promotional Tools can be accessed via the Promo link on the Menu Bar.
PROFILE PAGE
Click on Profile on the Menu Bar to access your profile. You will need to add missing information such as your first and last name. You can also change your email address and input a Paypal address. Paypal is required to receive your commissions.
You can also enter your usernames for Skype, IM Faceplate, Twitter, Skype and Clicktrack Profit. When you have finished click the Save button.
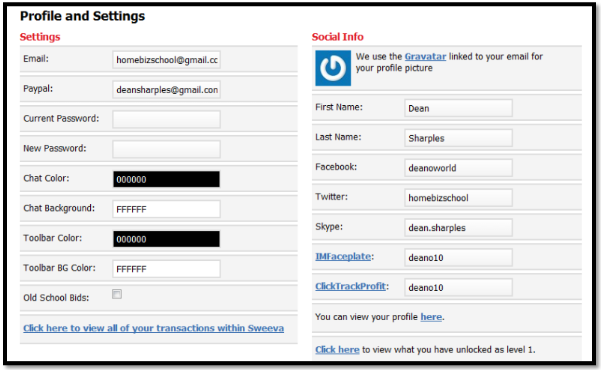
When you reach the higher levels you will be able to access the extra features such as giving other members the ability to tweet your website. You can change the background colors and text in the chat room to make your postings stand out. You reach higher levels by surfing. The higher the level you reach the more features are unlocked. At the bottom of your profile there is a link that allows you to see the features that you have unlocked at your current level.
PROFILE PICTURE
Sweeva uses Gravatar to display your profile picture. Adding your picture to your profile is a great way of branding yourself and is recommended by professional marketers. To add your picture, locate this section of the profile page.
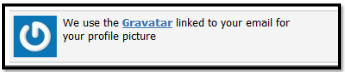
Click on the Gravatar link. Follow the instructions to upload your Gravatar (Profile Picture). Make sure you use the same email address you use in Sweeva. Once this is done Sweeva should display your picture. If not then make sure you have assigned your image to your Sweeva email address.
BROWSING SWEEVA
Now you can start building those credits. Click on the Browse button on the menu bar. The following screen appears.
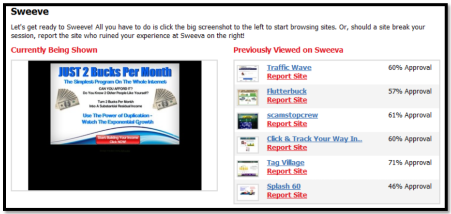
The websites on the right are ones that have previously been displayed. If you found any of these websites to be frame breakers then you can report them to Sweeva.
To start surfing, click on the large website image on the left. You are now in a surfing session.

At the bottom of the surfing window you have a line of red buttons.
BOOKMARK: Allows you to remember a website. This will be listed in your member’s area under the Reminders heading. It allows you to go back to that website later on and view all the postings, and of course the website itself.
TWEET: If you are on Twitter you can tweet the current website URL to your followers. You will be asked to allow Sweeva access to your Twitter account.
SKYPE: Skype is an instant messaging service which will allow you to have direct contact with the author of the current website.
VIEW DETAILS: Allows you to view all the postings and awards for the current website.
IM FACEPLATE: IM Faceplate is a social networking website. This feature allows you to go to the author’s Faceplate website and write on their wall.
FAVORITE: Submit a member’s site as a favorite.
On the right hand side you see the chat room window. You have the opportunity to enter comments about the website currently being displayed. Try to be as active as possible in posting your comments on a website. Offer your opinions and praises. Try and avoid using short terms such as: “good site” and “ok”.
At the bottom of this window you see a counter in the middle of two buttons. On the left is the Thumbs Down button, and on the right is the Thumbs Up button. When the counter reaches nought you get a Not Sure button. If you like the site then click on the Thumbs Up button.
This will give the author some bonuses credits. If you don’t then be honest and click the Thumbs Down button. If you are not sure then click the Unsure button.
SWEEVA TIPS
Sweeva is best used for sites that offer free stuff so it is recommended that you use it to get people onto your list. Use a splash page that offers free or trial stuff. Don’t use long-winded sales pages.
Take note on any comments made on other member’s websites. You could pick up some valuable information that could help to improve your own websites.
For each consecutive day you surf, Sweeva will credit your account in multiples of ten points. So if you surf on Monday you get 10 points, if you surf on Tuesday you get 20 points and so on.
Whenever you see a Tweet button under a member’s website, click it to tweet that site. You can earn more a Tweet Ribbon along with a credits and points.
Ribbons look good on your profile. Make sure you regular tweet, refer and surf to earn them.
Download the Sweeva Toolbar to get more points. It is also easier to start a surfing session.