STEP 4 - Build your master site (master copy)
As you will have already noticed, your welcome email from hostgator contains your cPanel access details, so let’s dive in and login in to our cpanel (the control panel of your new hosting).
At first glance, the cPanel looks very confusing, with huge number of unfamiliar colored icons that may give you a headache the first time you look at them, The good news is, we are going to use only a few of those icons to create and take full control of our income units.
Task # 1 - Creating 33 subdomains as a basis for our profits unit
Use the list of subcategories you compiled in Step 1 to create 33 subdomains on your system following these steps :
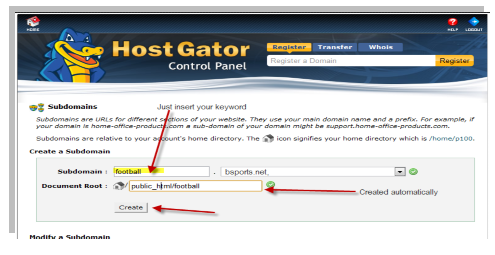
1. Login to your cPanel. On the front page, scroll down to the Domains section and click the link for Subdomains
2. In the top left empty field Insert your first keyword from the list, as shown below
3. Click on the empty Document Root rubric ( the path will automatically insert )
4. Hit “create”
5. Repeat these steps until you end up with 33 subdomains based on your list
Task # 2 - Installing basic wordpress setups on each of our new 33 subdomains
In order to do that, follow these steps :
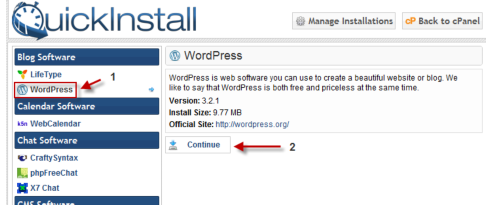
1. Click on the quickinstall icon >>>

2. On the left, click wordpress and then click the continue link >>
3. Fill out the form according to the following capture>>>
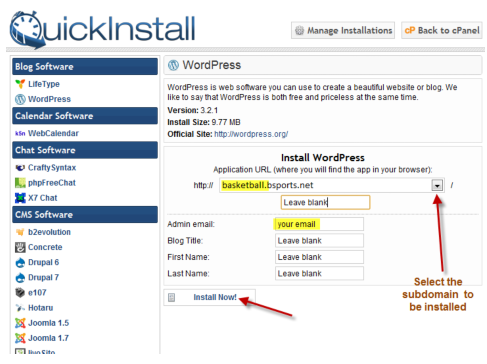
4. click install now! button
* It strongly recommended to use a free email provider that you are not using as your main email address.
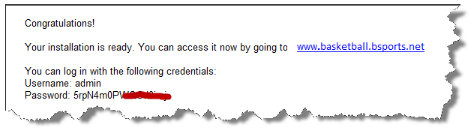
After the installation process is over you will immediately receive a welcome email with your login details (for the new WP installation you have just created)
Task # 3 - creating your master copy
The master copy is the "father and mother" of all your profit units in each domain.
As you know, each domain contains 33 subdomains and each sub domain is equal to one autonomous profit machine!
So under one domain we have 34 profit units (1 main domain + 33 subdomains) When we finish our master copy we will duplicate it on each of the other subdomains.
To create the master copy, we first need to follow those steps
Setup Phases :
Phase 1 : Downloading our must have WP plugins
Download the following plugins to your computer (your desktop location is fine) for free:
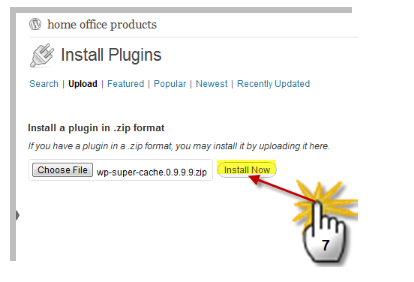
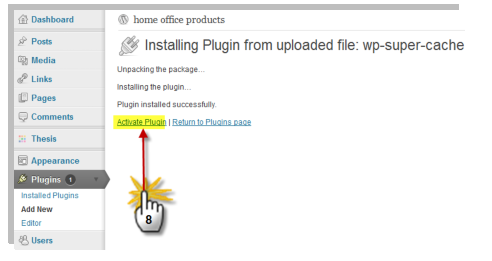
1. WP Super Cache - Very fast caching plugin for WordPress, which will help us to reduce our sever load
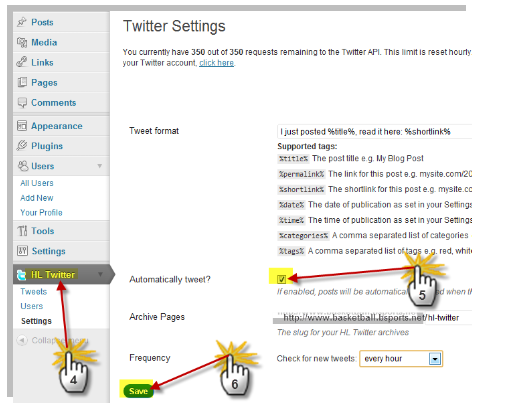
2. HL Twitter - HL Twitter automatically tweets when you publish a new post with a customizable message
3. Whydowork Adsense - Insert Adsense code in your pages without modifying the template
4. WP Robot 3 – our major core system - Automatically posts target content related to any topic of your choice to your profit unit (this, unlike the others, is a premium plugin that costs money. The good news is, you can use my special 42% off discount code: kidumim) (proper disclosure : the link is conjunction with my affiliate member)
Phase 2 : choosing one of our subdomains as master copy Pickup one of your subdomain addresses (that we going to use as our master) and insert its full url into your browser address bar
Immediately after the address add the extension : /wp-admin So if my chosen subdomain address is www.basketball.bsports.net My target address now will be www.basketball.bsports.net/wp-admin
Hit enter and log-in page will show up, insert details according to your welcome wordpress installation email (the email you received when you created your sub domain installations)
At this point you will see the main management screen (WP dashboard) of the subdomain you have chosen to be your master copy
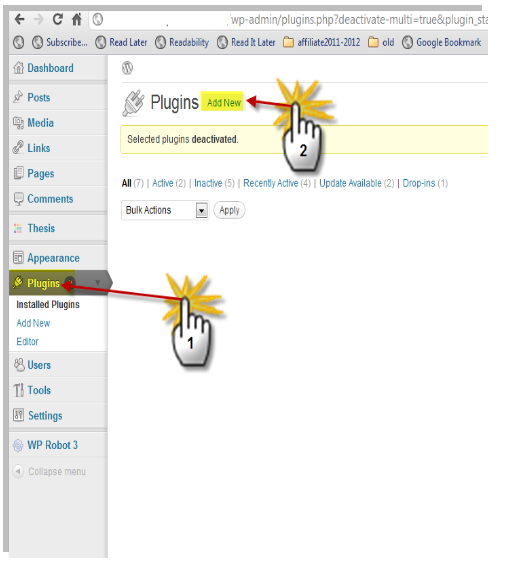
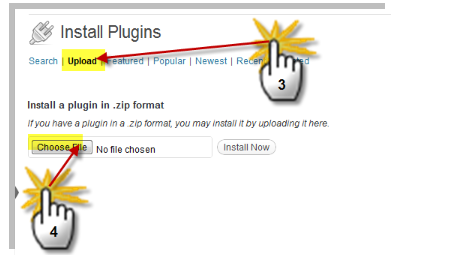
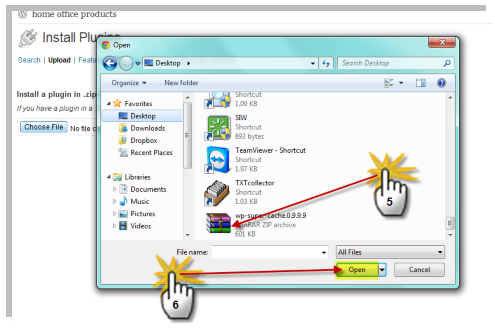
Phase 3 : installing our WP plugins + Initial settings
WP Super Cache Plugin The purpose of WP Super Cache plugin - is to reduce our server loads
Installation process:


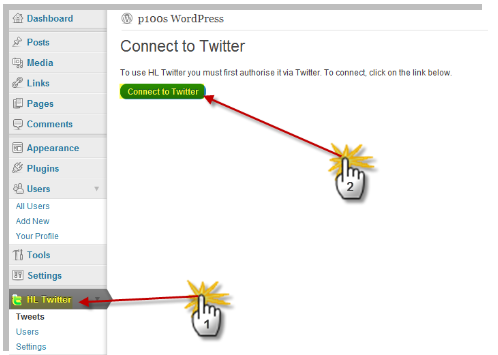
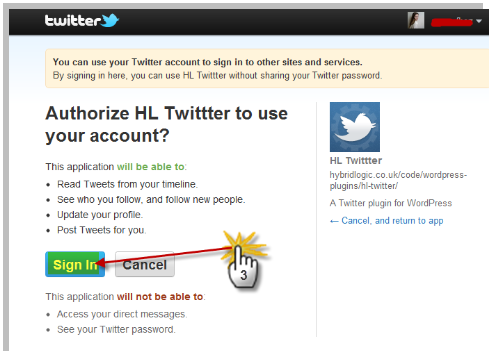
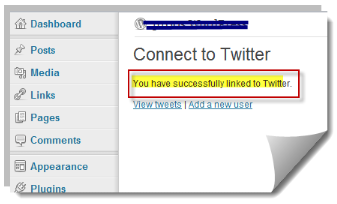
HL Twitter Plugin
The purpose of the HL Twitter twitter plugin - Automatically spread our posts to our twitter account and thus help our profit units exploit their presents to search engines
installation process:
Whydowork Adsense plugin
The purpose of Whydowork Adsense plugin - helping us to insert adsense adv code into our posts in width-range-position without messing with any WP templates. You can add any ads you want in any post with few clicks and some copy/paste ad codes.
installation process
a. register a BlogSpot account at blogger.com (Blogger.com is owned by Google)
b. create a new blog
c. make a post every couple of days. Make them informative. Bonus points if the content is original. Do this for about 8 blog entries, then apply for an Adsense account. Make sure you post a couple more entries while you're awaiting approval (this could take anywhere from 1 to 7 days, speaking from personal experience and what I've seen of others).
d. Once you have your approval, you can add the Adsense code to your blogspot blog as well as your other sites (in our case we are using the Whydowork Adsense plugin to embed adsense code into our profit units) .