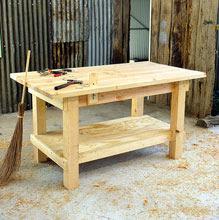
This workbench is simple to build and solid so it won’t move around as you work on it. It is also small enough to fit in most workshops.
 You'll need:
Part Item Dimensions
A Top 198 x 48 x 1800mm B Corner brackets 90 x 35 x 240mm C Side top rails 148 x 48 x 800mm D Front/back top rails 90 x 35 x 1400mm E Coach bolts, nuts
and washers 5/16 x 4 ½5/16 x 6 ½
F Side bottom rails 90 x 35 x 800mm G Legs 98 x 98 x 900mm H Front/back bottom
rails 90 x 35 x 1400mmI Shelf 800 x 1470 x 19mm J Bench stop 90 x 35 x 300mm
Tools
Claw hammer (570g) Smoothing plane (no. 4) Marking gauge Combination square
Steel tape (3 meters)
Three beveled-edge firmer chisels (10mm, 18mm, 32mm) Cross-cut saw (650mm long)
Tenon saw (300mm
long) Nail punch (3mm)
Set of twist drills
Set of screwdrivers (slotted, pozi,
Phillips) Oil stone
Sanding cork
Variable-speed power drill Jigsaw
Circular saw
1. Cut to length the four legs (G) and mark in housings for top and bottom rails (D and H). The top housing is 148mm x 48mm deep; the lower one 90mm x 35mm deep. Set your circular saw to the right depth and cut on the waste side of the lines you marked. Cut a series of parallel lines about 12mm apart between the housing marks and knock out waste. Smooth each housing with a chisel or rasp.
2. Cut to length front and back top and bottom rails (D andH), align them in their housing and pin in place with nails. Drill through both legs and rails as shown and bolt rails to legs. Check frame is square by measuring the diagonals.
3. Cut and clamp side rails (C and F) to the front and back frame, then drill and insert the longer bolts. Tighten all nuts securely and check the table doesn't rock.
4. Cut out four corner brackets (B) with 45-degree angles. A miter saw will be useful for this or set a circular saw to cut at 45 degrees. Screw brackets in place flush with top of rails. At this stage the bench frame should be completely rigid.
5. Cut the bottom shelf (I) to suit the dimensions of the bench. Notch out 35mm x 133mm in each corner to clear the legs. The shelf can be screwed in place or left loose.
6. Cut the five pieces for the top (A). Move them around to get a good fit for the edges and hold them in place with a nail. Screw them to the bench frame with 100mm screws,
two in each end, sunk slightly below the surface. Use a plane to smooth any major irregularities.7. Prepare a bench stop (J) as shown in the detail. Find the center and measure 60mm and 200mm from one end of a length of 90mm x 35mm pine. Drill an 8mm diameter hole at these points. Draw two lines joining the holes and cut along lines with a jigsaw to form a slot. Smooth the cut with a file or sharp chisel. Bevel the end at 45 degrees. Cut bench to a length of 300mm.
8. Locate the bench stop where you want it. Right-handed people generally prefer the stop at the left-hand end of the bench and left-handed people vice-versa. Make sure you avoid the braces. Hold the bench stop against the front rails and mark around it on the underside of the bench top. Transfer this shape to the top of the bench.
Drill two holes in opposite corners and cut out the rectangular hole. Insert the bench stop and make sure it slides smoothly. Adjust with a file or chisel as necessary. Hold the bench stop so it is flush with the bench top and drill a hole through the front rail at the top of the slot. Insert a carriage bolt with a washer and wing nut to allow the bench stop to be raised and lowered easily.
9. Workbenches are usually not finished with paint or a clear finish as it could mark other items which are built on the bench. Finally, let’s look at a plan for some simple shelving units that can be put together in no time!