HOW TO BUILD A “GLIDER”
THE simplest form of heavier-than-air machine is the stiff card or letter which you may spin across the room. If you give it just the right twirl it will glide on a level for many feet. There are many ways besides of folding a sheet of stiff paper which will convert it into a surprisingly clever little airship. With a little practice these gliders may be made to fly ten or twenty times their own length, which would be a very creditable flight for the best aëroplane models.
There is no better way to begin the construction of a model aëroplane than by study and experiment with these paper ships. The most famous aëronauts of the day, the Wright brothers, Curtiss, Herring, and many others, have spent years working with gliders before attempting to build or fly an aëroplane. It is in this way that they discovered what form of wing would support the greatest weight, whether the passenger should stand up or lie down, how to place the propeller and the rudder, and hundreds of other details which have made possible the actual conquests of the air.
Following in their footsteps, or rather their flights, the amateur aëronaut should first build and fly only gliders or aëroplanes without means of self-propulsion. The simplest form of glider may be made by cutting a broad oval from a sheet of stiff letter-paper and creasing it down the middle. The experiment may be made more interesting, however, by cutting out the plane like the outstretched wings of a bird, as suggested in the accompanying illustration. Try as you may, this sheet will not fly. Now add a trifling weight to the front of the plane. This may be done by fastening one or more paper clips to the edge, pasting a match or a toothpick, or by dropping a little tallow or sealing-wax.
At first you will underestimate the weight your little airship will carry. Add more weight in the same way, and test its gliding powers until the little airship will glide gracefully across the floor. Keep the length of these models under six inches. If you increase it beyond this, the model loses steadiness and flutters about ineffectively.
An interesting model may be made by folding a sheet of stiff paper in an arrow-like form. The idea is to form a series of planes which will support the weight of the tiny craft and, at the same time, enable it to fly or dart in a straight line. It will be found that the vertical surfaces lend stability and keep the ship moving in a straight line. You will soon learn, in this way, more of the principles of aëroplane construction than mere reading from books can teach you. Be careful, meanwhile, to remember just how you have launched the various forms of models, whether you have thrown them with an upward or downward motion, and how hard a push you have given them. The skill you acquire in this way will be valuable later on when you come to launch your regular model aëroplane.
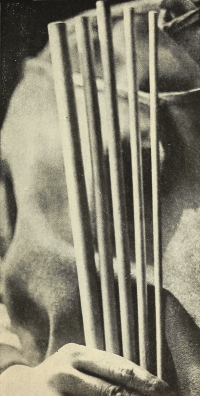
Dowel Strips of Different Sizes.
We are now ready to begin the construction of the frames of aëroplane models. The first model will be merely a glider. The frame and wings or planes of an aëroplane are built much the same as a kite. The idea in all such work is to combine the greatest possible strength or stability with extreme lightness. Remember, however, that the aëroplane during its flights is racked and shaken by its motor, and is likely to land with a bump. The materials used must be stronger than in the case of an ordinary kite, the joints more securely formed, and the entire structure braced in every possible way.
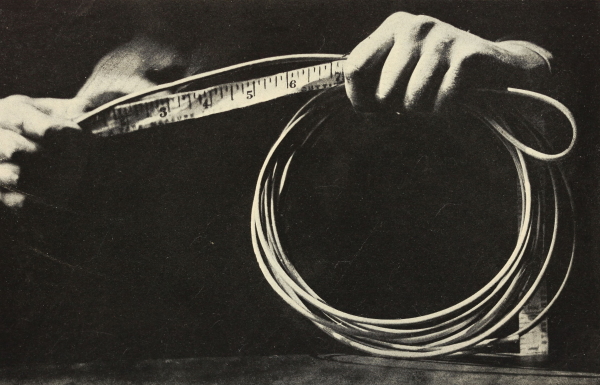
The best materials for constructing these gliders or aëroplanes are very cheap and easily obtained. At almost any hardware-store you will find a variety of “dowel-sticks,” which seem especially made for this work. They are smooth, round sticks a yard in length and of a variety of diameter. The sticks three sixteenths of an inch in diameter will be found most serviceable, while the larger sticks are just the thing for the backbones of your aëroplane. These sticks will not split at the ends and may be readily worked. They cost one cent apiece.
Some boys find that the reed or cane suits their purpose better than the dowel-sticks, since it is more flexible and a trifle lighter. The cane is easy to work when you wish to build planes with curved lines. It can be readily shaped to any desired form by first wetting it and allowing it to dry after working. Care must be taken in using it, since the ends are likely to split. Bundles of this cane may be bought at most hardware-stores or in department-stores. Enough material for constructing a model may be bought for a few cents.
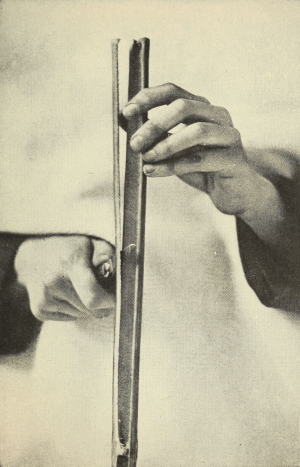
The lightest of all available materials is bamboo. It is difficult to procure, however, and requires more working up than the others. The best plan is to buy a stick of bamboo, a dry piece, and split it into strips of the desired length and thickness. The grain is so straight that there is practically no waste material as in ordinary wood. The strips may be readily planed or sandpapered. The wood is extremely light and strong enough for all practical purposes of the model aëroplane builder. An old bamboo fishing-pole may answer your purpose.
The first gliders constructed should be of the monoplane form, that is, with a single surface. The biplane or multiplane models will come later. Meanwhile, one is not losing time in working only on these simple models, for the experience is valuable and nothing is lost, since when the frame is properly constructed the motor and propeller may be added. The work throughout is extremely simple, and there are no problems of which the average ingenious American boy need be afraid.
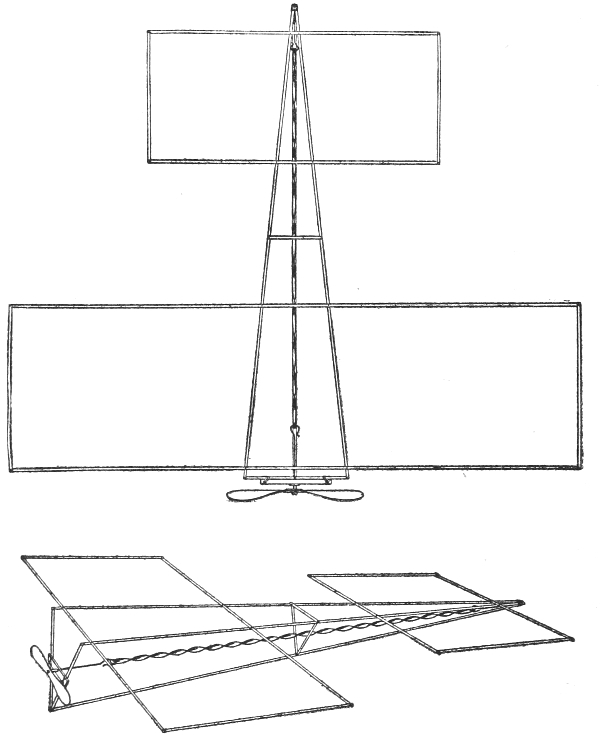
DIAGRAM FOR PLAN OF THE AËROPLANE ON PAGE 58.
DIAGRAM—SHOWN IN PERSPECTIVE.
PLATE A.
To construct the model shown in Plate A first make two frames of dowel-sticks, bamboo, or reed, or, if these be lacking, of light lath, the smaller frame 8½ by 19½ and the larger one 10½ by 36½ inches. Care must be taken to have the sides of the rectangle exactly the same length and the joints closely and neatly finished. Some boys prefer to lay one stick over another, then wrap the joint tightly with thin but strong linen thread, and over this brush a coat of thin glue, without using any brads or nails.
In kite-building, to be sure, it would be enough to lay the strips over one another and fasten roughly with a tack. Nor did the lengths of the stick, when covered with paper, make much if any difference. The aëroplane, it must be remembered, travels edgewise, and, having no guiding string, is at the mercy of every gust of wind. If the frames are carelessly proportioned it will not travel true, but is likely to be deflected. Imagine a boat whose sides are not exactly uniform trying to travel in a straight line. It would be lopsided, and would roll and pitch under the most favorable conditions. Now an aëroplane, since it travels in so thin a medium as air, is far more sensitive than a boat, and it becomes lopsided if its proportions be in the least inaccurate. Only the greatest care in construction will produce an air craft which will fly true and straight.
It makes little or no difference in a kite if the ends project a little and the joints be carelessly made. Not only must your aëroplane be perfectly proportioned, but it must be finished like a piece of fine furniture. The question of friction is a very important one in the heavier-than-air machine. You cannot be too careful to round off every corner and smooth every exposed surface. If you have opportunity to see a regular aëroplane, a Wright or Curtiss model, you will find that every part of the machine has been sandpapered and varnished with the greatest care. This is not done for the sake of appearances, but because it has been found that the wind striking against the rough piece of wood meets an appreciable amount of resistance, whereas it slips past a polished surface with little or no friction. Your aëroplane should be finished like a violin.
In building these planes be careful to compare the lengths of the corresponding sides throughout. If you prefer to use brads for fastening the joints do so. The dowel-stick and bamboo will take the brads with little danger of splitting. When thoroughly dry, cut away the glue which has squeezed out, round off the ends, and sandpaper with fine sand or emery-paper. If you use brads it will not be necessary to place the joints in a vise while drying. Should your strips split, bore the holes with a fine awl. Some boys after drilling the holes merely tie and glue the sticks together, using no nails whatever.
Now cut three dowel-strips 34 inches long and slightly sharpen their ends, so that when brought together they will form a prism whose base is about one fourth their length. Next bend a strong piece of wire into a hook—a hair-pin will answer for small models—and fasten it in the apex of the prism, with the hook inside. The projecting end of wire should then be bent over, and the three dowel-sticks glued and tied tightly together.
At the open end of the prism next fasten two strips from end to end, leaving the third side of the triangle open. Now fasten your two planes on the open side of the prism, slightly mortising the sticks and gluing and nailing them securely in position. To further strengthen the prism, join the three sides at the middle with three sticks, forming a complete triangle. The prism thus braced will be found as strong as a heavy central stick, besides being much lighter and providing an excellent base for the propeller. A strong stick about half an inch square should be tied and glued across the middle of the triangle at the base of the prism to support the motor.
The frame once complete, sandpapered and varnished, it is ready to be covered. At first this may be done with some smooth paper. Almost any thin material, muslin or linen, will answer for the purpose, although white silk makes the most finished-looking model. Such scraps as may be found in the family piece-bag will answer every purpose. In sewing the cloth over the frame the advice of some big sister, aunt, or the mother may well be taken. The idea is to fasten the cloth smoothly and neatly over the frame, keeping the surface free from creases or wrinkles of any kind. Boys are likely to be awkward with the needle. The cloth may also be glued over the frames. When complete cover the planes with a thin solution of paraffin dissolved in benzine.
In attaching the planes or wings to the central axis of the model, the larger stick or backbone may be mortised neatly, so that the sides of the frame will be sunk in flush with the upper surface. A fairly good glider may be made, however, by merely nailing down the frames against this backbone. The distance between the two planes is a complicated problem, but the beginner had better at first imitate the model shown in the accompanying illustration. If the two supporting planes be too far apart or too near together, the glider will fall. The amateur must experiment by changing their position on the central axis until he hits the right proportion. He will be able later to carry this proportion in his eye, and the experience will prove invaluable. Until you have hit upon the proper position, fasten them to the backbone with rubber bands. These permit you to slide the planes back and forth without the trouble of nailing.
Aëroplanes, unlike kites, fly best in a perfectly quiet atmosphere. If you make your trial flights out of doors, select a quiet day. A room, a barn, or any large interior will be found better. In launching your glider, hold it from beneath, so that it balances, and throw it forward with a swift, steady movement of the arm. A little practice will make you very expert.
You will now find yourself fitted to reproduce any of the simpler forms of monoplane models, several of which are here illustrated. An interesting model is made by attaching U-shaped wings to a central axis. In making these curved planes the reed will be found useful. Other effective gliders are made with triangular wings fixed at a variety of angles. Remember that the model must be absolutely symmetrical. In attaching the frames to the central axis, always make the joints as smooth and rigid as possible.
The weighting of the glider will be found to be a very important detail. As a rule the gliders require a considerable weight at the front. The exact position of the weight can only be determined by experiment. The simplest way is to wire a nail or a piece of metal to the edge of the frame. If your glider does not balance perfectly, which is likely to be the case, this fault can be largely remedied by weighting it. The tendency of the glider is likely to be upward, and the weight serves to keep it on an even keel. When your model glides steadily through the air, without rolling or pitching, you have constructed a well-balanced frame. It will then be time to take up the problem of propulsion.