• If you find there isn’t enough space between staves to add symbols (like for example text) please see page 279 for info on how to separate the staves.
• If you find the score looks crammed after adding symbols, check out Automatic Layout on page 283.
Unlike the other MIDI Editors, there is no Pencil tool in the Score Edit Toolbox. Instead, the Pencil tool is “automatically” selected when you insert Symbols. There are various rules for how this is done:
• Normally, the Pencil tool is automatically selected when you click on a Symbol in a Palette.• However, if the option “Double Click Symbol to get Pencil Tool” is activated in the Preferences–Score–Editor Behaviour dialog, you need to double click the Symbol to get the Pencil tool.
This is useful if you want to insert Symbols using the Do pop-up menu or computer keyboard as described below (and therefore don’t want the Pencil tool to appear every time you select a Symbol).
• In the same Preferences dialog, you will find an option called “Display Arrow Tool after Inserting Symbol”. When this is activated, the Arrow tool is automatically selected after you have inserted a symbol.
If you want to insert a lot of symbols with the Pencil tool, you may want to deactivate this option.2. Click (or double click) on the desired Symbol in the Palette.
As mentioned above, the “Double Click Symbol to get Pencil Tool” preference determines whether you need to double click. In any case, the Pencil tool is automatically selected.
3. Either click on the note or above or below it.
If you click on the note, the symbol is put in at a predefined distance from the note. If you instead click “above or below” the note, you decide for a vertical position yourself. In either case, the symbol is aligned vertically with the note. It can later be moved up/down.

 Clicking on a note inserts the Note Symbol (in this case a tenuto) at a predefined distance from the note head.
There are two options in the Scores–Additional Settings dialog that affect the vertical positioning of note symbols:
• Accents above Stems.
When this is activated, accent note symbols are displayed at the stem side of notes instead of the note head.
• Accents above Staves.
When this is activated, accent note symbols are displayed above the staff, regardless of the stem direction of the notes. This setting overrides the “Accents above Stems” option.
You might for example want to add a staccato symbol to all notes within a few measures. Proceed as follows:
1. Make sure the Note Symbol Palette is visible.
You may also want to use the To pop-up menu, to restrict which notes should be affected. 3. Click (or double click) on the desired Symbol in the Palette.
4. Hold down [Alt] and click on any note in the score.
The symbols are put in at a predefined distance from all of the notes that meet the criteria on the To pop-up menu. The symbols can be moved later.
 Clicking with [Alt] down inserts the symbol to a number of notes.
Adding a Symbol to several Notes using the Do pop-up menu
You may also want to use the To pop-up menu, to restrict which notes should be affected. 2. Select the desired Symbol from the Palette.
3. Pull down the Do pop-up menu and select “Multi Insert”.
The Symbol is added to the selected notes (taking the To pop-up menu into account), at a predefined distance from the note heads. The symbols can be moved later.
Note dependant symbols can be entered freely too. This for example allows you to add a fermat to a rest symbol.
1. Click or double click the symbol so that the Pencil tool is selected, as described above.
2. Hold down [Ctrl].
Make sure that the symbol ends up in the correct Staff!
Editing a Note Symbol
If you hold down [Ctrl] and click on a note symbol, a pop-up palette appears, allowing you to select another note symbol. Note that this affects all selected symbols of the same type (taking the To pop-up menu into account).
This makes it very easy to e.g. exchange all accent symbols for staccato symbols: 1. Hold down [Shift] and double click on the first accent symbol.All the following accent symbols are selected.
2. Press [Ctrl] and click on one of the symbols.
All the accent symbols are replaced with staccato symbols.
2. Click (or double click) on the desired Symbol in the Palette.
As mentioned above, the “Double Click Symbol to get Pencil Tool” preference determines whether you need to double click. In any case, the Pencil tool is automatically selected.
3. Click once or click and drag somewhere in the score.
The symbol appears. For many symbols with a length, you can drag while holding the mouse button down, to set the length of the symbol directly. The symbol appears with its handles selected (if it uses handles) so that you can change its size directly if you wish. This is all described in detail on page 209.
 Press the mouse button — drag — and release!
Slurs, Ties and the Snap Value
Since a slur or tie “musically” always spans from one note (or chord) to another, the beginning and end of a slur/tie in Cubase is always related to two notes in the score.
When you draw in a tie or slur, the program uses the Snap value to find the closest two notes to “attach” the symbol to. In other words, if you want to add the slur/tie to a note at a sixteenth note position, make sure snap is set to 16 or smaller (this is only true for manual drawing of slurs and ties).
Please note that this does not mean that the symbol has to start or end exactly above/below two notes. You can position the end points as you like. Instead, what it means is that when you use the Layout Tool to move the note graphically to adjust the look of the bar, the slur/tie moves with it (see page 171). The same is true if you adjust the width of the measure, the slur/tie is adjusted accordingly.
Drawing the Slur/Tie1. Check the two notes that the slur/tie should span and set the Snap value accordingly. For example, if one of them is at a quarter note position and the other at an eighth note position, set Snap to 8 or smaller (16, 32 etc).
2. Click or double click on the correct slur/tie in the Symbol Palette, so that the Pencil is selected.3. Position the mouse close to the first note and drag to a position close to the second note.
The end points of the slur/tie will snap to their default positions - holding down [Ctrl] allows you to move the end points freely.
Adding a Slur/Tie between two Notes
Inserting a Slur/Tie over a Selection of Notes
1. Select a span of notes.
3. To insert a tie, select the tie symbol, pull down the Do pop-up menu and select “Multi Insert”.
This method can of course also be used to add slurs, but if you use the “Insert Slur” function, you don’t need to have the Symbols Palette visible. You can even create a key command for the “Insert Slur” function, for instant access.
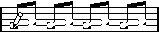
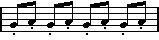
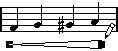
If you have recorded or entered a trill, Cubase VST can help you display this properly:
1. Select the notes that make up the trill.
A dialog appears.

3. Select the options you want.
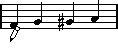
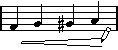
The radio buttons determine how the trill should look. Activate the “Help Note” option if you want an extra note to indicate between which notes the player should trill.
Now the following happens:
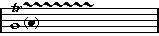
• All notes except the first one (and possibly the second) are hidden.
• The first note automatically gets a Display Length matching the length of the whole trill.
• If you chose to include a help note, the second note is converted to a “Graphic” note, with brackets but without stem. Otherwise, the second note is hidden as well.
• The trill symbols you indicated in the dialog are inserted.
• If you hold down [Alt] while adding a symbol to one staff in a grand staff, this symbol will be put in at corresponding positions on all staves. This allows you to for example insert rehearsal marks, repeats, etc for all instruments at the same time.
• By the same token, if you hold down [Alt] when inserting braces/brackets, they are inserted to all grand staves.
 The Layout Palette contains a piano keyboard symbol, useful for example in educational scores. The symbol has the following properties:
• To insert the keyboard symbol, select it from the Palette, click with the Pencil tool at the desired position and drag a box to specify the approximate size of the keyboard.
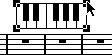
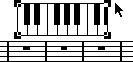
• If you double click on an inserted keyboard symbol, a dialog appears, allowing you to specify further properties of the symbol.
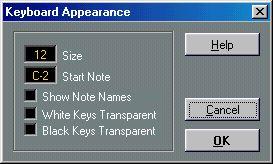 Governs the width of
 When this is activated, each C key is displayed with note name and octave (C1, C2, etc).
Activate these if you want white or black keys to be transparent.
A fretboard symbol of a guitar chord can be inserted anywhere in the score. There are two ways to do this: by using the “Other” Symbol Palette or by using the Guitar Lib dialog.
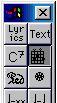
Using the “Other” Symbol Palette
1. Make sure the “Other” Palette is visible.
2. Click or double click on the Guitar Chord symbol, so that the Pencil tool is selected.
 3. Click in the score, at the position you want the symbol. The Guitar Symbol dialog appears.
• To put a black dot on any fret and string, click on it.
To remove it, click again.
• To input a symbol just above the string, outside the fretboard, click there. Consecutive clicks allow you to select between a ring (open string), a cross (don’t play this string) and no symbol.
• To add a Capodaster number, click to the left of the symbol.Consecutive clicks allows you to step through the possibilities.
• You can also add a Capodaster symbol (a line over the strings), by setting the “Capo Frets” parameter to a value higher than 0.
By adjusting the Capo End and Start values, you can create Capodaster symbols that span fewer strings.
• If you want a bigger symbol than the default one, activate the “Large” checkbox.
• If you want the symbol to be horizontal, activate the “Horizontal” checkbox.
The guitar symbol appears in the score.
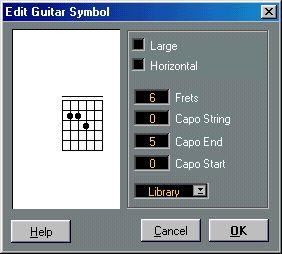
• You can edit the symbol by double clicking it.
The Edit Guitar Symbol dialog appears. This has the same parameters and settings as the dialog that appeared when you first created the symbol, with two additions:
Apply Clicking the Apply button applies the changes you have made in the dialog to the selected guitar symbol. Note that the dialog is non-modal, that is, it can remain open while you select other guitar symbols and edit them. The dialog will change to reflect the currently selected guitar symbol.
• [Ctrl]-clicking on a guitar symbol brings up a pop-up menu, listing all chords defined in the Guitar Library (see below).
This allows you to quickly change chords for the symbols you have inserted.
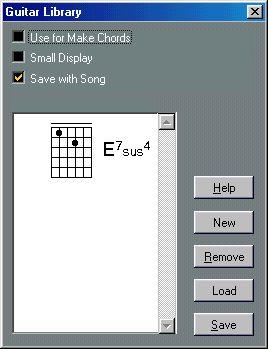
This is fine if you only want to add a few chord symbols to your score. If you need a lot of chord symbols, or if you are using chord symbols in a lot of different scores, you can gather all your chord symbols in a “Guitar Library” instead. This way you don’t need to recreate the same chord symbol over and over again:
1. Pull down the Score menu and select “Edit Guitar Lib...” from the Global Settings menu. The Guitar Lib dialog appears.
 2. To add a guitar chord symbol to the library, click the New button.
A chord symbol appears in the list to the left.
3. To edit the chord symbol, double click it in the list.
This opens the Guitar Symbol dialog, as when editing a chord symbol in the score.
• The symbol you create will also be “interpreted” and displayed as a written chord to the right of the fretboard symbol.
This can also be edited by double clicking if you like.
4. To add a chord symbol from the Guitar Lib window to the score, drag it into the score window and drop it at the position you want it.
Guitar chord symbols added this way behave like “regular” guitar chord symbols from the “Other” Palette. You can double click them to edit them in the Guitar Symbol dialog.
A file dialog appears, allowing you to specify a name and location for the file.
• To load a guitar library file, click the Load button.
In the file dialog that appears, locate and open the desired Guitar Lib file.
P Loading a Guitar Lib file replaces the current library!
There are also three additional checkboxes in the Guitar Lib dialog:
Checkbox:
When this is activated, and you use the “Make Chords” function (see page 224), the program will insert guitar symbols as well as regular chords (if any fitting guitar symbols can be found). If there are several guitar symbols for a certain chord in the Guitar Lib, the first one will be used.
If this is activated, the chord symbols in the list will be displayed in the size they will have in the score. If it is deactivated, the symbols will be displayed in a larger size, for easier editing.
When this is activated, the Guitar Library is saved with the Song. Otherwise, it is saved with the Cubase Preferences (and thus available to other Songs).
The symbols in the “Global” palette belong to the Layout layer. When you are editing a layout containing several Tracks, you can have inserted Global Symbols automatically copied to any combination of Tracks in the layout. You decide which Tracks should display Global Symbols by ticking their “Glob” column in the Layout Settings dialog.
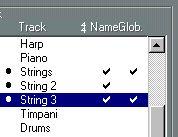
Here, Global Symbols will be displayed for the Tracks “Strings” and “String 3”.
• Any editing you perform to Global Symbols is automatically duplicated in the other Tracks.
• You can turn on and off the display of Global Symbols for different Tracks at any time.
• Global Symbols can be copied between layouts, by using the “Get Form Only” or “Get Layout” functions in the Layout Settings dialog.
Let’s say you are editing a full orchestra score, and want Rehearsal Marks inserted for more than one staff (typically, above each instrument group - brass, strings, percussion, etc.). Now all you need to do is insert the Rehearsal Marks from the Global Symbols palette for one of the Tracks, open the Layout Settings dialog and tick the “Glob.” column for the desired Tracks. When you close the Layout Settings dialog, the inserted Rehearsal Marks are automatically duplicated to the specified Tracks.