This section describes the general procedure for adding and editing Text Symbols (as opposed to fixed text elements such as title, Staff Names etc - see page 247). As described on page 239, there are several different types of text symbols, but the basic procedures are the same:
1. If you wish, select a font, size and style for the text (or select a Text Attribute) as described on page 235.
The text you insert will use the text settings made when no text is selected, but you can change all settings after you inserted the text.
The different Text Symbols are found on the “Other”, “Layout” and “Global Symbols” Palettes. 3. Click or double click on the Text Symbol in the Palette, so that the Pencil tool is selected.
4. Make sure the correct Staff is selected, and click in the score at the position you want the text.
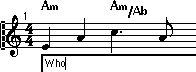
If you are inputting Lyrics, you should click above or below a note (lyrics are centred around each note and positioned vertically to where you clicked). See page 239.
 5. Enter the text in the text box that appears.
You can use [Backspace] to delete letters, and move the cursor with the arrow keys.
6. If you want to enter several lines of text, press [Ctrl]-[Return] to insert a line break (this is not possible for lyrics).
The text lines can be left, right or center aligned, depending on the Text Style setting (see page 236).
This is described on page 234.
8. When you are done, click outside the text box to close it.
The text appears. You can move, duplicate or delete it as with any symbol.
When you add a text symbol, you will find a handle at the right edge of the text block. By dragging this handle to the right, you can extend a “melisma line” from the text. This has several uses:
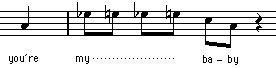
• If you are adding lyrics and want to indicate that a syllable should be sung over several notes:
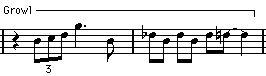
• If the text is an advice about articulation or playing style, and you want it to apply to a certain musical phrase only:
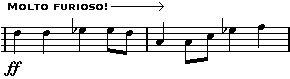
• If the text is an advice about articulation or playing style, and you want it to apply from that point on in the score:
 On the Text Style submenu you will find a number of options to determine the appearance of the melisma lines:
 Option:
Solid Line
End Line Down End Line Up
End Line Arrow
Description:
When this is activated, the line will be solid. Otherwise, it will be dotted. When this is activated, the line will be turned down, forming a “bracket”. When this is activated, the line will be turned up, forming a “bracket”. When this is activated, the line will end with an arrow.
1. When you are entering the text, position the text cursor where you want the score symbol to be.
2. Insert an @ sign.
This indicates to the program, that the next character should be displayed with the “Score Font 4.0” font.
3. Enter a character.
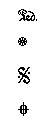
The characters associated with some of the most common score symbols are listed in the table below.
It is only the first character after the @ sign that will be interpreted as a “special” character.
Some common Score Symbols and their Characters:
O P Q R
 S
S
 F T G
F T GU W V
W\
• If you find there isn’t enough space between staves to add for example lyrics please see page
279 for info on how to separate the staves.
• If you find the score looks crammed after adding text, check out Automatic Layout on page
283.
If you made a mistake when typing or for some other reason wish to change text, double click on a text block with the arrow tool, edit the text and click outside the text box to close it.
• It is also possible to replace all occurrences of a certain word in the score, without having to edit the texts manually - see page 246.1. Select the Text Symbol(s) you want to make settings for.
If nothing is selected, the settings you make will be the “default settings”. The next time you insert text, these settings will be used.
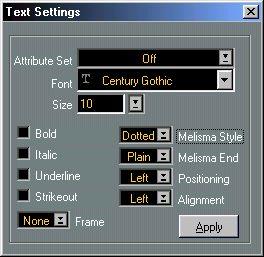 The “Text Settings” dialog.
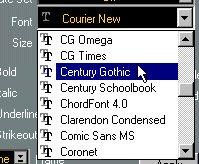
3. Select a Font from the pop-up.
How many and which fonts appear depends on what typefaces you have installed on your computer.
P For regular text you should probably avoid the items “Score Font 4.0” and “ChordFont 4.0”. These are the fonts Cubase uses for all scoring symbols. If you don’t know exactly what you’re doing, using these fonts will probably just produce garbage.
4. Select a text size from the “Size” pop-up menu (or enter one manually in the text field). Some fonts will look good in any size, others only in certain sizes. If you want to be on the safe side, stick to the True Type fonts in your system (the ones whose names are preceded by “TT”).
5. If you wish, add one or several text style options from the checkboxes and pop-ups.
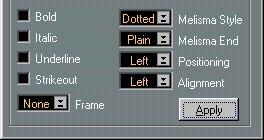 Most of the options are common text style variations such as bold, italic, underline, etc. But there are also a few special style options:
Option:
Allows you to select which side of the text block (left or right) should be used for calculating its position. This has an effect in situations where that text block is moved automatically (as a result of an Auto Layout function, when you move bar lines manually, etc.). If, for example, the text block appears just in front of a note (to the left of it), it will appear in a more sensible position after the adjustment, if the “Right” option is selected.
Allows you to specify the alignment of the text.
These options are only valid for texts with more than one line (when you have used [Return] to insert line breaks).
6. Click Apply to apply the settings to the selected text.
Note that you can select other text blocks while the dialog remains open - the dialog will be updated to reflect the settings of the currently selected text.
• If you just need to change the text size for a block of text, you can simply select it and use the key commands for Next/Prev Dynamic/Text Size/String.
By default, these are [+] (larger) and [–] (smaller) on the typewriter part of the computer keyboard, but you can assign other key commands for this in the Preferences-Key CommandsScore dialog if you like.
A Text Attribute Set can be seen as a “preset” containing all font, size and style settings. By creating Text Attribute Sets for the settings you use most often, you can save a lot of time.
Creating a Text Attribute Set1. Pull down the Score menu and select “Edit...” from the Text Attribute Set submenu. The Text Attribute Set dialog appears. You can also access this from the Preferences–Scores dialog.
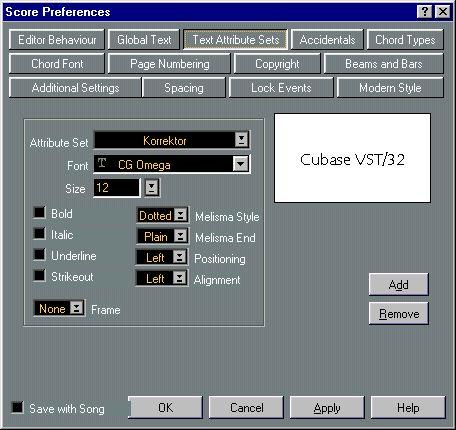
2. If you want the Set to be saved with the current Song, activate “Save with Song”. Otherwise, the Set will be saved in the Cubase Preferences, and thus be available for other Songs as well.
3. Click the Add button.A name box opens.
4. Enter a name for the new Text Attribute Set.
5. Select a font, specify a size and add style options with the checkboxes. The options are the same as when you make text settings on the Score menu (see above). The display in the dialog will help you by displaying a sample text with your current settings.
6. When you are done, click OK to close the dialog.The Set you created will now be listed on the Text Attribute Set submenu on the Score menu.
 Using a Text Attribute Set
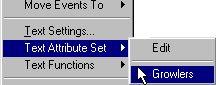
To apply the settings in the Text Attribute Set to one or several text blocks, select them and select the Set from the Text Attribute Set submenu on the Score menu. You can also access this submenu by holding down [Ctrl], pointing on a text block and pressing the mouse button.
• If you select a Text Attribute Set when no text is selected in the score, the settings will be used the next time you insert some text.Note that there will now be a “link” between the text and the Attribute Set. Any changes to the Attribute Set (see below) will affect all texts that use it. You can still edit any text settings manually (on the Score menu) but then the “link” to the Attribute Set will be removed.
Editing Text Attribute SetsIf you edit the settings in a Text Attribute Set, all texts using that Set will be affected. This is very practical, since it allows you to use the same number of “generic” Sets for all your Songs (for titles, comments, lyrics, etc), and simply change the fonts, sizes, etc for a different Song if necessary. This will also make it easier to move Songs between computers (which may not have the same fonts installed).
1. Open the Text Attribute Set dialog.2. If you want the changes to apply to the current Song only, activate “Save with Song”. Otherwise, the edited Set will be saved in the Cubase Preferences, and thus be available for other Songs as well.
3. Select the Set you want to edit from the “Attribute Set” pop-up menu.
4. Change the settings as desired.
5. Click OK to close the dialog.
P You should only remove text sets with “Save with Song” activated. Otherwise all Songs that uses the removed Text Attribute Set will display text in a wrong font/size/style.
1. Open the Text Attribute Set dialog.
2. Select the Set you want to delete from the “Attribute Set” pop-up menu.
3. Click the Remove button.
4. Click OK to close the dialog.