In this short Tutorial you will find out how to open the Score Editor and enter some notes in Page Mode. The purpose is for you to get some understanding for how MIDI Data and the score relate.
1. Open the DEF.ALL Song that comes with the program.
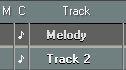
2. Make sure the first MIDI Track is selected. Rename it to “Melody”.
3. Create a Part between bar 1 and 5.
This is probably most easily done by double clicking in the Part Display between the Left and Right Locator.
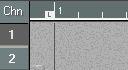
 Double click here
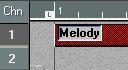
 Double clicking between the Locators creates a Part.
4. With the Part selected, pull down the Edit menu and select “Score”.
The Score Edit window opens.
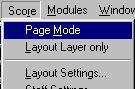
5. Pull down the Score menu and select Page Mode.
The Score is now displayed as it appears on a printed page. If the item on the menu says “Edit mode”, you are already in Page mode and don’t need to select anything.
 ...makes the Score appear as on a page.
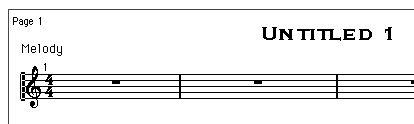 6. Pull down the File menu and select Print & Page Setup. The standard Page Setup dialog appears.
7. Make sure all your Printer settings are correct.
8. Close the dialog by clicking OK.
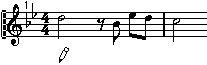
 The Score you are about to create!
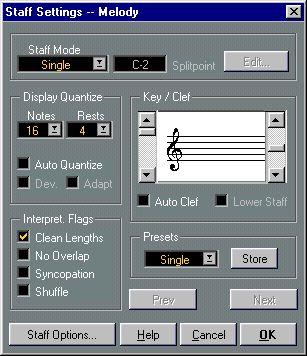
1. Pull down the Score menu and select “Staff Settings...”.
A dialog box appears.
The Staff Settings dialog.
2. Since we are only entering a simple melody, we can leave the Staff Mode set to “Single”.
If you examine the Score, you will see that the “smallest note position” that occurs, is eighth notes (i.e. there are no notes on odd sixteenth note positions or smaller). Furthermore, the smallest note value for a single note positioned on a beat is a half note. As described on page 12, this tells us the necessary Display Quantize settings. We will now “feed this information” into the staff.
3. In the Display Quantize section of the dialog, pull down the Notes menu and set it to “8”.
4. In the same section, pull down the Rest menu and set this to “4”.
Following the general guidelines, the value “2” (half notes) should be enough, but “4” is the largest Rest Display Quantize value available.
The function of these flags is described in “Transcribing MIDI Recordings”. 8. The Clef is OK, so leave it as it is.
 The Key Signature/Clef part of Staff Settings.
10.Click OK to close the Staff Settings dialog.
1. Since the “smallest position” we will enter any notes at is eighth notes, pull down the Snap pop-up menu and set it to “8”.
This will restrict input to eighth note positions. Now you will not be able to input notes at sixteenth note positions, but that’s exactly what we want, right?
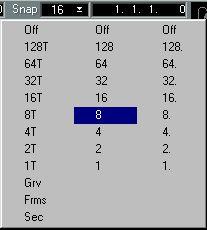 The Snap pop-up menu.
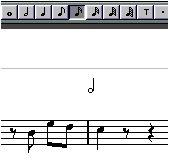
2. The first note is a half note, so click on the half note symbol on the Score Toolbar. The Score Toolbar is located just above the Score.

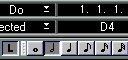
 The Score Toolbar with the half note selected.
When you click on the note symbol and move the mouse pointer into the score, please observe that the program has now automatically selected the Note tool for you. This tool can also be selected “manually” from the Toolbox as in any editor.
3. Move the mouse pointer over the note lines and press the mouse button without releasing it.
A half note symbol appears “under” the pointer.
 Dragging a half note in the score.
4. Since the note is supposed to be positioned at the beginning of the staff, drag the mouse all the way to the left of the staff.
5. When you have found the right horizontal position, drag vertically to find the right pitch.
You can check the pitch in two ways: directly in the score (accidentals appear as you drag) and in the mouse box on the Status bar. The pitch you are aiming for is D4.
 The Status bar shows mouse position and current pitch.
6. Release the mouse button.
The note appears. It is selected and therefore has a black rectangle around its head.
The first note entered!
7. The next note is an eighth note, so click on the eighth note symbol on the Score Toolbar.
The pointer takes on the shape of an eighth note.
9. Drag the note back and forth without releasing the button.
You will notice that the note is ‘magnetically’ attracted to the eighth note positions within the bar. This is because we have Snap set to eighth notes. The position we are aiming for is the first upbeat after the half note rest’s start position. You can also check the position by looking at the mouse box on the Status Bar (it should display “1.3.3.0”).
10.When you have found the right position and pitch, release the mouse button. The note now appears in the score, and the program automatically inserts the correct rest in front of it.
The first bar with the second note added.If the note doesn’t appear at the correct position, there are two ways to go:
• Undo and try again.
11.Click to enter the next two eighth notes. If you think you can find the correct position immediately, just position the pointer and click briefly to make the note appear. These two notes will automatically be grouped under a beam.
The first bar finished! 12.Enter the first note in measure two, with the current settings.
Oops, the note is of the wrong length, since you didn’t change the note value. Of course, you could Undo and try again, but let’s try another method, to change the length of the existing note:
13.Click on the half note symbol on the Score Toolbar.The Mouse pointer takes on the shape of a half note.
14.Hold down the [Alt] key and click on the note with the wrong length.
Its length changes to a half note.


This way of changing the lengths of notes is probably something you will use a lot when you make mistakes entering notes and when you tidy up MIDI recordings.
15.Continue entering the last notes in the remaining bars, using the techniques described above.The finished score.
Let’s check what Display Quantize can do with your piece as it is now.
1. Play back the piece via MIDI to check that it is correct.
2. Open Staff Settings again and change the Note Display Quantize to quarter notes (4).
Oops again! As you can see, the eight notes are now interpreted as quarter notes. This is natural because by changing the Display Quantize value, you specifically instructed the program not to display any notes on anything other than quarter note positions.
3. Now try playing back.As you will note, playback is not affected. This is because Display Quantize, as set up in Staff settings, only affects how the score is displayed, not the MIDI data. 4. When you are done, set Note Display Quantize back to eighth notes.
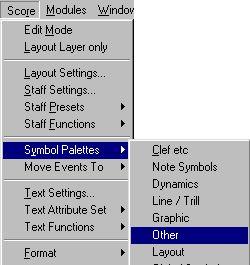 Selecting the “Other” Palette.
2. In the Palette that appears, click on “Lyrics”.
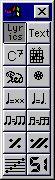 The “Other” part of the Symbol Palette.
• When you select a symbol like this, the cursor automatically switches to the Pencil tool. If the Pencil tool doesn’t appear, double click on the “Lyrics” symbol instead (there is a preference for this, as described later in this manual).
3. Move the pointer to a position straight below the first note.
 Positioning the pointer under the first note.
4. Click once with the mouse.
A box appears.
 Clicking brings up a box for the first word.
We shall now enter the text “More, much more than this, I did it my way!”, with one word on each note.
5. Type in the first word (“More”) and then press the [Tab] key.
More appears under the first note.
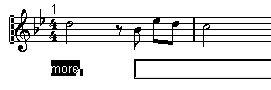
After hitting [Tab], the program moves on to the next note.
6. Type in the next word (“much”) and hit [Tab] again.
7. Proceed like this for all notes except that last.
The lyrics appear under the notes.
 The Score just after adding the last word.
The lyric blocks are spaced far too tightly, and also selected, which makes the score look very strange.
9. Select the arrow pointer from the Toolbox and click on a white area in the score. All text gets deselected.
10.Pull down the Score menu. From the hierarchical “Auto Layout” menu, select “Move Bars”.
The measure spacing gets adjusted to make the lyrics readable.
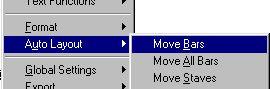 Auto Layout and its submenu.
• If you find that the lyrics are too close to the notes or too far below them, you can easily adjust this: Select all the words by enclosing them in a rectangle with the Arrow tool, and drag them up or down.
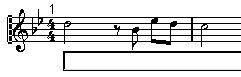
 The finished score.
11.Double click on the Score Title at the top of the screen.
The Score Title dialog appears.
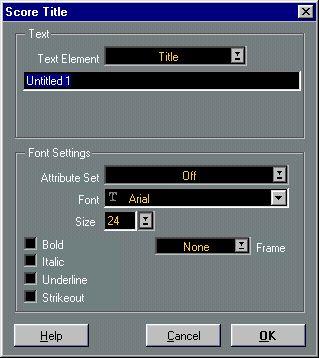 12.Pull down the Text Element pop-up menu and select “Title”.
This finishes the first tutorial! Congratulations! You might want to proceed with the next tutorial directly if you wish, or dive into the program and get back to this one when you are ready to enter the world of Polyphonic Voicing!