There are four ways to display the Track Staff settings:
• Make the staff active and select Staff Settings from the Score menu.
• Double click to the left of the staff.
• Make the staff active and select “Get Info” from the Edit menu.
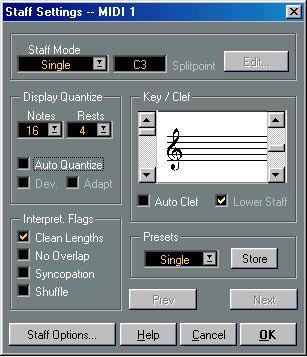 The Staff Settings for a Track called “MIDI 1”.
1. Note in the title of the dialog box which Staff/Track is currently selected. 2. To move the Staff settings indicator one staff down, click the Next button or press [Page Down] on the computer keyboard.
3. To move it one staff up, click the Prev button or press the [Page Up] key on the computer keyboard.
If there’s no staff above/below the current, one or both the buttons may be greyed out.
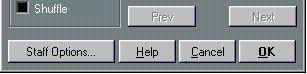 In the lower right corner of Staff Settings you find the Next and Prev buttons.
When you step through the staves, the dialog gets updated to show the settings for the Track. However, it always shows the Staff settings (the ones valid for the entire Track), never the “exceptions” you might have inserted using the Display Quantize tool (see page 78).
P Stepping between Staves this way is the same as clicking “OK” and opening Staff Settings for another Staff. This means that any settings you have made to a Staff is made permanent when you select another Staff - pressing Cancel will only restore the settings for the last selected Staff.
If you hold down [Alt] when you click OK to close Staff settings, the settings you have made are copied to all staves currently in the score. This can be used for quickly making settings that are common to all staves on a grand staff.
1. Open Staff Settings.2. Adjust all the parameters that are common to all Staves.
This might for example be Key Signature, Display Quantize, Syncopation handling, Shuffle, Beaming etc.
4. Open Staff settings again for each staff and make the adjustments particular to that staff.
This might for example include Clef and Display Transpose (for brass, etc).
The basic Key and Clef Track Staff settings are described in detail on page 56. There is also a Lower Staff check box which is only used in conjunction with Piano (Split) Staves and Polyphonic Voicing. This is described on page 59.
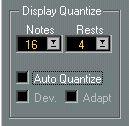 The Display Quantize settings.
This is where you give the program basic information about how to interpret your playing. There are “fixed” Display Quantize values plus an “Auto” option which should only be used when your music contains mixed straight notes and triplets. For background information about Display Quantize, see page 10.
If your music only contains “Straight” Notes or Triplets1. Set the Note Quantize value according to the “smallest note position” you want to be shown in the score.
For example, if you have notes on odd sixteenth note positions, the Note Display Quantize value should be set to 16 (sixteenth notes). The “T” values on the pop-up are for triplets.
2. Set the Rest Quantize value according to the smallest note value (length) you want to be displayed for a single note, positioned on a beat.
For example, if you want a single short note on a beat (quarter note position) to be displayed as a quarter note, set the Rest Quantize value to 4 (quarter notes).
These are described in detail below.
5. Examine the score.
If your music contains Mixed Straight Notes and Triplets
1. Examine the score and decide if it mainly contains triplets or mainly “straight” notes.
2. Set the Note Quantize Value accordingly.
If the score is mainly triplets, select the smallest triplet note position used in the score. If it is mainly straight notes, select the smallest “ordinary” note position.
This is done according to the same rules as above.
4. Activate the Auto Quantize option.
5. Turn on the Deviation (”Dev.”) and Adapt flags if you need them.
When Deviation is activated, triplets/straight notes will be detected even if they are not exactly “on the beat”. However, if you know your triplets/straight notes are perfectly recorded (quantized or entered by hand), turn this off.
When Adapt is activated, the program “guesses” that when one triplet is found, there are probably more triplets surrounding it. Turn this on if not all of your triplets are detected.
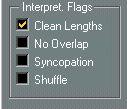 The Interpretation Flags
Clean Lengths
When this is turned on, the program interprets the length of your notes differently than otherwise. A note’s length (in the display only) might be extended to the beginning of the next note or to the next Rest Quantize “position”. An example:
• If a note is too short, you will get a rest just after it.• When Clean Lengths is turned on, the rest will disappear.
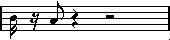 A slightly short eighth note with Clean Lengths off and on.
If using Clean Lengths doesn’t help in a particular situation, you will have to manually resize the offending note(s) or use the Display Quantize tool (see page 78).
No Overlap
When notes starting at the same position have different lengths, the program generally adds more ties than you may want. This can be avoided by using No Overlap.
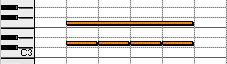 This recording in Key Edit...
...and like this when No Overlap is On.
You can insert “exceptions” to the No Overlap setting in Staff settings, by using the Display Quantize Tool.
P Please note that there will probably be situations when neither of these alternatives is ideal. If you run into such a situation, it can probably be resolved by using Polyphonic Voices, see page 128.
SyncopationWhen syncopation is off, the program generally adds ties to long notes crossing beats. There are a few exceptions to this. For example, a half note starting at “2” in 4/4 is always displayed as a half note, never as two tied quarter notes.
If you want more “modern” notation of syncopated notes, turn on Syncopation.
 Syncopation off, and on.
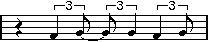 Again, Syncopation off, and on.
Please note that you can insert “exceptions” to the Syncopation setting in Staff Settings, by using the Display Quantize Tool. You could also create tied notes in various combinations by using the Cutflag tool.
ShuffleIn jazz it is very common to score a shuffled beat as straight notes, simply to make it more legible.
When the Shuffle flag is turned on, Cubase searches for groups consisting of a quarter note triplet followed by an eighth note triplet or groups of an eighth note and a sixteenth note triplet. If it finds one, it displays the group using regular eighth notes or sixteenths.
Shuffle Off and On.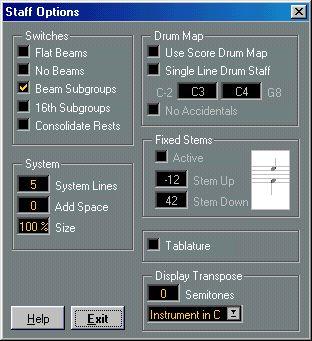 The “Staff Options” dialog.
When you click the “Staff Options” Button in the Staff Settings dialog, another dialog opens up with additional Staff Settings (which can be made part of a Staff Preset just as the other settings). Below follows a brief description of these, with references to more detailed explanations:
Staff Options SwitchesActivate This: Flat Beams
Consolidate Rests As above, but with 16th Subgroups activated.
When you want small consecutive rests joined into one (an eight note rest and a sixteenth note rest joined to a dotted eighth note rest for example).System
This section allows you to set the number of system lines and to control spacing between the lines. See page 300 for an example of how this can be used with Tablature.
Fixed StemsActivate this if you want all note stems to end at the same vertical position.
Drum Map Options
These settings are all described in the chapter “Drum Scoring”.
Tablature
Activate this to create tablature scores.
Display Transpose
• The numerical setting is used to transpose the score up or down without affecting playback and without actually transposing the MIDI data.
• The pop-up menu contains a number of preset transposition values for common instruments which are scored transposed.