There are instances when you will want different Staff Settings on different sections of the Track. The Staff Settings are valid for the entire Track, but you can insert changes wherever you like. There are two ways to do this:
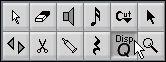
The Display Quantize Tool in the Toolbox.
2. Move the mouse over the Staff where you want to insert a new Display Quantize value.
The vertical position is of no relevance as long as you click somewhere in the staff.
Only horizontal position matters when you use the Display Quantize Tool. 4. Click the mouse button.
The Display Quantize dialog appears.
 5. Activate the flags you need and set the Quantize values as desired.
Details are found on page 70 and page 71. Additional hints below.
6. If you want to restore the settings to the ones used in the Staff Settings, click on “Restore to Staff”.
7. Click OK (if you use Polyphonic Voices, see below).
The new Quantize Settings are now inserted into the Staff at the position indicated in the dialog. The settings are valid until a new change is inserted. You will see a text “marker” below the notes that indicates that a Display Quantize change has been inserted (if you don’t see this, check the Show Invisible settings, as described below).
When using this method, there is one important difference: The Display Quantize Events have a length. That is, the settings you make will affect a finite section of the score only. After the “end” of such a Display Quantize Event, the Display Quantize settings are restored to the Staff Settings.
1. Select the notes that you want to be affected by the Display Quantize settings. This selection is used to automatically set the “Length” of the Display Quantize change. In other words, it is really only the first and last selected notes that count - all notes in between these will be affected.
2. Pull down the Do pop-up menu and select “Insert Quantize...”.The Display Quantize dialog appears.
3. Make the desired Display Quantize settings.
A Display Quantize Event is inserted, encompassing the selected Events.
• If you click on the “All Voices” button, one event is inserted for each Voice.
• If you click OK, only one event is inserted, into the current Voice.
For more details see page 142.
P Note that if the option “Display Quantize Tool affects All Voices” is activated in the Preferences–Score–Additional Settings dialog, all voices will be affected even if you click OK.
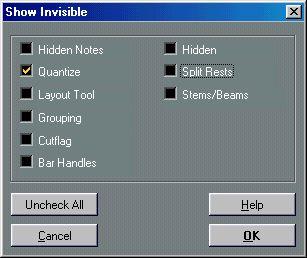
The “Show Invisible” dialog.
2. In the dialog, turn off “Quantize”.
3. Close the dialog.
P If you want to be able to edit or delete your inserted Display Quantize values, the markers need to be visible.
You can also hide and show “Invisible” elements using the “Show Invisible” Filter Bar, as described on page 55.
See above.
2. Double click on a Display Quantize indication.
The Insert Quantize dialog box appears.
3. Change the settings in the dialog box as described above.
• If the edited Display Quantize Event was created using the “Insert Quantize” command on the Do pop-up menu, the dialog will contain a ”Length” field.
This allows you to adjust the length of the Display Quantize Event, i.e. how large a section it should encompass. Setting Length to 0 effectively converts the Event to a “standard” Display Quantize Event, i.e. an Event without Length (valid until the next Display Quantize Event).
See above.
2. Click on a Display Quantize with the Eraser or select it with the arrow tool and hit [Backspace] on the computer keyboard.
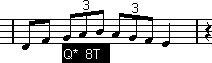 A selected Display Quantize event.