Before you start entering notes, you need to make some initial Staff settings in addition to those described in “The Basics”. In order for you to understand why, and how these settings and the note data in the score interact, please read “How the Score Editor works”.
• Make the staff active and select Staff Settings from the Score menu.
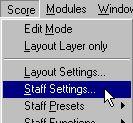 Opening Staff Settings from the pop-up menu.
• Double click to the left of the staff.
Double click in this area

• Make the staff active (with no objects selected) and press [Ctrl]-[I] on the computer keyboard.
This is the default key command for “Get Info” - as always, you can choose another key command for this if you like.
Either way, the Staff settings dialog appears and shows the current settings for the Staff.
The Track name is displayed in the window title.
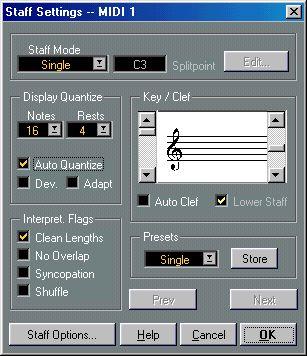 The Staff Settings dialog box.
1. Note in the title of the dialog box which Staff/Track is currently selected. 2. To move the Staff settings indicator one staff down, press the Next button or press [Page Down] on the computer keyboard.
3. To move it one staff up, press the Prev button or use the [Page Up] key on the computer keyboard.
If there’s no staff above/below the current, one or both the Next/Prev buttons may be greyed out.
When you step through the staves, the dialog gets updated to show the settings for the Track. However, it always shows the Staff settings (the ones valid for the entire Track), never the “exceptions” you might have inserted using the Display Quantize tool.
If you know you will reuse the settings you now make, on other Tracks, you should probably take the time to turn the settings into a Staff Preset. This is described in detail on page 121.
Parameter:
Staff Mode
Display Quantize: Notes Display Quantize Rests Auto Quant
Clean Lengths
No Overlap
Syncopation
Shuffle
Key
Clef
Auto Clef
Setting:
Single (for split staves, see page 114)
64
64
Activated only if you have mixed “straight” notes and triplets. Off
Off
Off
Off
As desired
As desired
You will later find out how to adapt these settings in detail to make the score read as you wish it to be.
P It is “extremely important” that you understand how Note and Rest Display Quantize interact with the score. If you select too large a note/rest value, the notes you “click in” will not appear as intended. Please read the chapter “How Score Edit works”. If you have mixed triplets and straight notes, please refer to page 70.