Since Logical Presets are disk files, you need to specify in which folder you keep your Presets. By default, the program assumes all your Logical Presets are in the “Logical Presets” folder in your Cubase VST folder. If this is OK, you don’t need to change anything.
Furthermore, the subfolders can be used to create hierarchical menu items, which proves a very neat way to organize your Presets, if you have many. If you need to specify another folder than the current, proceed as follows: 1. Pull down the Functions menu and select “Set Path” from the Logical submenu. A file dialog appears.2. Locate and select a folder on your hard disk.
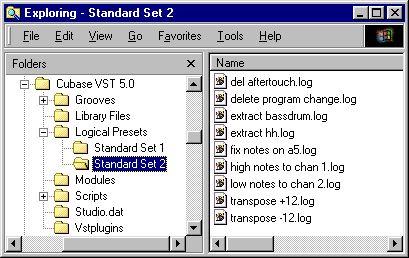
If you use the Explorer to check the Logical Presets folder in your Cubase VST folder, you will see all the items that make up the Logical Presets in the program. Note that the structure of the files correspond to the way the Presets are shown on menus in Cubase VST.
• To move items between the hierarchical menu items, drag and drop files between the folders inside your Logical Presets folder.
1. Open Logical Edit.
2. Select “Create New” from the Preset pop-up menu.
3. Double click on the current name (“Untitled”) and type in a new.
4. Set up all the fields and values as desired.
A new file is created in your Logical Presets folder.
1. Open Logical Edit.
2. Select the Preset in the list.
3. Change the fields and values as desired.
4. Click the Store button.
1. Open Logical Edit.
2. Select the Preset in the list.
3. Double click on the name and type in a new name and hit [Return].
4. Click Store.