When you switch Logical Edit to Expert Mode (by clicking the “Expert” button) you get two more columns in the Filter and Processing sections, plus a graphic Bar Range setting in the Filter section. The pop-ups in the Processing section are also extended with additional functions.
 Column Description
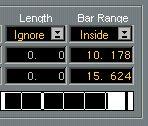
Bar Range This allows you to only include Events at a certain position within each Bar in the editing. You can type the beat and tick value. Or, you can drag a range in the Bar Range graphic at the lower part of the whole dialog box. This is done in the same way as when you drag to set the Loop range in Key, Drum or List Edit.
Bar Range Example
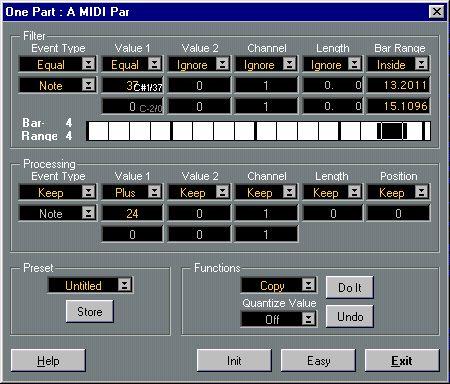
Check out the settings above. If you have a snare drum playing on the key C#1, this setting will allow you to pin-point all snare drum beats that lie around the fourth quarter in each bar and transpose them up two octaves to C#3. This is useful if you want to double up the second snare drum in each bar in a basic rock beat, with some other Sound. Since this example uses Copy, it assumes that you entered Logical Edit from an Arrange window. Click on “Do it” to make up a Part with the copied beats only. Then use transposition and MIDI Channel settings to assign the new Track to another Sound.
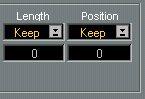 The Processing section also gets two new columns in Expert mode. Column Description
Position Processing position will affect the Events' position values so that you are able to move Events and create Events at new positions. The Operations for it are Keep, Plus, Minus, Multiply, Divide and Spread (see below for details about the Spread operator).
The integer (the number to the left of the decimal point) represents ticks.If you for example add to the Position value and use Insert, this will result in some sort of echo effect. If you multiply or divide the Positions, this will be the same as changing the tempo of the music in the Part. There are examples of this in the Logical Presets in the Def.All Song that comes with the program.
SpreadA lot of MIDI data starting on the same tick could lead to a MIDI overflow situation in some older devices (producing stuck notes etc). The Spread operator “spreads” out the data according to the tick value specified in the Position field. If you set this value to three ticks the Events’ start positions are thus spread 0, 3, 6, 9. 12 etc.
Processing Invert
This inverts the values, so that the bigger it originally was the lower it comes out. If you for instance select Controller values in Key or Drum Edit and Invert them, you will find that it looks as if the graph has been turned upside down. An upwards scale becomes a downwards scale etc. This Operation needs no values.
Appears for Value 1 only. This works like Scale Correction in the Transpose/Velocity dialog box. The upper value field is the Scale type, which is selected from a pop-up, and the second value is the Key Signature.
Appears for Value 1 only. This flips the Events around a set axis. For notes this will invert the scale, with any key as a “center point”. For velocity it will make high velocities low and low velocities high, with any value as a flip axis. It will have similar effect on Controller values etc.
This Operator adds or subtracts values relative to the original values, as opposed to the Dyn. Operator, which creates a ramp. For example, setting the values to 0 and 127 will produce a velocity fade-out, with the relative velocities intact.
This adds or subtracts random values relative to the original. If you set the lower value to 40, and the upper to 0, it will add values between 0 and 40 to the original (as opposed to the Random Operator which would set all values randomly between 0 and 40).