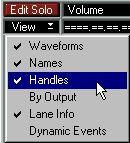
 Waveforms
This turns the display of waveforms on and off in the editor. Deactivating this speeds up screen redraws.
Names
This turns the display of Segment names in the Events on and off.
Handles
This allows you to decide if you want to see the Start, End and Q-point handles in the Events. See below.
By Output
By selecting this item you sort your Events so that all Events that play back on the same audio channel are put on the same Lane. See page 344 for details.
Lane Info
This shows/hides the display to the left of each Lane that tells what audio channel the Events on the Lane play back on.
Dynamic Events
If this item is activated, the lower half of each Event displays one of these three alternatives:
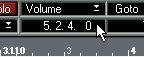
• The Volume curve for the Event.
• The Pan curve for the Event (see page 392 for descriptions on how to edit Volume and Pan).
• The M-Points (Match Points) for the Event (see page 373).
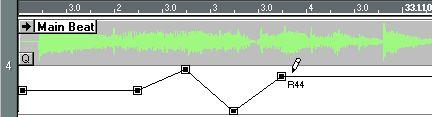
 A Pan curve
 Match Points
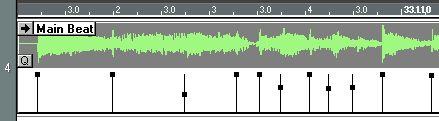 You determine which of these three Event types is shown, by using the pop-up to the right of the Edit Solo button.

• Zooming in all the way horizontally allows you to see the waveform in ultra-high resolution: one sample per pixel (screen “dot”).
• Zooming in vertically makes the Lanes “higher”. This is convenient for example for detailed editing of Volume and Pan.
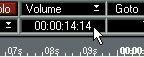
By clicking the Meter Scale button you can decide if the display and the ruler should show time or meter linearly:
• In a time linear display, each “second” on the screen occupies equal amount of space, horizontally. This is convenient if you are working with time related material, such as for example narration or sound effects to be matched to video.
• In a meter linear display, each bar on the screen occupies equal amount of space, horizontally. This is the mode to use if you are working with musically related material.
Ruler and Position Formats
By clicking on the mouse box you can determine whether the rulers and the mouse position box should be displayed in time code (SMPTE) format or as bars and beats, as in the Arrange window and some of the MIDI editors (see the Basic Methods chapter in the Getting Started book).
• Normally, you would match the Time Meter Scale and Ruler formats so that they are both set to Time or Meter positions.
• If you set the display to Time Scale and the Ruler to Meter positions, the ruler will not be linear.
That is, if you have tempo changes, there will not be equal spacing between the measures. This is natural, since if the measures are played at different tempo, they occupy different amounts of “real time” (minutes, seconds etc.)
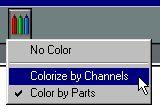 There are three options on this menu:
No Color
Select this option if you don’t want any color for the Events.
Colorize by Channels
If you select Colorize by Channels, Events on different audio channels will get different colors. This is useful if for example you are editing a Track with channel “Any”, and viewing several Events by Output.
• When Colorize by Channels is selected, the Color pop-up menu is automatically expanded to include an item called “Channel Colors...”.
Select this to edit which color goes with which audio channel.
If you select Color by Parts, the Events in the editor will get the color that you have selected for their respective Parts in the Arrange Window. This allows you to distinguish Events from different Parts on the same audio channel, even if View by Output is selected on the View pop-up menu.