1. Pull down the Panels menu and select VST Inputs.
The Input window appears:
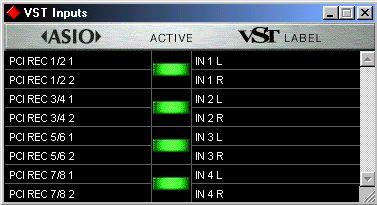
The left column contains the available “physical” Input ports. The fields in the right column show the names that will be used for each Input throughout the program. The indicators in the middle column show which Inputs are active (in this figure inputs Main L/R, Ret 1 L/R and S2 1/ 2 are active).
2. To rename an Input, click on its name field in the Labels column, and type in a new name.
The name can contain up to seven characters, and will be displayed when you select Inputs for the audio channels in the Monitor window and the Inspector.
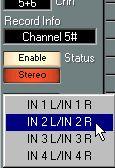
The active Inputs will
appear on the Input
popup, for example in
the Inspector.
3. Activate the Inputs you need in the VST Inputs window, by clicking on their buttons in the middle column.
The buttons lights up, indicating that the Inputs are active. Note that all Inputs are activated in stereo pairs.
P Make sure not to activate more Inputs than necessary, to possibly conserve processor power. In situations when you don’t need any Inputs at all, such as audio mixdown, you should consider deactivating all Inputs, to make more processor power available for effects, EQs, etc.
4. Press [Return] on the computer keyboard to close the Inputs window. The Input settings are saved with the Song. However, if you would select another ASIO Device and then open the Song, the Input settings saved in the Song will be ignored.