Straighten Up is a function, and as all others in the Master Track editor it is located on the Do pop-up menu. Straighten up adjusts and inserts tempi to make Linked Time and Meter Hits match, so that musical positions (Meter Hits) happen at specific time cues (Time Hits).
In some cases a perfect match can not be found (for “mathematical” reasons). In this case, the line remains dotted, but it may be straight on screen anyway. This slight mismatch (which is always in the millisecond range) probably won't be noted.
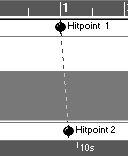
If you have cross-linked Hitpoints, the program will be unable to straighten up and will inform you via a dialog box.If you are working with music for film or video, for example with Cubase VST synced to time code from a video, Straighten Up is an invaluable tool for making cues match the picture. Here's a general outline of how to work with Hitpoints and Straighten Up:
1. Set up synchronization to the video.See the the chapter “Synchronization”.
2. Activate the Master Track (press Master on the Transport Bar) and open the Master Track editor. Set an approximate initial tempo for the music you have in mind. 3. In the Synchronization dialog box, find a starting point, for example approximately two bars before the music should actually start.
4. In the same dialog, to make the Time Ruler in Cubase VST display the actual time code on the tape, set the Time Display to the same value as the Song Start. Also set Bar Display to for example -2, so that position 1.1.0 in the Song is where the music should actually start.
5. Draw in, or use MIDI to insert a Time Hit where the music will start.
7. Now select Straighten Up, and the tempo will get adjusted so that these two points line up.
If the tempo was changed too much, you might have to repeat the procedure, set a new Song Start and Time Display in the Sync dialog, and move the Time Hit accordingly, then Straighten Up again.
8. When the beginning of the Song is adjusted to taste, you can begin inserting Time Hits for important visual cues.
We suggest you name them for future reference.
10.Move the Meter Hits around to fit the music and use Straighten Up to examine what kind of tempo changes were needed.
Please note that Straighten up only inserts one tempo change for each linked pair. If you want a gradual tempo change between two pairs, draw in an accelerando/ritardando, and Straighten Up will scale the entire section to fit.
Don't worry about making last minute changes. If you for example receive a new copy of the video where a few frames have been cut out, just move your Time Hits accordingly and straighten up again. Changes you make in the beginning of the Song won't affect tempi at later positions, since each matched pair of links creates a new fixed “reference” between time and meter.
During the course of this procedure, you can of course switch back to the Arrange window and record and edit music to fit the cues.It is not uncommon to have to synchronize MIDI sequencing to existing music. To do this, you need the Master Track editor and a tape with the music on one track and time code on another.
Anyone who has been in the unfortunate situation of losing a time code track, for example by accidentally erasing it, knows how time consuming it can be to restore it.
The procedure below lets you do both these things very easily:1. Start by striping the tape with fresh time code, if necessary. This code should start a few bars before the music and extend well after it.
4. Try to set an approximate initial tempo.
You can for example turn off sync, and guess at a tempo. Start the sequencer in time with the metronome turned on, and adjust roughly.
6. In the same dialog, to make the Time Ruler in Cubase VST display the actual time code on the tape, set the Time Display to the same value as the Songstart. Also set Bar Display to for example -2 (if the music starts two bars after the Songstart), so that position 1.1.0 in the Song is where the music will actually start.
7. Use MIDI to insert a Time Hit where the music starts. Verify its position by making it play back for example a drum sound via MIDI.9. Now select Straighten Up, and the tempo will get adjusted so that these two points line up.
If the tempo was changed too much, you might have to repeat the procedure. Note down the position of your Time Hit. Select a new Songstart and Time Display in the Sync dialog, and move the Time Hit accordingly. Then Straighten Up again.
10.When the beginning of the Song is adjusted to taste, you can begin inserting Time Hits. We suggest you use MIDI to input them, and start out with one or two Hits per Bar. Of course, the tighter you place the Hits, the tighter your sync will become, but editing will also be more difficult and each Straighten Up will take more time to perform.
11.Use Fill to input Meter Hits at the same spacing as the Time Hits (set Snap to for example whole notes or half notes).
Make sure the first Time Hit and the first Meter Hit indicate the same position in the song; for example, the first Time Hit should be where the downbeat of bar 1 is on the tape and the first Meter Hit should be on position 1.1.0 in Cubase VST.
Straightening Up might take some time.
14.Play back the Song in sync with the tape.
Remember, Straighten Up only scales the tempo changes between two Hitpoints. If you need a gradual tempo change between two Hits, use the Line tool to create an accelerando or ritardando that can be scaled to fit.