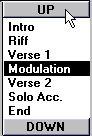
On the right side of the Arrange window a special column can be made to appear, containing all the Groups. This list, called the Group List, is used as a “palette” when placing the Groups on Group Tracks (see page 146).
Showing and Hiding the Group ListThe list is first displayed when you create the first Group. To hide the list, select “Hide Groups” from the Structure menu. To show the hidden list, select “Show Groups” from the Structure menu (this menu item toggles between “Show Groups” and “Hide Groups” depending on whether the Group List is visible or not).
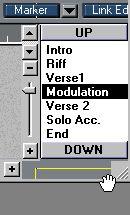
Scrolling the Group ListSince you can have up to 64 Groups in a Song, you may have to scroll the list to be able to see all Groups. This is done by clicking on the UP and DOWN buttons on the top and bottom of the Group List.
 The Groups in the list are always sorted so that those Groups that were created in the selected Arrange window appear at the top of the list.
Displaying the contents of a Group
When you click on a Group in the List, all the Parts in the active Arrange window that are members of the Group get selected. This can also be used as a quick way of selecting a number of Parts, for example for editing.
Renaming a Group in the Group List
1. Double click on the name of the Group in the Group List.
The change is also reflected in the corresponding Group Parts on Group Tracks (see page 146).
Deleting a Group from the Group List
• Drag the Group out of the Arrange window.
This deletes the whole Group. The individual Parts that have made up the Group are of course not affected.
If you delete a Part from the Arrange window it is also deleted from the Group.
How Groups are saved
The Group List and all the Groups in it are part of the Song. When you Save or Open a Song, all the Groups are saved/opened with it. On the other hand, when you save an Arrangement, only the Groups created in that Arrange window are saved.
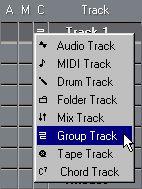
You use Groups by placing Group Parts on a Group Track. To create a Group Track, select the Create Track item on the Structure menu and then change the Track Class for the new Track to “Group Track”.
 You can create several Group Tracks if necessary.
P Group Tracks can't be set to a certain MIDI Channel, Instrument or Output, since this is independent for each Part in the Group.
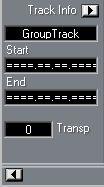
Group Tracks only have one Playback Parameter in the Inspector: Transpose, which transposes all notes in MIDI Parts in the Group.
1. Drag a Group from the Group List.
An outline is shown to help you position the Group.
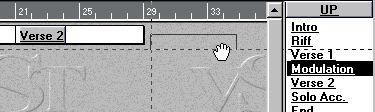 2. Place the outline at the desired position on a Group Track and release the mouse button.
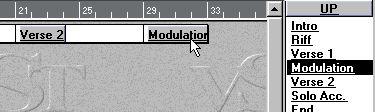 A Group Part is created. This has the name of the Group, and is as long as the Parts the Group is made up of. The Group Part will start where you place the outline.
 P If you hold down [Alt] while dragging, the Group Part will be inserted on the Track instead. This means that all the Group Parts after it will be moved down the line to make room for the new Group Part.
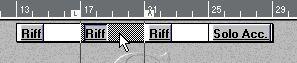
3. Continue placing Groups on the Group Track.
The same Group can be used as many times as you like, on one or many Group Tracks, in the same or different Arrange windows.
• If you want to be able to Mute the “original” Parts (or their Tracks) without affecting the playback of any Groups they are part of, activate the option “Groups do play muted Parts” in the Preferences–MIDI–Playback dialog.
For example, you might need to Mute a Track if the Parts on it are used in a Group and the Group is played back at the same time as these Parts (to avoid double notes).• On the other hand, there might be occasions when you want to be able to exclude certain Parts from the playback of a Group by muting them.
If this is the case you should deactivate “Groups do play muted Parts”.
• A Group Part has “living” links to all the Parts in it.
If you delete a Part, it disappears in the Group, and if you change its Playback parameters, this is also reflected in the Group. If you move it, however, this is not reflected in the Group.
• If you add Parts to a Group, so that this lengthens the Group, this is not shown in the Group Parts on the Group Tracks.
That is, the already placed Group Parts keep the original length. Use the Pencil tool to lengthen the Group Part and “reveal” the added music. When you place Group Parts from the Group List after having added Parts to the Group, these new Group Parts automatically get the right length.
• Moved.
• Selected in any way that regular Parts can.
• Duplicated (Hold down [Alt]).
• Muted.
• Deleted in any way that Parts can.
• Sized using the pencil tool.
Group Parts can not be:
• Recorded into.
• Merged with other Parts.
• Grouped.
• Edited in any way (split, joined, or edited in the Edit windows. You can edit the contents by editing the Parts that make up the Group).
It is possible to actually build the Group Track in real-time, while the music is playing:
1. Start playback.
2. Hold down [Ctrl].
The Group is inserted on the active Group Track, at the beginning of the next bar.
P If you have already made up the basics of your Arrangement and wish to experiment with adding Group Parts this way, create a separate Group Track for the Group Parts you are adding in real-time. This will give you a better overview of what is going on.
You can take a Group Part apart into its original components by using the “Unpack Group” command on the Structure menu.
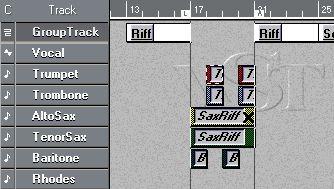
An example: you have repeated a verse several times during a piece of music by making a group out of all the Parts that make up that verse. This Group has then been used several times on a Group Track. Now you find that you want to leave out one of the instruments in the first verse only. A convenient way to do this is to Unpack the Group Part on the Group Track that plays that first verse, and then simply Mute the desired Part.
P It is the Group Parts on the Group Track that can be Unpacked, not the Groups in the Group List.Performing the Unpacking
1. Select the Group Part (on the Group Track) that is to be Unpacked.
One of two things happens:
• If the Group was created in the same Arrange window as it is used, Ghost Parts are created on the original Tracks at the same Positions as the Group Part.
• If the Group was created in another Arrange window, real Parts are created at the same Position as the Group Part.
If possible, the Parts are put in on existing Tracks set to the same MIDI Channel and Output. Otherwise, new Tracks are created as needed.
P Unpacking can be undone using the Undo command.
The Group feature can be used to an extreme by packing all different sections of a song (intro, verse, chorus...) into Groups to get an overall feeling of the structure of the song. Then you can Unpack all Groups and start making detailed changes.
P If you want to use the Unpack feature for detailed editing this way, make sure that the Group Parts you Unpack are in another Arrange window than the Parts that make up the Groups. If not, Unpacking will create Ghost Parts, and if you make changes to a Ghost Part, they will affect all Group Parts containing the original Part.