 This means you can reorganize and manage your Grooves on the desktop, but there are also several features in the program that makes this easier.
 By default, Cubase VST looks for Grooves in the “Grooves” folder within your Cubase VST folder. If you have stored your Grooves elsewhere, you can change the default Groove folder location in the following way:
1. Open the Groove Control window.A file dialog appears.
3. Locate the desired folder, select it and click the “Select” button.
The Grooves and subfolders in the selected folder are displayed in the Groove list. Note that you shouldn’t open the folder in the file dialog, only select it.
You can add separate Grooves to your Groove folder, by dragging their file icons from the desktop directly into the Groove Control list. This allows you to import Grooves from floppy disks, etc.
2. Locate and select the Groove file.
3. Click Open.
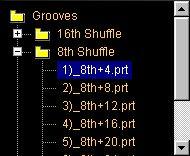
Cubase VST creates a new subfolder with the name of the file, within your default Groove folder. Each individual Groove within the imported file is converted and saved as a Part File in the subfolder.
2. Make sure the resulting Part (and no other) is selected.
3. Select “Save As...” from the File menu.
4. Select “Part” from the File type pop-up menu, specify a name and location and click Save.
The Part is saved as a Part file.
P Note that this procedure deletes the actual Groove file from your hard disk. Only use this method if you are sure you don’t want to use the Groove in any Song. If you want to remove the Groove from your Groove list, but still keep it for future use, locate the file on the desktop and move it to another folder instead.
1. In the Groove Control window, select the Groove you want to remove. 2. Click the “Remove” button.You will be asked whether you really want to remove the Groove.
3. Click Yes to confirm, or No to abort the operation. In the Arrange Window toolbox, you will find a tool labelled “Grv”. This is the Groove Tool, which allows you to quickly apply Grooves to separate Parts: