P Parts are not created automatically when recording from the Mixer, so the step above is a must!
By Playing the Objects
Make sure you the Part is long enough to cover recording of mixes for the entire song! 2. Make sure Cubase VST is stopped.
4. Set the Objects to the desired values.
Only the ones you actually use are recorded. You may move e.g. a fader up and down as much as you wish, it is only the last setting (the one you leave the Object at) that is recorded.
5. When you are finished, either switch back to Local Mode, or move somewhere else to Write another mix. When you play back the music, all the Objects will be updated at the correct position.
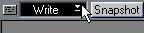
P To make your Object recording play back, you have to have the MIDI Mixer in Write or Replace Mode.You can also Write a complete Snapshot, which records one Event for each Object. This can be done in two ways:
Method 1:
• Proceed as above, but instead of setting up the Objects, click on the Snapshot icon that recalls the right Snapshot.
Method 2:
• Put the MIDI Mixer in Write Mode. Start Playback. When the Music reaches the right Position, recall the Snapshot on the fly.
You can recall as many Snapshots as you like during one “take”, they will all be recorded at the right Positions. Make sure the Part is long enough to cover recording of mixes for the entire song! Stop Playback when you are finished and switch back to Local Mode or continue recording as described above.
In Replace Mode, Cubase VST records no new data, but replaces the values of existing MIDI Mixer Events. This is useful if you for instance have recorded a static mix at the beginning of a Song and decide that one of the volumes is too low, or for some other reason want to make changes to Events already recorded. Replacing is best done while Cubase VST is stopped.
1. Move to the same Position as, or some Position just after the Event(s) that you want to replace.3. Set the Object(s) to the new value(s), or recall a complete Snapshot.
Cubase VST now tracks your recording backwards from the current Position. The first MIDI Mixer Event found for each Object is replaced with the new values. If no Event is found (within the Part) a new Event is inserted at the beginning of the Part.
You can also record any Object-actions while the music is playing. This allows you to create dynamic changes in timbre, volume or anything else you can control via an Object.
1. Put the MIDI Mixer in “recording” mode by selecting “Write” from the pop-up menu in the top left corner of the Mixer window.Your actions are now recorded as MIDI Mixer Events. When you play back the music, the Objects will move as they did when you used them, and their MIDI messages are sent out.
P To make your Object recording play back, you have to have the MIDI Mixer in Write or Replace Mode.If you’re not satisfied with what you did, you may decide to redo the whole take. Use any of the methods described on page 17, to erase Events for one or more Objects and redo the take.
1. Set the Mixer to Write mode and start Playback for recording, as described above.
2. Press the mouse button over one Object, and keep it pressed. Play the Object if you like or hold the mouse still.
As long as you keep the mouse button down, the old Events created with that Object are erased and new ones are put in if you play the Object during the take. This means that you can easily replace e.g. one fader movement among many, by just redoing it.