Creating and Editing Objects
Creating a New Object
1. Select the Create tool.
 The Create tool.
2. Drag a rectangle to make up the size of the Object in a free area of the window (it can be moved and sized later), or...
 Setting the size of the Object by dragging with the create tool.
3. Click once to get an Object with a default size.
In either case, a dialog box opens where you can change a number of parameters for that specific Object. These parameters are described on page 34.
4. Fill out the Object dialog box.
5. Click on OK or press [Return] on the computer keyboard. Selecting Objects
• To select an object, click on it using the Edit tool.
Sizing an Object
When you select an object using the Edit tool, a small handle appears at its lower right corner. Drag this to change the size of the Object.
• If the Move Locked item is activated on the pop-up menu in the upper left corner of the Mixer window, Objects cannot be resized (see page 23).
 Changing the size of an Object.
Moving an Object
To arrange all your Objects into a neat display, you need to move them around. Normally, movement is restricted to invisible grid lines eight pixels apart (a pixel is the smallest dot on the screen). This makes it easier to arrange Objects in neat rows and columns. But, if you hold down [Ctrl] you can move to any position.
• If the Move Locked option is activated on the pop-up menu in the upper left corner of the Mixer window, Objects cannot be moved (see below).
1. Select the Objects you want to move.
2. Select the Edit tool and dragg with the pointer positioned anywhere on one of the Objects (except on the sizing corner, of course).
 Moving an Object by dragging.
The “Move Locked” option
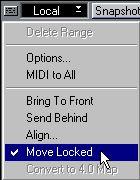
On the pop-up menu in the upper left corner of the Mixer window, is an item called Move Locked. If this is activated (ticked), Mixer Objects can not be moved or resized. Use this function to prevent accidental changes of the Mixer layout.
Duplicating an Object
1. Select the Edit (arrow) tool.
2. Hold down [Alt] on the computer keyboard and drag it as when moving. When you release the mouse, the same dialog box opens as when you create a new Object.
Bring To Front and Send Behind
Objects may overlap on the screen. For example, putting faders and knobs on top of text Objects helps to make up nice graphic sections in a Mixer Map.
Also, each time you create an Object, it is automatically put behind all other Objects, so it may be covered by another Object from the start! To fix this problem and to create nice looking maps with text Objects, you need to use Bring To Front and Send Behind.
1. Select one or more Objects.
2. Click on the small button in the upper left corner of the Mixer window.
3. Select Bring to Front or Send Behind from the pop-up menu that appears.
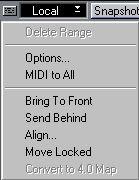
Use this item to put the selected Object in front of the other Objects.
Use this item to put the selected Object behind the other Objects.
The selected Objects are now put on top of or behind all other Objects.
P
We don’t recommend you to put several faders or knobs on top of each other (there is no reason), because the screen may get muddled.
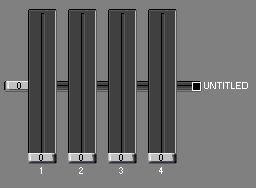
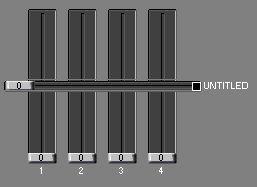
Aligning Objects
This Object is newly created, and therefore appears behind other Objects.
Use Bring To Front while the Object is still selected, and it is put in front of the other Objects.
To align a number of Objects in the Mixer Window, proceed as follows:
1. Select the Objects you want to align.
2. Press the button in the upper left corner and select “Align...” from the pop-up menu.
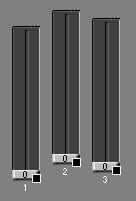
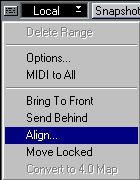
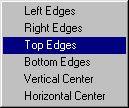
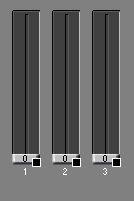
3. Select one of the Align options. The selected Objects get aligned.
Deleting Objects
This is also done as in other places in Cubase VST.
• Select the Objects and press [Backspace] or...
• Select the Objects and select Delete Object from the Edit menu.


