You can indent a paragraph by moving it in one tab stop (about five spaces) toward the right or you can outdent a paragraph by moving it out one tab stop toward the left, as shown in Figure 8-13. This is an excellent way to make certain paragraphs - such as quotations - stand out. The steps should be familiar by now:
1. Click the paragraph or short line you want to indent or outdent, or click where you're about to type a new paragraph or line. If you want to adjust several paragraphs or short lines at once, select them.
2. Click the Increase Indentation or Decrease Indentation button on the Formatting toolbar or choose Format → Increase Indent or Format → Decrease Indent from the New Message window menu bar.
Figure 8·13: Indented and outdented text
That's all there is to it! As you'll see next, indenting and outdenting is also useful when you're typing lists.
Typing lists
I'm a great fan of bulleted and numbered lists (as you can tell from this book) because they make it easier to understand a series of choices or a logical sequence of steps. You can create lists like the ones shown in Figure 8-14 with a few keystrokes and mouse clicks. When you create a numbered list, new items are numbered automatically in their proper sequence. If you delete an item in the list, the numbering adjusts accordingly, as you would expect.
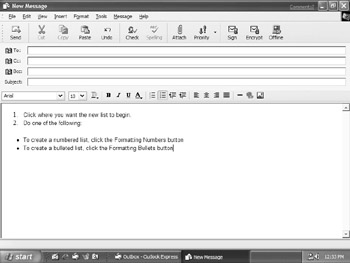
Figure 8·14: A numbered list with an indented bulleted list
Typing a new list
Here's how to type a new list:
1. Click where you want the new list to start.
2. Do one of the following:
• To create a numbered list, click the Formatting Numbers button on the Formatting toolbar or choose Format → Style → Numbered List from the New Message window menu bar. A number appears at the insertion point and the Formatting Numbers button will appear pushed in.
• To create a bulleted list, click the Formatting Bullets button on the Formatting toolbar or choose Format → Style → Bulleted List from the New Message window menu bar. A bullet appears at the insertion point and the Formatting Bullets button will appear pushed in.
3. If you want to indent or outdent the current item, click the Increase Indentation or Decrease Indentation button on the Formatting toolbar (or choose the equivalent options on the New Message window's Format menu).
4. Type the next list item and press Enter. A new number or bullet will appear.
5. Repeat Steps 2 through 4 as needed.
When you finish typing the list, follow the steps given in the section "Removing numbers and bullets." (Alternatively, just hit the Enter key twice to turn off bullets or numbers.)
Tip The Formatting Bullets and Formatting Numbers buttons and the equivalent menu options are toggles. Choosing the button or option once turns on the numbered or bulleted list. Choosing it again turns off the list.
Creating a list from existing text
If your message already includes some paragraphs or short lines that would work better as a list, converting them is easy:
1. Select the paragraphs or lines you want to format into a list.
2. Click the Formatting Numbers or Formatting Bullets buttons and the Increase Indentation or Decrease Indentation buttons on the Formatting toolbar as needed (see Steps 2 and 3 of the procedure for typing a new list).
Creating a list within a list
You can even create a list within a list, like the bulleted list within the numbered list shown in Figure 8-14. As usual, you can make the change while you're typing a new list or by selecting text first. Follow these steps:
1. Position the insertion point where you want the indented list item to appear or select the existing paragraphs or lines you want to indent.
2. Click the Increase Indentation button on the Formatting toolbar or choose the equivalent menu options until you get the indentation level you want.
3. If you want to change the type of list, click the Formatting Numbers or Formatting Bullets button, or choose the equivalent menu options. A number or bullet appropriate to the indentation level appears.
4. If you did not select text in Step 1, type your list items, pressing Enter after each one.
Of course, you can return list items to their previous levels by outdenting. Simply repeat the previous four steps except, in Step 2, click the Decrease Indentation button on the Formatting toolbar as needed.
Removing numbers and bullets
You can remove the numbers or bullets from list items at any time. Simply select the items or position the insertion point anywhere in the item from which you want to remove the number or bullet. Then click the Formatting Numbers button (if it's a numbered item) or the Formatting Bullets button (if it's a bulleted item) on the Formatting toolbar until the number or bullet disappears. If necessary, increase or decrease the indentation level.
Tip You can remove numbers and bullets and return the text to its leftmost position by repeatedly clicking the Decrease Indentation button.
Inserting a picture
A great-looking picture of your pet, spouse, kid, or newest possession can spice up an e-mail message. You can insert many types of pictures, including scanned images and clip art, by following these steps:
1. Click in the message editing area where you want the image to appear.
2. Click the Insert Picture button on the Formatting toolbar, or choose Insert → Picture from the New Message window menu bar. You'll see the Picture dialog box shown in Figure 8-15.
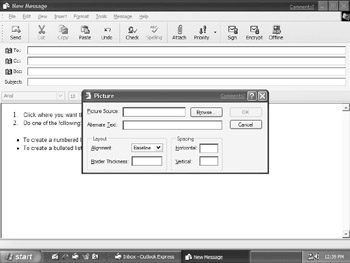
Figure 8·15: Add graphics to your e-mail messages using the Picture dialog box.
3. In the Picture Source box, type the complete filename of the picture. Or, click the Browse button and then locate and double-click the picture's filename in the dialog box that appears (see Figure 8-16).

Figure 8·16: Select the picture you want from the list.
4. If you want to specify alternate text or various layout and spacing options, fill in the appropriate Alternate Text, Layout, and Spacing fields.
5. Click OK.
Your picture appears at the insertion point. Recipients who don't have HTML e-mail clients will see the image as a regular attachment, not as an inline image. Recipients whose e-mail clients have no graphics capability will see only the alternate text.
Note text will appear in place of the image if the recipient's e-mail client has pictures turned off or cannot display them. Alternate text also appears while the image is loading.
Outlook Express can import images in GIF, JPEG (JPG), bitmap (BMP), Windows XPtafile (WMF), XBM, and ART formats. The default import formats are GIF and JPEG. You can choose a different format from the Files Of Type drop-down list shown at the bottom of Figure 8-16.
Inserting a hyperlink
By now, you've probably had experience browsing the World Wide Web and you know you can click hyperlinks on a Web page to jump to another place on the Internet or to perform some action, such as
sending e-mail or downloading a file. Well, guess what? You can insert your own hyperlinks into any e- mail message (see Figure 8-17).
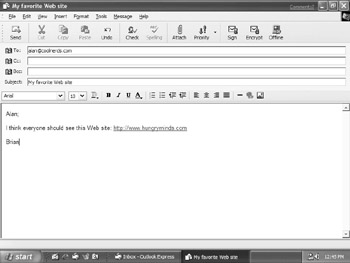
Figure 8·17: An e-mail message with an underlined hyperlink for http://www.hungryminds.com
Outlook Express automatically creates hyperlinks from valid e-mail addresses and URLs as soon as you type them into a message and press the spacebar or Enter key. For example, after I type my e-mail address (alan@coolnerds.com) or the URL of my home page (http://www.coolnerds.com) and press the spacebar or the Enter key, Outlook Express automatically converts the text to an underlined blue hyperlink. The message recipient simply clicks the hyperlink to send me an e-mail message or to jump to my home page on the Web.
You also can create hyperlinks manually, using any text you want. For example, you may want your message to include a sentence, such as:
Click here to send me an e-mail message or click here to downlo