• To display or hide an Explorer bar, choose View - Explorer Bar and then choose the Explorer bar you want. (You also can click the Search, Favorites, or History buttons on the Standard Buttons toolbar.)
Remember, if a toolbar's option is checked on the View menu, that bar will be visible. If it isn't checked, you won't see that bar.
The Links toolbar offers buttons that can take you to handy places on the Internet, and it contains the same entries as the Links folder in your Favorites list. The initial items are set up as a gift to you from Microsoft, but you can update them if you want. To add an item, drag a Web page hyperlink or the icon next to the URL in the Address box to the place in the Links bar or Links folder where you want the new item to appear. To delete an item, right-click the item and choose Delete. To change the URL of the item, right-click the item and choose Properties.
Clever toolbar tricks
You can reposition the toolbars if you want. To reposition a toolbar, move your mouse to the dotted line at the left side of the toolbar. (If you don't see the dotted line, choose View - Toolbars, and select Lock the toolbars to clear its check mark and unlock the bars.) Then, drag the bar up, down, left, or right. (As you drag, the mouse pointer changes to a four-headed arrow.) When the bar pops into place, release the mouse button.
Tip To prevent the toolbars from being moved accidentally, you can choose View – Toolbars - Lock the Toolbars to reselect that option.
When the toolbars are unlocked, you can also resize them, making them narrower (to show fewer buttons) or wider (to show more buttons). To resize a toolbar, drag the dotted vertical line at the left of the toolbar to the left or to the right. (This line won't appear if the toolbars are locked.) The mouse pointer changes to a two-headed arrow when it's safe to drag. If you want to shrink or expand the toolbar quickly, double-click the vertical line instead.
Tip To display or hide a toolbar quickly, right-click in any visible toolbar and then click the name of the toolbar you want to show or hide.
Most of the figures in this chapter show the Internet Explorer title bar, menu bar, and some of the toolbars along the top of the window. Figure 6-9 shows the Internet Explorer window after unlocking the
toolbars and moving the Links toolbar to the top row.
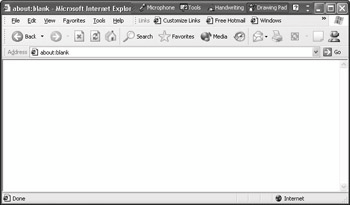
Figure 6·9: Here are the menu bar and the Standard Buttons, Address bar, and Links toolbars after unlocking and then moving and resizing some of them.
Clever Explorer bar tricks
As you know, when you open an Explorer bar, the left frame shows the bar and the right frame shows the current Web page. Now, here are some ways to put any Explorer bar through its paces:
• To hide the Explorer bar, click the same button on the Standard Buttons toolbar you clicked to display it originally. Alternatively, click the Close (X) button on the Explorer bar's upper– right corner.
• To narrow or widen an Explorer bar, move your mouse pointer to the border on the right side of the bar until the pointer changes to a two-headed arrow. Then drag the border to the left or to the right.
Clever full·screen tricks
When you choose View - Full Screen, or press the F11 key, the current Web page displays without the added clutter of the status bar, menu bar, Address bar, or Links toolbar (see Figure 6-10). You can quickly toggle between the normal display shown in earlier figures and the full-screen display by pressing F11.
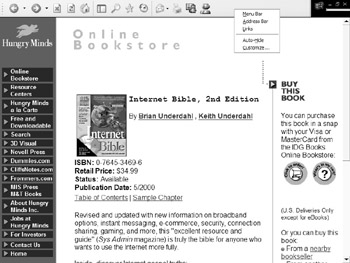
Figure 6·10: This is Internet Explorer in full-screen view. In this example, I right-clicked the Standard Buttons toolbar.
You can customize full-screen view in several ways:
• To display or hide bars in full-screen view, right-click any visible toolbar and choose Menu
Bar, Address Bar, or Links (as appropriate).
• If the menu bar, Address bar, or Links toolbar are visible, you can resize or move them as described earlier. Note, however, that you can move them to the left or right only.
• To toggle the Auto-Hide feature for the Standard Buttons toolbar, right-click the toolbar and choose Auto-Hide. When Auto-Hide is on, the Standard Buttons toolbar is invisible until you point your mouse to the top of the screen, where the toolbar magically reappears. When Auto-Hide is off, the Standard Buttons toolbar is always visible in full-screen view.
To turn off the Auto-Hide feature, bring the toolbar back into view, right-click some empty area, and choose Auto-Hide again.
When viewing Internet Explorer full-screen, you can click the Restore button near its upper-right corner, or press the F11 key, to return to the normal windowed view.
Browsing without Your Browser
Practically everything in Windows XP is capable of connecting you to the Internet, whether you've fired up Internet Explorer or another browser first. When you open Windows Explorer, or the Address toolbar on the taskbar, for example, you can type a URL into the Address text box and press Enter, just as you do in Internet Explorer. Instantly the window will have all the basic features of Internet Explorer, and you can surf the Net as usual.
If you don't see an Address bar in Windows Explorer, choose View - Toolbars - Address Bar from its menu bar. To view an Address bar on the taskbar, right-click some neutral area of the taskbar and choose Toolbars - Address. To move or size the Address bar in the taskbar, right-click the taskbar and clear the check mark next to Lock the Taskbar. The Address bar in the taskbar will gain the dotted vertical line. You can drag that line left or right to size the bar, or up onto the screen to reposition it. Figure 6-11 shows an example with the Address bar displayed in Windows Explorer (under the toolbar in the My Computer window). The free- floating Address bar on the desktop was dragged off of the taskbar.
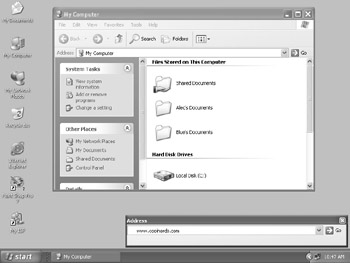
Figure 6·11: The Address bar visible in Windows Explorer (under the My Computer toolbar) and free-floating on the desktop
You also can choose options on the View or Favorites menus in My Computer or Windows Explorer to use the toolbars, Explorer bars, and Favorites lists you learned about in this chapter. And, anytime you click a hyperlink anywhere - on your desktop, in a document, or on a button - the Internet features will kick in exactly as you'd expect. This Internet-awareness in Windows XP is a huge bonus because you never have to plan your Internet travels ahead of time. Just do what's convenient and Windows XP will handle the rest.
Adding Internet Links to the Desktop
Windows XP offers tons of ways to integrate the Internet with your desktop. I'll dive deeper into those features in Chapter 7. To whet your appetite for what's to come, I want to explain a few quick ways to create links to the Internet right on your Windows desktop. To begin, go to the Web page you want to add to your desktop or go to a Web page containing a hyperlink you want to add. Now, do any of the following steps to add a hyperlink to your desktop:
• To add a link to the current page, choose File - Send - Shortcut to Desktop from the Internet Explorer menus.
• To drag-and-drop a link to the current page, be sure you can see the desktop. (Click the Refresh button in your browser if you need to.) Then drag the little icon shown next to the URL in the Address box to your desktop and release the mouse button (see Figure 6-12).
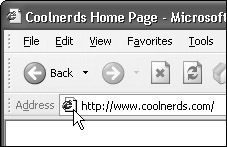
Figure 6·12: Start dragging the mouse pointer to create a desktop hyperlinkto the current page
• To drag-and-drop a link that's somewhere on the current Web page, point to the link so that the mouse pointer changes to a pointing hand. Then drag the link to your desktop and release the mouse button (see Figure 6-13).
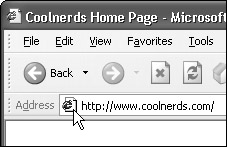
Figure 6·13: Start dragging at the mouse pointer to create a desktop hyperlinkto a hyperlink contained on the current page.
A shortcut to the Internet hyperlink will appear on your desktop. Now you can open it as you would open any shortcut on your desktop (for example, by double-clicking or clicking it), and the Web page you linked to will open in your browser.
Of course, what goes on the desktop can easily be swept off it. If you no longer want the desktop shortcut, just drag it to the Recycle Bin.
Tip You can drag-and-drop Internet shortcuts to the Start button, to the Favorites Explorer bar,


