Amplifying Your Reach with a Paid Facebook Marketing Campaign in 2020 and Beyond
Facebook is among the best social media platforms to promote your business. You can give an explosive boost to your complete internet marketing plan by running a paid marketing campaign on Facebook.
In this lesson I’m going to show you how to amplify your reach with a paid Facebook marketing campaign, step by step!
Accessing the Ads Manager and Creating the Campaign
First note that Facebook often updates how the ads manager looks. Don’t focus on differences in this printing. Focus of the thrust of the idea presented.
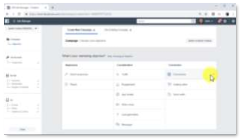
32 Facebook Ads Manager
To start creating a Facebook advertising campaign you must access the Facebook Ads manager. First ensure you are logged into your Facebook account. You can then access the ads manager by going to http://facebook.com/adsmanager/creation on your browser.

33 Select Facebook Ad Campaign Objective
That URL will take you to the campaign creation screen, where you must select a campaign objective to get started. Campaign objectives are pre-built campaign setups that are optimized to help you achieve specific marketing goals.
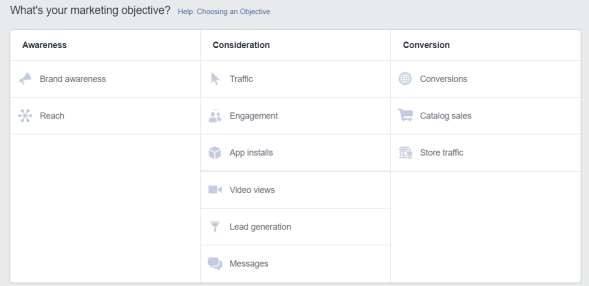
34 Objective Choices in Facebook Ads Manager
Because your marketing goal with this campaign is to increase your reach, you must click on the “reach” option under the “awareness” column.
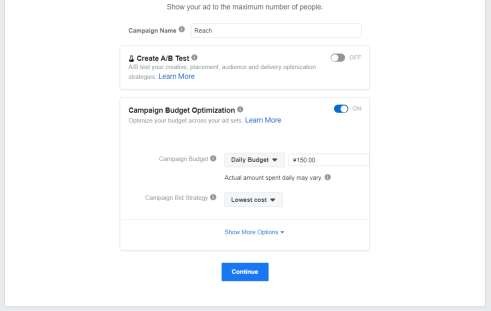
Now enter a name for your new ad campaign in the “campaign name” field, and then click on the “set up add account” button.
Then you can choose to do and A/B split test. That’s advanced, and we won’t do that here. Go down just a little further and enter your budget. You can choose from “Daily” or “Lifetime” budget. You decide what is best for you.
I typically start with a small daily budget. This way I can see if the add is getting any traction and quickly turn it off it it’s not working. It won’t empty my bank account. I suggest for the “Bid Strategy” to use “lowest cost.”
Then click on the “Continue” button.
35 Facebook Ads Optimization Choices
Creating the Ad Set
Next up you must create the ad set for this campaign. First, enter a name your new ad set in the “ad set name” field.

36 Creating the Facebook Ad Set
To run ads, the ad must be associated with a Facebook page you control. Select the Facebook page that you’re going to promote from the “Facebook page” menu.
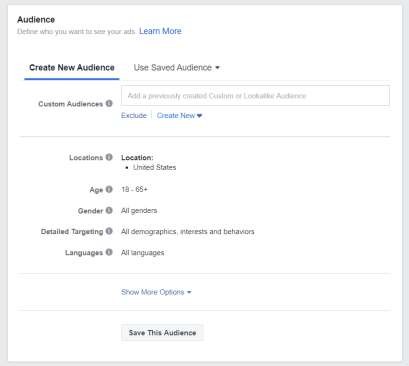
37 Selecting Your Facebook Target Audience
Now you must set up the target audience. With Facebook ads you’ll be able to hyper target your audience for better results.
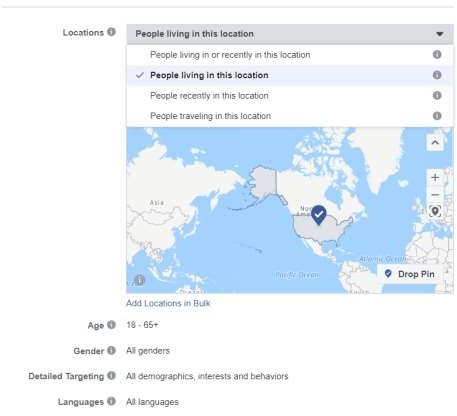
First, select the locations that you’re going to target in the “locations” section. To select a location, you must type the name of a location in the text field above the map and to click on it to select it. You can target more than one location on a single campaign! Be as specific as necessary.
You can type in specific countries, state/regions, cities, postal codes, addresses, DMAs (Designated Marketing Area) or even congressional districts. A designated market area (DMA), also referred to as a media market, is a region of the United States that is used to define television and radio markets.
38 Selecting Facebook Ad Demographics
After selecting a location, you can select to target “people living in or recently in this location”, “people living in this location”, “people recently in this location” or “people traveling to this location”.
Now select the “age” of your target audience.
Next, choose the “gender” of your audience.
Now select the “languages” of the audience that you want to reach. To select a language, click in the “languages” box, type the initials of the language that you want to target, and click on it to select it. You can target more than one language.
In the “detailed targeting” section you can “include” or “exclude” people based on “demographics,” “interests,” and “behaviors.” in the “connections” section you can select to reach users according to the type of connection that they have with your page, such as “people who like your page” or “friends of people who like your page”.

39 Detailed Targeting Options
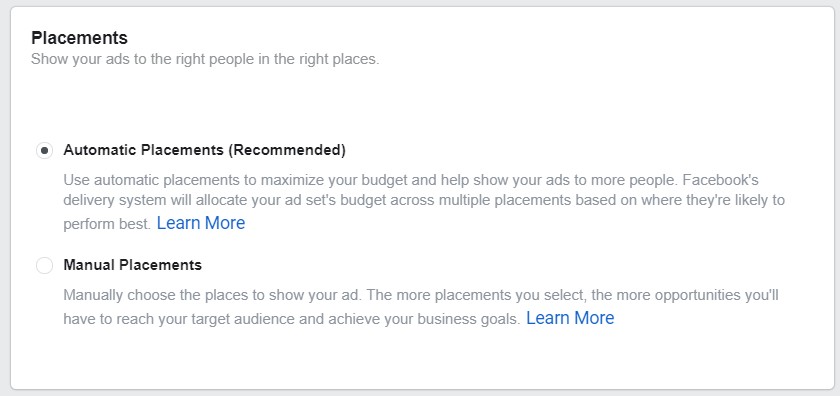
In the “placements” section you can select the placements where to show your Facebook ads. If you select “Automatic placements” your ads will appear to all users on all types of devices across multiple placements that include Instagram and the Audience Network.
If you select “edit placements,” you can select where you want to show your ads and on what devices.
40 Ad Placements Choices
On the “budget and schedule” section you must select a budget and a schedule for your campaign. Select “daily budget” if you want to spend a fixed daily amount or select “lifetime budget” if you want to spend your entire budget until your campaign ends or you deplete your budget.
On “Optimization and Spending Controls” you can select “run my ad set continuously starting today” to run your ads until you stop them manually, or you can select “set a start date and an end date” to select when your ads start running and when the campaign ends.
You can click on “continue” to move to the next step.
Now it’s time to create the ad. Start by typing the name of your new ad in the “ad name” field.
41 Writing Your Ad Text
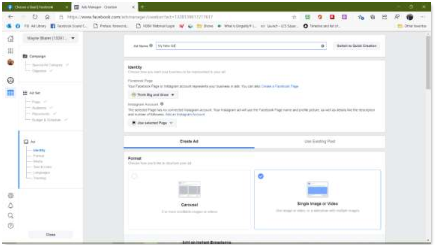
In the “Identity” section you must choose how you want to represent your business in your ad. By default, the Facebook page that you selected when you created the ad set will be selected here.
If your page is associated with an Instagram account, you can also send your ad to Instagram. But let’s skip that for now.
Now you must select your ad format. The ad formats available for this type of campaign are “carousel” and “single image or video.” You can also choose to use and existing post.
Let’s select “single image or video.”
After selecting a format, you must upload media to use on your ad. Select “image” if you’re going to use an image. Select “video or slideshow” if you’re going to use a video or slideshow.

42 Choosing Your Ad Media
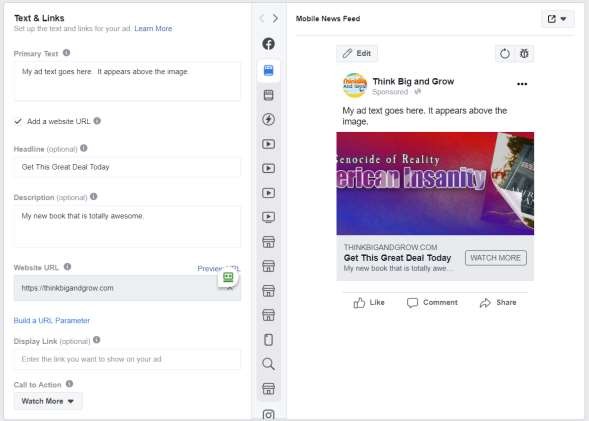
On the “text and links” section you must add your ad copy, ad text, and your ad URLs. Start by adding your ad copy to the “text” field. This will appear above the image.
The remaining information appears below the image or video.
Now check the “add a website URL” box and enter your destination URL in the “website URL” field.
Now enter your ad headline into the “headline” field. Now add a brief description or value proposition to the “news feed link description” field.
Now click on the “call to action” menu to add a “call to action” button to your ad. You can preview how your ad will appear on different placements in the “ad preview” window.
43 Completing Your Facebook Ad
The “Languages” section is so you can add translations for your advertisement. I’ll skip that for now.
The “Tracking” section is to allow you to build a list of visitors inside Facebook so you can retarget them in future ads. You’ll want to click “set up” and create a pixel. Follow the screen instructions. You’ll add the pixel it creates to your website in the header. Facebook will give you the instructions.
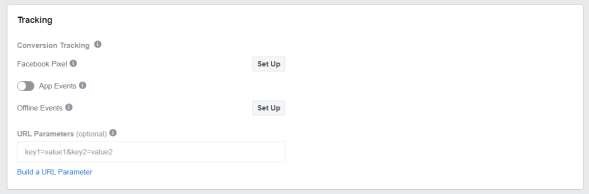
44 Tracking Choices
You can click on the “confirm” button to submit your ad for approval. Approval usually takes between 10 and 15 minutes. As you can see, running a paid ads campaign on Facebook is easy when you know the steps!