Chapter 8:
Generating Qualified Website Traffic with a Google Ads Campaign in 2020 and Beyond
You can significantly boost search traffic to your website with a targeted traffic generation campaign on the Google Ads platform, Google’s advertising solution for advertisers.
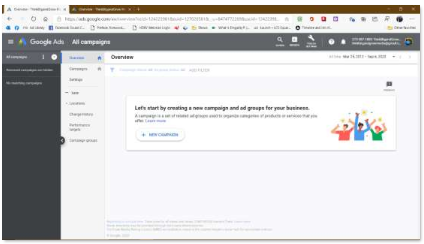
45 Checking into Your Google Ads Dashboard
To use Google Ads, you just need an active Google account.
Accessing Google Ads and Creating the Campaign
To access “Google Ads” go to “ads.google.com” on your browser while logged in to your Google account. You’ll be redirected your Google Ads dashboard.
Once in the dashboard, click on the “campaigns” tab on the left-hand menu.
Now click on the “plus” button, and then on “new campaign.”
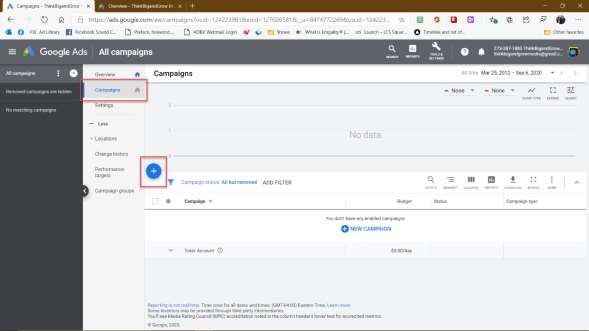
46 Adding Your First Google Campaign
Start by selecting a campaign goal. To generate qualified traffic, you must select “website traffic” as your campaign goal.
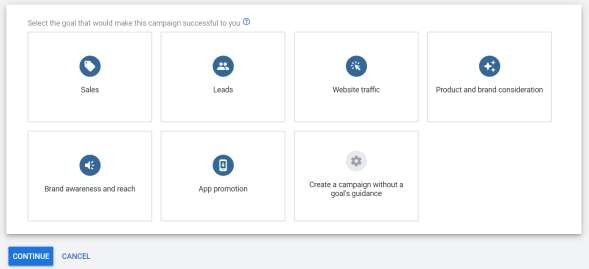
47 Selecting Your Campaign Goal
Now you select your campaign type. There are four different campaign types:
“search,” “display,” “shopping,” and “video.”
“Search” campaigns allow you to serve ads on top of search results pages on Google. They’re easy to set up and cheap to run.
Select “search” as your campaign type.
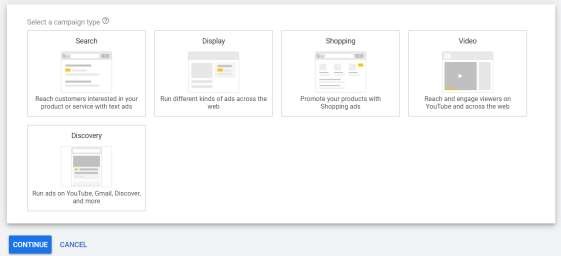
48 Select Your Campaign Type
Now enter your business website URL in the “business website” field and click on “continue.”

49 Enter Your Target Website
Setting Up A Traffic Generation Campaign
50 Creating Your Search Campaign
Now it’s time to set up the search campaign. Start by entering the name of your new search campaign in the “campaign name” field.
You can keep both “Search Network” and “Display Network” selected in the networks section.
Also, you can ignore the “Show more settings” selection for now. That’s more advanced and not needed to get your first ad running successfully.
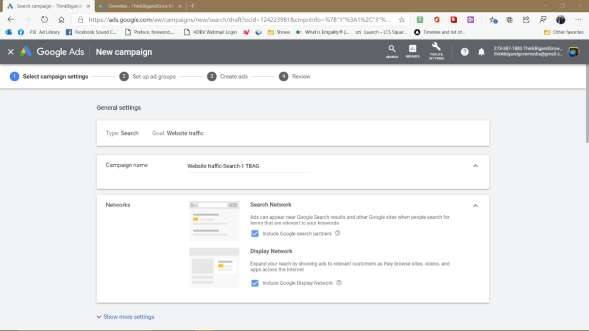
51 Selecting Your Google Campaign Settings
Now move to the “targeting and audiences” section. Start by selecting your target “locations.” You can target “all countries and territories,” your current location, or “enter another location.”
In “enter another location” you can use countries, cities, regions, or postal codes. You can also choose location groups. See if any seem appropriate for your ad.
Don’t worry if you don’t know, just skip it.
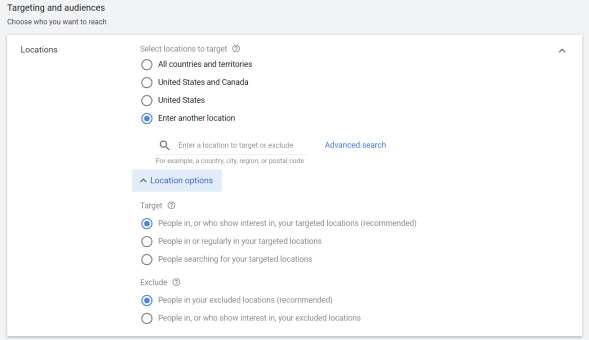
52 Choose Your Target Geographic Locations
Now select the “languages” that your audience speaks. Click on the “select a language” field and select languages from the menu.

53 Choose Your Campaign Language
Skip over audiences if since you’re new to Google Ads, as you won’t have any to choose from. Move to the “budget and bidding” section.
Start on “budget” and enter your daily ad spend in the “budget” field.
Now move to “bidding.” Here you can select a different bidding optimization option and enter a “maximum cost-per-click limit.” The platform simplifies bidding for you by selecting the best bidding strategy according to your selections.
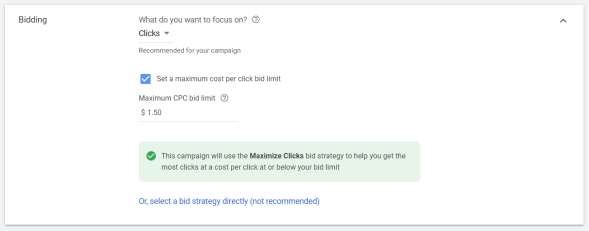
54 Make Bid Selections
Skip over “show more settings” as that is advanced and not needed to get started.
You can also insert “ad extensions” into your ads. Ad extensions allow you to show additional information on your ads. You can insert “sitelink extensions” to add additional links to your ads, “callout extensions” to add more business information to your ads, and “call extensions” to add a phone number to your ads.

55 Use Ad Extensions for More Viewer Options
Next, review your campaign settings and click on “save and continue” to move to the next step.
Setting Up Your Ad Groups
Now you must set up the ad groups. Start by entering a name for your new ad group in the “ad group name” field.
Then, in the “keywords” section, your URL should already be entered. If not, add it in the field with the chain link icon on the left of the field.
Then add product names related to the page. Leave it blank if there are none.
Below that you will enter your keywords. Most times, it is already filled in for you. Delete any you don’t like and add any you think are missing.
You can add additional add groups for other related links or related groups of keywords. But I suggest you skip that now if you are new to Google Ads.
Click the “Save and Continue” button.
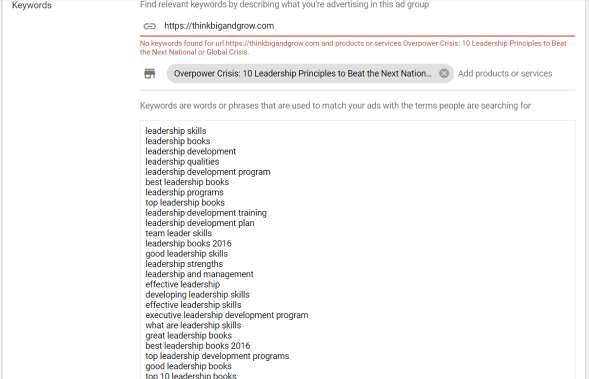
56 Add Your Keyword Phrases
Creating the Search Ad
Now it’s time to create the search ad. Start by entering your landing page URL in the “final URL” field if it’s not already there.
57 Create Your Search Ads
Now use “headline 1” to add a high search volume term, and “headline 2” to add a keyword-rich call to action. Add at least 5 different headlines as Google Ads suggests. You don’t have to, but it’s a good practice to find the best converting ads quickly. Each headline must be 30 characters or less.
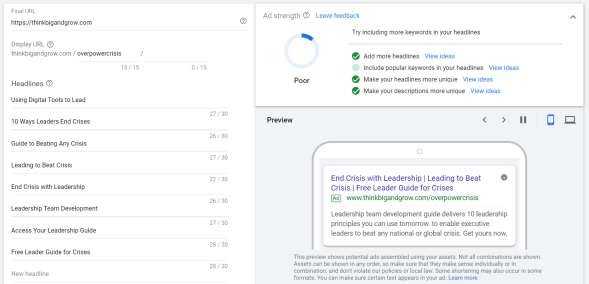
58 Create Multiple Ad Headlines
Now use the “description 1” field to add a brief description of your business, URL content, or offer. You can expand your description text using the “description 2” field. It may be pre-filled, but you can change it. You will need to. Now review the information that you added to the ad.

59 Enter Your Ad Description
Ignore the “Ad URL options” unless you understand the advanced features. It’s not necessary for a successful ad. But, in the future, as you improve, the URL options can help you track your ads.
Now click the “DONE” link and on the next page you’ll see an option to create more ads. Don’t hesitate to do this.
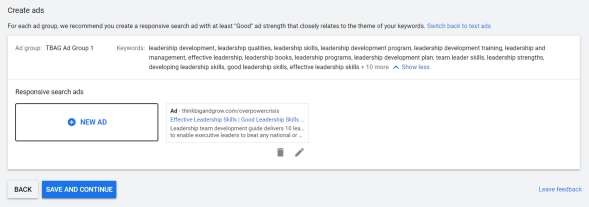
60 Make More Ads or Continue
If you just want to complete this first ad, click the “Save and Continue” button at the bottom of the page.
The next screen will show you any problem with your ads and make recommendations for improving them.
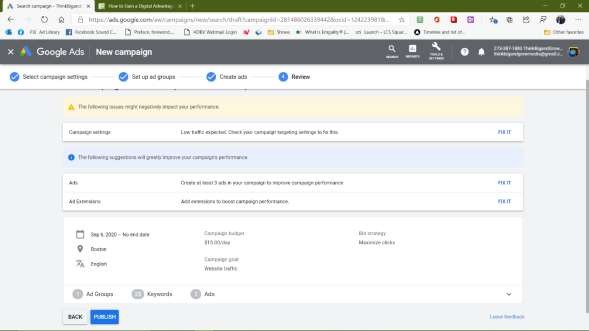
61 Review Google Recommendations
When you like what you see, click the “PUBLISH” button at the bottom.
And this is how you can create and run effective traffic generation campaigns on Google Ads!


