Chapter 10:
Recovering Abandoning Visitors with Remarketing in 2020 and Beyond
One of the most painful challenges a complete internet marketer faces is losing visitors and leads. Many new online marketers and business owners are stunned by the low percentage of sales versus the number of total visitors to their web pages.
The good news is that remarketing is a crucial tactic to implement on any complete internet marketing plan and boosts lead and sales numbers significantly.
What Is Remarketing?
Remarketing is an internet marketing tactic intended to recover abandoning website visitors and leads. Remarketing works by tracking visitors leaving a website to other websites they visit, where they’re served ads promoting the website that they abandoned.
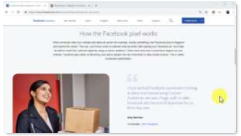
75 Remarketing with Facebook Ads
When someone visits a web page on your site, a little piece of code called a cookie is left in their browser. An ad firm like Facebook Ads gives you the code to place on your pages that causes the cookie to be saved in the visitor’s browser.
When this same visitor goes to another site where your ad firm posts ads, the cookie is detected in the visitor’s browser. The ad firm then knows this visitor was on your web page and shows your ad again on the new web page they visit.
Pretty damn cool, don’t you think?
I’m going to show you how to easily implement remarketing into your complete internet marketing mix. in this chapter I’m going to use the Facebook remarketing platform. By choosing the Facebook remarketing platform, you’ll be able to reach abandoning website visitors right in their Facebook timelines. Does that sound powerful? Let’s get started!
Generating A Remarketing Code
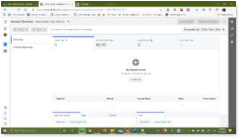
76 Facebook Ads Manager
Like I said, remarketing works by tracking abandoning visitors from the original website they abandoned to the websites they visit during the same session. To track website visitors from one site to another, remarketing platforms install retargeting codes on the websites that they remarket.
The Facebook tracking code is called a “retargeting pixel” and you can create yours from the Ads manager.
Start by going to “facebook.com/ads/manager” while logged in to your Facebook account. Click on the 9-dot square on the top-left, and then click on the “audiences” option.
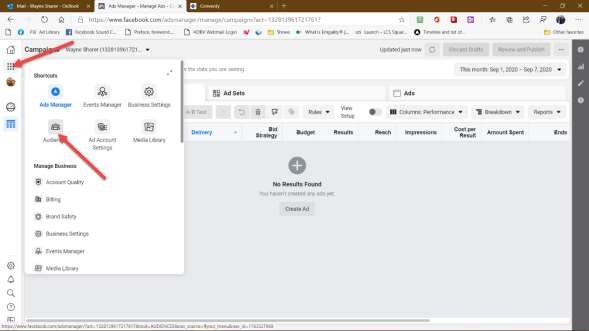
77 Select Audience
Once on the “Audience” page, click on the “create a custom audience” button to open the create a custom audience window. You’ll choice the “use your sources” “Website” option.
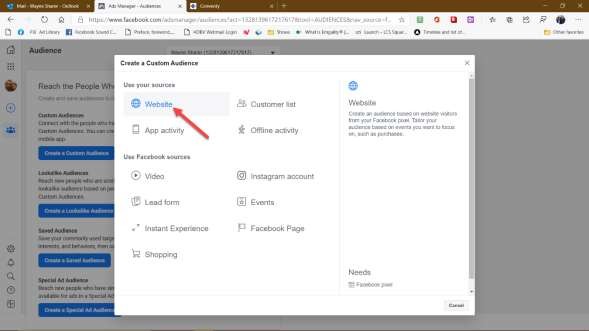
78 Select Website
Now enter a name for your new retargeting pixel in the “pixel name” field, and then click on “create audience.” This will be for any visitor to your site, call it something like your website name, or general visitors, or something like that.
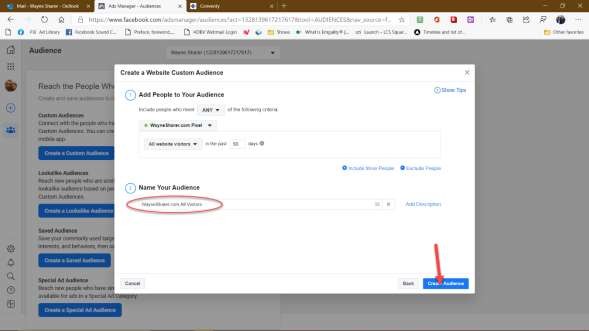
79 Name Your Facebook Audience
Your Facebook Retargeting pixel is ready, and now you must install it on your website.
Next, I’ll show you how to install the Facebook pixel manually. The check box next to the audience you just created and click “view pixel” to continue to the next step.

80 Select the Audience You Want
Installing the Remarketing Code on Your Website
Now your Facebook Pixel code popped up in this new window. Hover over it with your mouse and click on it to copy it to your clipboard.
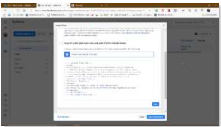
81 Copy the web code
You must paste this code between the “<head>” and “</head>” tags of your website code before you’re able to create your first remarketing campaign.
Many website/web page builders will have a special “slot” where you simply paste your pixel ID in the slot. It’s the number in the line that has fbq('init', '26375xxxxxxxx65') [it won’t have Xs, just numbers]. Copy that number and enter it in the “slot” provider by your we builder.
On many site builders, you will need to paste the entire pixel code into the header. Again, many builders provide a special place in your user interface to add this entire pixel code.
Here’s how to install it manually on a WordPress website.
Go to your WordPress site’s dashboard, move over the “appearance” tab on the left-hand menu and click on the “theme editor” option.
Now go to the “theme files” menu on the right and locate “theme header. Click on “theme header” to access the header section of your website code. Paste your remarketing code between the “<head>” and “</head>” tags, and then click on “update file.”
Next up you must “add the events you’d like to track.” To track and recover abandoning visitors, you must activate the “view content” event.
In the “install pixel” window still open in Facebook, scroll down a little further and you’ll find section 2, Install Event Codes.
Click on “view content” and a piece of code appears that looks something like this — fbq('track', 'ViewContent');
Hover over it and click it to copy it to your clipboard.
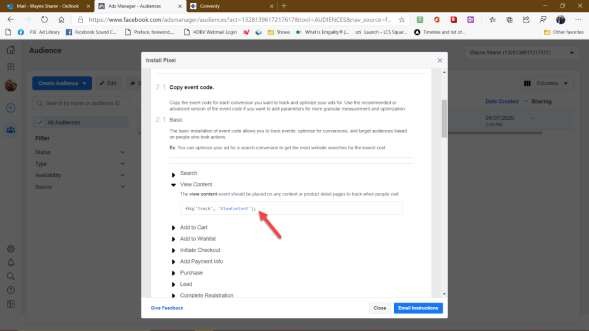
82 Copy your event code
Now copy the event code generated below and go back to the header section of your website’s code. Paste the event code right below the </head> tag and click on the “update file” button. Then go back to Facebook and click on “close.”
You will need to add <script> at the beginning and </script> at the end.
Example: <script> fbq('track', 'ViewContent');</script>
Important: Place this on all pages after the closing head tag (</head>)
Setting Up A Remarketing Campaign on Facebook
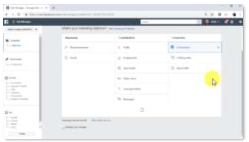
83 Set up your Remarketing Campaign
Now you can create your first remarketing campaign on Facebook. Go to the campaign creation page in the ads manager and select the “conversions” objective. Enter a name for your new remarketing campaign in the “campaign name” field below, then click on “set up ad account.” Now select your “account country,” your “currency,” and your “time zone.” Then click on “continue.”
Now you must create the ad set for his campaign. First, enter a name for your new ad set in the “ad set name” field. Now go to the “conversion” section.
Here selects “website.” Click on the “conversion event” box and select “view content.”
Next you must define your target audience. in this example I’m going to select a saved audience that I targeted with a previous campaign. To select a saved audience, click on the “use a saved audience” tab and select a saved audience from the menu.
Next you must define how much you’re going to spend in the “budget and schedule” section. Select your budget type, enter the amount you’re going to spend, and select a schedule. You can click on “continue” after you enter all the information required here.
Now it’s time to create the ad for your new remarketing campaign. First, enter a name for your new ad in the “ad name” field.
When you create ad campaigns on Facebook you can use existing page posts as ads. in this example I’m going to select and promote an existing post from one of our Facebook pages.
To use an existing page post as an ad, click on the “Facebook page” menu inside the “identity” section, select the page that you’re going to use to represent your business in your ads, and then click on the “use existing post” tab.
Now go to the “creative” section and click on “select post.” Now select the page post that you’re going to promote and then click on “continue.”
As you can see, this page post has a shortened URL that links to a content page on your business website.
You can now preview your promoted page post in the “ad preview” section. Click on the “confirm” button to send your ad for review when you’re ready. Your new remarketing ad will be approved to start running in the next 5 to 10 minutes. This is the easiest, most effective way to recover abandoning website visitors!


